
How To: Vapor Polishing ABS 3D Printer Filament
Vapor polishing is the process of smoothing the surface of 3D printed ABS parts. The results give your models the look of professionally made injection molded parts. If you want to achieve this look, read on.
Acetone is a powerful solvent that quickly dissolves ABS. However, the ABS reconstitutes itself once the acetone has evaporated. This phenomenon is used for welding ABS drain pipes (ABS glue contains acetone). It also allows us to use 'ABS juice' to apply a thin film of ABS to the print bed to help with adhesion.
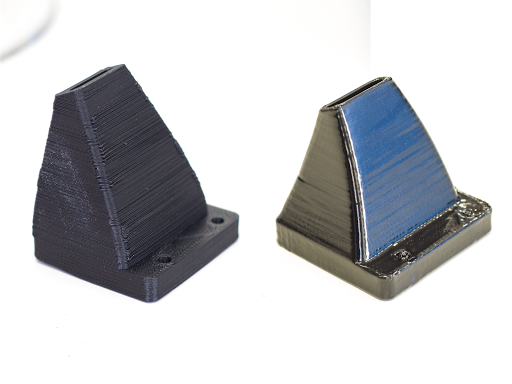
3D printed fan duct - using ABS before (left) and after acetone vapor polishing (right)
Acetone vapor smoothing uses gaseous acetone to dissolve the surface of a print. This 'acetone bath' blends the 3D printing layer lines together and results in a smooth shiny finish. Since acetone evaporates quickly even at room temperature, this process can be done slowly without any heating. However, to accelerate it we are going to use a hot plate to boil the acetone. This way the process will only take 15 minutes.
A note on Safety
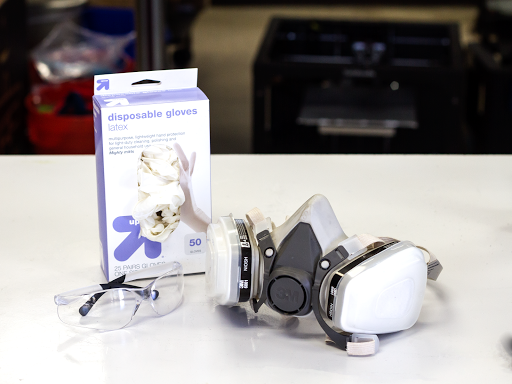
Be sure to perform this task in a well ventilated area, even outside is a good choice. Be conscious of the chemicals you are using and read the MSDS and precautions from the manufacturer before beginning. Always be prepared with safety equipment, in this case gloves, respirator, eye protection are advised. Be sure to have eye washing station prepared and a fire extinguisher ready.
Things You'll Need
- Eye protection
- Rubber gloves
- Respirator
- Fire extinguisher
- Hot Plate
- Digital Thermometer
- Acetone
- Empty Paint Can
- String
Step 1- Gather Your Supplies

Your Supplies: acetone, an empty paint can, hot plate, and string.
Safety Gear: gloves, eye protection, respirator, fire extinguisher (not pictured)
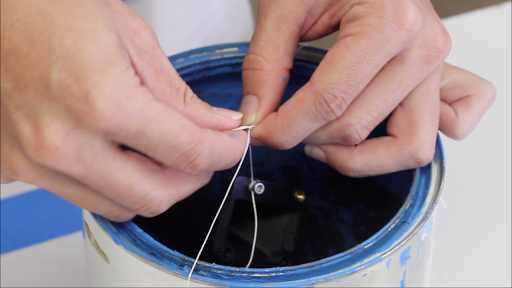
Step 2- Suspend Your Print Inside the Can
- Find a way to tie some string to your print, in order to hang it.
- For this example I am using a fan shroud from a TAZ. It has holes on the back for screwing bolts into. I screwed a bolt into one hole and then tied the string to the bolt.
- Remember that the string will get stuck to any part of the object it is touching.
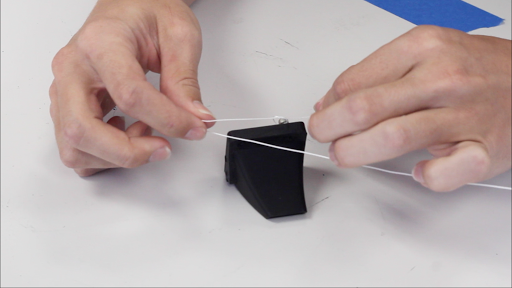
- I tied another piece of string across the top of the can. This is what the part will hang from.
- The part should be suspended roughly in the center of the can. Make sure it is high enough that it won't be touching the acetone we will pour in.
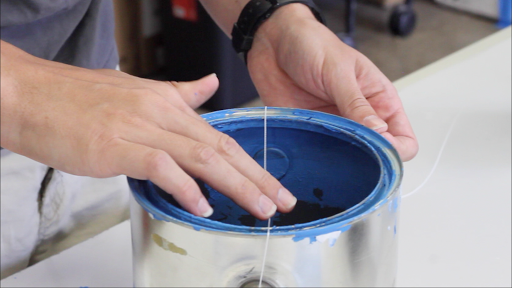
Step 3- Pour Acetone Into Can
- Pour about a 1/2" of acetone into the bottom of the can.

- Make sure that you add enough acetone so that it will not run out before the process is complete. This is important because the cooling action of the vaporization stabilizes the temperatures inside the can. If it runs out of acetone, the temperature will rise and any acetone absorbed into the part will boil out and create bubbles.
- Also make sure that the part is not touching the acetone and that it is high enough not to get splattered by the boiling action.
Step 4- Heat For 15 Minutes
- Do this in a well ventilated area.
- Place the lid on the can.
- Do not seal the lid tightly. If the vapor cannot escape, the can will explode from the expansion of the gasses.
- We drilled a hole in the lid to act as a vent and also to allow us to insert a temperature probe.
- Place the can on the hot plate and turn on the heat to the lowest setting. When set to "Warm" our hot plate kept the temperature stable at 55 °C (130 °F).

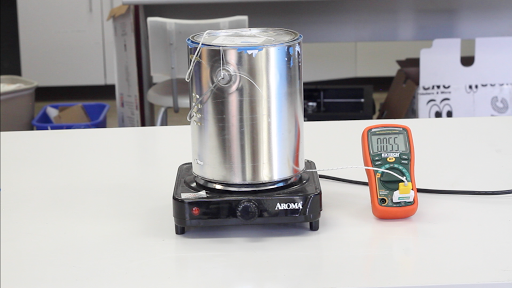
- Set a timer for 15 minutes and check the print every 5 minutes.
- DO NOT BREATHE THE ACETONE VAPORS.
Step 5- Set Part Aside to Solidify
- After 15 minutes, turn off the heat, take the part out, and hang it somewhere to dry.
- Do not wait longer than 15 minutes. After 20 minutes it will start to develop boils.
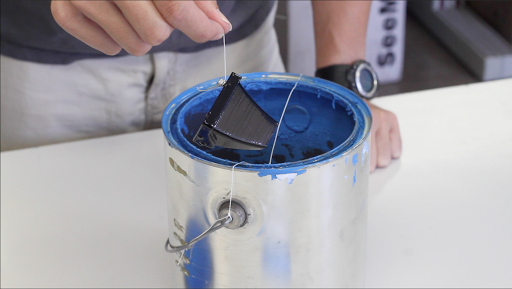
- The part will be very soft and tacky now. Do not touch it. Give it about 30 minutes to solidify.
- If you decide it isn't smooth enough yet, wait for it to solidify and then repeat the process.

Finished Product
And that is all there is to it! Good luck, be safe, and happy printing!