Is MatterControl Compatible With My 3D Printer?
An in-depth look at MatterControl, MatterHackers' open source 3D printer-controller software, and how you can ensure success when connecting your 3D printer.
Compatibility with MatterControl is a topic that we are often addressing, so we will take some time to delve into exactly what type of technology MatterControl uses to communicate with the 3D printers for which it is designed.
Specifically, we’ll review the following:
- Identifying the technology that makes a printer work with MatterControl,
- Streamlining the process of connecting to MatterControl with profiles,
- Discussing why some printers will not work with MatterControl, and
- Troubleshooting connections
First, we need to be clear on a few terms so we understand exactly what’s involved in the connection process.
Terms to be familiar with
MatterControl is 3D printer-control software. It uses a slice engine called MatterSlice by default, although Slic3r and CuraEngine are also available through the MatterControl desktop interface. All of these slice engines transform 3D models into detailed G-Code toolpaths that 3D printers follow to print the object.
G-Code is a code language used by CNC (computer numerical control) machinery like 3D printers, CNC routers, and other robotic equipment that uses a coordinates system to move a toolhead. G-Code files have one command per line and can be hundreds of thousands of lines long.
X3G is a machining language used by certain printers (MakerBot, FlashForge, and others that use Sailfish firmware) that is very similar to G-Code but has a few key differences that make the two incompatible.
S3G is a protocol that allows X3G to be communicated over a serial connection. It essentially “wraps” the X3G code with important transmitting information at the beginning and end of each transmission.
Serial communication refers to the process of sending data sequentially one binary bit at a time, usually through a data cable. Essentially, ones and zeros are arranged into coded patterns that represent letters, numbers, and other characters that are then assembled on the receiving end of the transmission.
Serial over USB is a form of serial communication that uses a USB cable as the data cable over which the data is transferred. USB communication has several layers of complexity, though, and some of the more complex levels communicate with protocol that replaces the standard serial protocol.
Firmware is software installed on the printer’s controller board that tells the printer how to do what it’s supposed to do. Marlin and Repetier are examples of two types of firmware that are compatible with MatterControl.
In this context, compatible with means MatterControl will work with the printer but does not have a pre-configured profile available to streamline the process of connecting and extra configuration is required. Supported means that MatterControl already has a pre-configured profile so connecting should require minimal effort.
Proprietary software or firmware, in this context, is developed primarily to protect intellectual property of closed-source 3D printer manufacturers. The code is not shared with anyone outside of the company so writing other code to interact with it is usually difficult and sometimes impossible.
Configurations that work
Now let’s get into what makes MatterControl work with 3D printers.
For MatterControl to be able to connect to a 3D printer, the printer must have firmware installed on the controller board that 1) accepts G-Code or X3G as its primary machining language, and 2) communicates using serial communication, whether that is over a serial cable, USB, etc.
That’s basically it. There are exceptions (explained in more detail later) and the printer must be mechanically functional, but so long as the aforementioned two criteria are met connecting to MatterControl should be fairly simple.
Check our list of currently supported (i.e. for which we have profiles) printers here: MatterControl Supported 3D Printer Models
Prerequisites
Of course, MatterControl requires that certain specific criteria be met in order to make a connection. The following is a list of the most important considerations and the first troubleshooting steps:
The printer must be connected to the computer with a known good USB cable.A USB cable can make or break a connection-- literally. Make absolutely sure the one you’re using provides a reliable connection.
The printer must have drivers installed and be successfully recognized by the operating system with no errors. For Windows users, this is important. If the operating system doesn’t have drivers for the printer, the computer won’t know how to communicate. The printer needs to appear under the ‘Ports (COM & LPT)’ section of Device Manager.
For Mac and Linux users, the drivers are already built in to the operating system so you shouldn’t have to worry about this.
The printer must not already be connected to another program. Serial ports can only communicate with one program at a time, so the printer must be disconnected from any other programs that may be trying to use it.
For some X3G printers, a program called MakerWare is designed to run in the background of the operating system and is always connected to the printer, even if it’s not printing. This can be a source of confusion to someone who is trying to use MatterControl but the port is busy.
Connecting
The typical method for adding a printer to MatterControl is by using the 3D printer connection wizard:
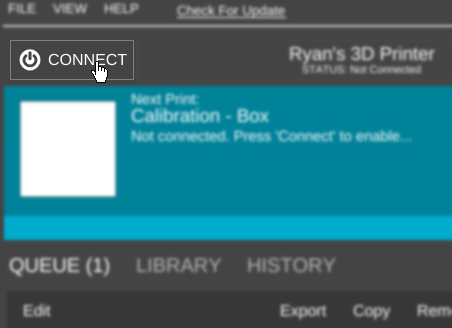
To start the 3D printer connection wizard from a fresh install of MatterControl, click the ‘Add Printer’ button at the top of the screen. |
|

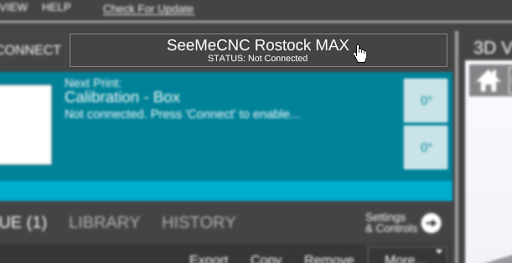
| To start the 3D printer connection wizard if you already have printers configured in MatterControl, click the box with the name of the currently-selected printer at the top of the screen. |
|
|
In the new window that opens, click the ‘+ Add’ button. |
|

|
The first screen in the setup process is the name, make, and model specification. This is the point at which you’d select a preconfigured profile if available. *If your printer does not have a pre-configured profile, choose ‘Other’ from the ‘Make’ menu and ‘Other’ from the ‘Model’ menu. |
|

|
You can give your printer a name, or just choose the Make and Model from the drop down menus and a name will be automatically populated. Once you’re satisfied with your selections, click the Save & Continue button. |
|

|
Next, you’ll be given the option to run a driver installer. This driver will open communication to the printer if not already open. It’s usually a good idea to just run through the installer, just to be sure. If you know for sure that your printer’s driver is already installed and working properly, you can skip this step. |
|

|
In the next step, MatterControl will attempt to automatically detect your printer’s settings and connect. First, you need to physically disconnect your printer from the computer, then click ‘Continue’. |
|

|
Now connect the printer and click ‘Connect’. |
|

|
Now that it knows what serial port your printer is connected to by deductive elimination, MatterControl will attempt to automatically connect to your printer. |
|

|
If everything goes as it should, you will receive a message: ‘Connection succeeded!’ Click ‘Done’ to exit the wizard. *If your printer does not automatically connect, click ‘Manual Configuration’ and continue to the next step. |
|

|
On the next page you’ll be presented with the available serial ports so you can choose the one that your printer is connected to.
*If you do not see any available serial ports, then review the ‘Prerequisites’ section above to determine why. In this case, my printer is connected to COM17, so I’ll select that one and click ‘Connect’. |
|

|
MatterControl will now attempt to connect to the printer... |
|

|
Once connected, a message will appear: “Connection succeeded!” Click ‘Done’ to exit the wizard. *If you still can’t connect to your printer review the ‘Prerequisites’ section above, and if those have all been met continue to the ‘Troubleshooting’ section below. |
|

Custom Profiles
MatterControl is configurable so you can create a custom profile for a printer that is not currently supported. For information about how, read our other article: How to Integrate a Custom Printer Profile Into MatterControl
If you happen to get the profile working reliably, we might be interested in integrating it into the next version of MatterControl. Feel free to email our support department for more information.
Configurations that do not work
Internal host boards
Some printers use G-Code to communicate but also employ other technology to aid with the printing process-- which is fine, but can cause confusion as to whether or not MatterControl will work with the printer.
The best example is the Type A Machines Series 1 printer-- the new one. Type A reused the model name Series 1; the first being a wooden-frame machine. The new Series 1 is metal and boasts a wifi access point amongst many other upgraded features, but what we’re interested in is the internal BeagleBone Black controller board with OctoPrint pre-installed.
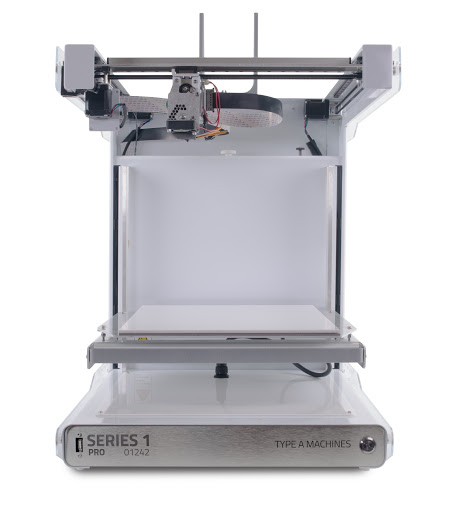
This internal board is a great concept-- wireless printing out of the box. However, it acts as a host the same way a computer is supposed to be a host, and there can only be one. Thus, even though the printer uses G-Code to take instructions, the instructions are coming from inside the printer and cannot come from MatterControl.
If the BeagleBone Black board were to be removed, the internal USB hub could be reconfigured to accept a host connection from a computer, and the Series 1 could then be used with MatterControl. Using the stock configuration, though, the printer is incompatible.
USB-only printers
Printers that communicate by using the higher-level complexities of USB protocol (mentioned earlier) currently do not work with MatterControl. These include the FlashForge Dreamer, the Dremel 3D Idea Builder, and the BeeTheFirst amongst others.
These printers have proprietary firmware, use proprietary protocol to communicate, and thus require proprietary software to control and run. The MatterControl development team would like to crack the code to these and other printers so we can use our software to control them, but progress is slow and other new features usually take priority.
SLA Printers
SLA printers use a UV light projector to cure resin in a vat one layer at a time. The process is much different than moving a toolhead around in a coordinate system, and these printers use software that has complex functionality like the ability to output the projections to a projector.
While some of these printers do operate using G-Code, MatterControl doesn't issue commands meant for this type of machine. However, we do hope to enable this functionality in the next year or so.
Other proprietary and non-G-Code-based printers
Any other printer that does not communicate with G-Code over a serial connection or which has any other proprietary firmware will not work with MatterControl.
Troubleshooting
If the process outlined in the ‘Connecting’ section above wasn’t successful in connecting MatterControl to your printer, then go back and ensure that all criteria in the ‘Prerequisites’ section has been met before continuing to this section for advanced troubleshooting techniques.
Serial (COM) Port
Occasionally MatterControl will not be able to automatically detect which serial port the printer is connected to and the connection will fail. It can be necessary to edit the printer’s connection settings in order to ensure MatterControl is using the correct port.
Baud Rate
For supported printers with existing pre-configured profiles, the baud rate is already set and should not require additional configuration. However, occasionally a printer will ship with a baud rate different from that of the manufacturer’s specifications so this can need to be adjusted.
For printers without a pre-configured profile the setup wizard will automatically detect available serial ports but will only try the default baud rate so manual configuration may still be required if the connection attempt fails.
Editing the connection
To manually specify a baud rate or serial port, follow these instructions:
|
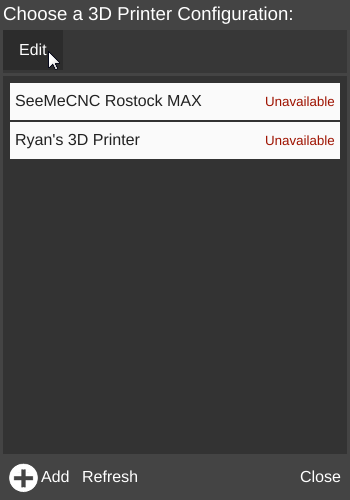
From the 3D Printer selection window, click the ‘Edit’ button at the top left. |
|
|
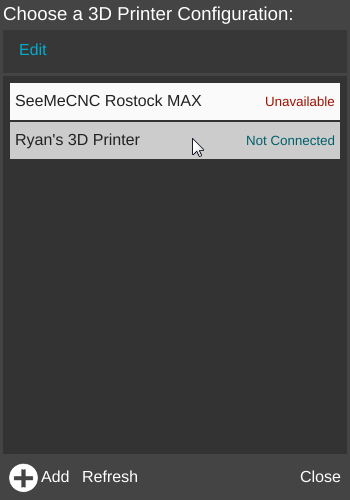
Click the ‘Edit’ button next to the printer you want to edit settings for. |
|

|
From this window you can edit the printer’s information including the serial port and baud rate. Click the radio button for a different baud rate, then click ‘Save’. |
|

Click the name of the printer to select it for use with MatterControl. |
|
Click the ‘CONNECT’ button on the MatterControl main screen to attempt connection with the new baud rate. |
|