
MatterControl Feature Spotlight: Baby Stepping
Learn how to use MatterControl's Baby Stepping feature and gain the ability to actively adjust your first-layer-height.
If you started a print and your first layer was a little too high or a little too low there were two options: hope for the best, or stop the print, re-level the bed, and start over. Now there is another option. You can actively control the first layer height by using Baby Stepping in MatterControl.
What is Baby Stepping?
“Baby stepping” stepping is a little known feature that has been in Marlin and Repetier firmware for quite some time, but it’s generally not enabled, and it requires an LCD screen with a click-wheel to function. It allows the user to move the Z axis up/down in small amounts during a print in order to finely tune the first layer height.
MatterControl now allows baby stepping without any firmware modifications. You can move the X and Y axes in addition to the Z axis.
How to use Baby Stepping
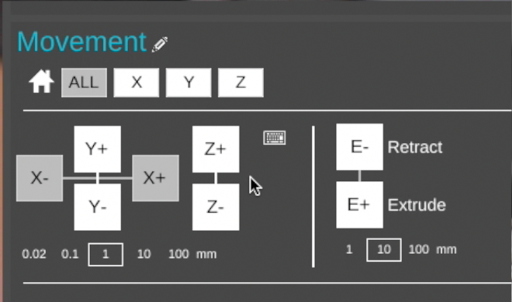
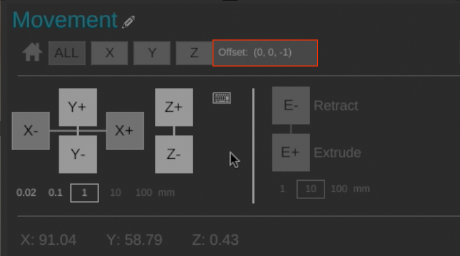
You can access baby stepping in the 'Movement Controls' – under the Controls Tab.
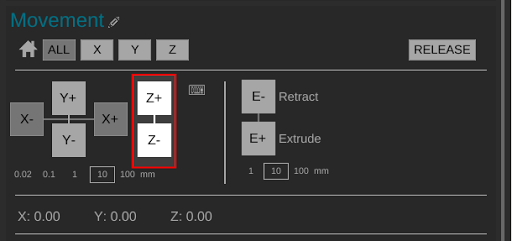
Once the print has started, simply click Z+ to move the nozzle higher off the bed, or Z- to move it closer to the bed.
Notice the “Offset” next to the Home buttons. This indicates how much you’ve moved each axis since the print started (X, Y, Z). So, in the print shown, the nozzle was moved down 1mm closer to the bed.
So why would you need to use baby stepping? There are a couple of handy uses for it.
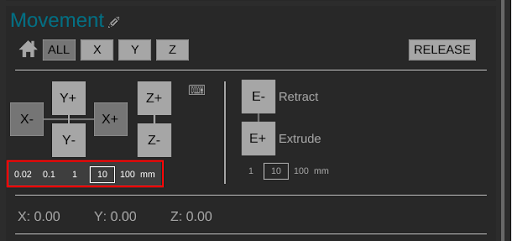
Offset Amount
Different materials stick to different bed materials differently. For example, if you are using BuildTak and printing with Ninjaflex, you must be very careful not to smash your first layer down too much. If you do, you’ll likely never be able to remove the part or you’ll damage the BuildTak. You could adjust your Z offset and/or your Z height before you start printing, or you could simply use baby stepping to adjust it on the fly.
If you use different build plates and surfaces for different materials, you likely need to adjust your Z height any time you switch build plates. Baby stepping allows you to adjust as you start printing rather than recalibrating and adjusting your hardware and software settings.
The best reason, at least in our experience, is that it can be difficult to adjust your Z height perfectly . Some machines have 4 point bed adjustments, some have 3, and some have none. Some use inductive probes, some use mechanical endstops, and some use conductive probes. They can all have different issues that lead to improper first layer heights, and the first layer is by far the most important layer of your print. And while a good first layer isn’t a guarantee of a successful print, a bad first layer is virtually certain to ruin your print.
Baby stepping allows you to perfectly adjust your first layer height to ensure the best possible chance for a successful print.
What does good first layer look like?
1) This is a representation of a bad first layer. The filament is just laying on top of the bed – with no real compression. This leaves a very small contact point with the bed and will likely result in the part not sticking to the bed.
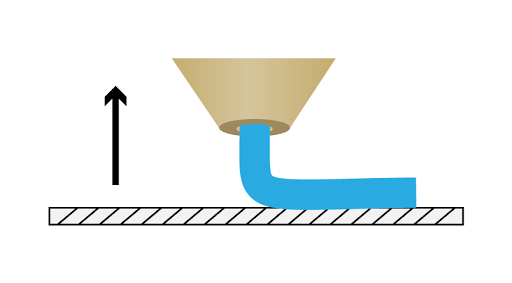
Too High
2) Ideal first layer for most materials
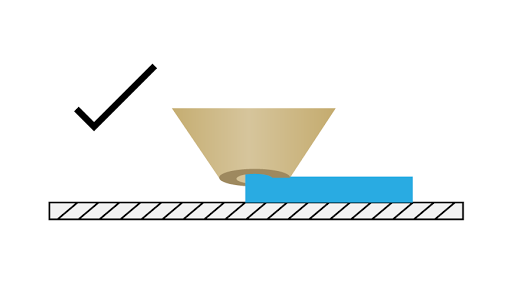
Perfect
3) Way too close. You will likely have extrusion issues because there’s nowhere for your filament to go. Pressure will build up in the nozzle and could cause filament grinding, heat creep, or other extrusion related issues.
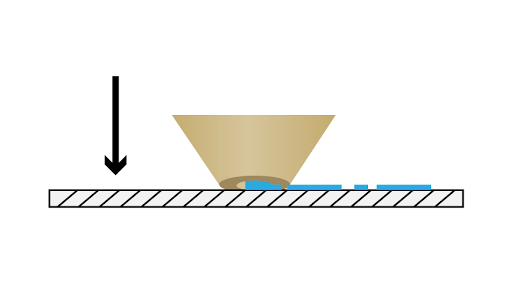
Too Low
Baby stepping tips and tricks:
- A skirt of 4-5 loops is a great way to adjust the first layer height before it starts printing your part.
- If you change beds or surfaces frequently, it’s probably a good idea to put a Z Offset that would prevent the nozzle from ramming into the glass at the start of prints. You can then use baby stepping to move the nozzle to the appropriate height at the beginning of the print.
- If you notice that you always need the same amount of baby stepping to achieve a good first layer, note the number in the offset and enter that into your Z Offset setting under Printer > Print Area > Z Offset.