
Collapsible 3D Printed Surfboards
Dylan George created a collapsible surfboard thanks to 3D printing. Learn about his process and how 3D printing can enhance your hobbies.
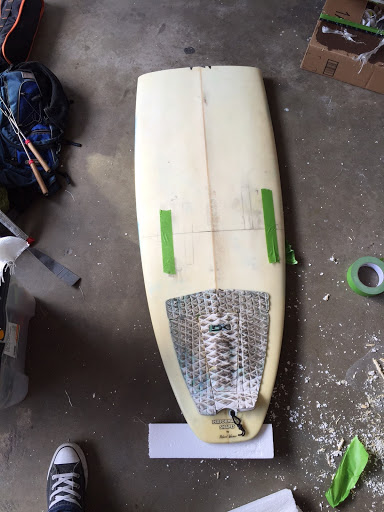
People who travel frequently know that airlines can gouge you for the cost of over-sized luggage. I know this all too well because I travel with my surfboard a lot. I needed to find a way to cut the cost of traveling with my board, as well as the inconvenience of hauling it through airports.
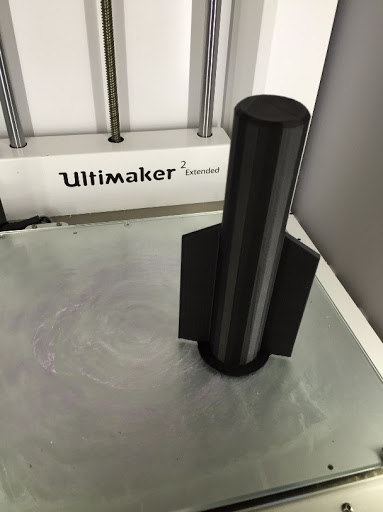
I decided to chop my board apart into three pieces (crazy) and use my Ultimaker 2 Extended to design fixtures to reattach it. It was a risky idea, but it definitely paid off thanks to 3D printing.
Below is my step-by-step process in creating the collapsible surfboard, from CAD to assembly. All in all, the project took about 60 hours to complete.
CAD
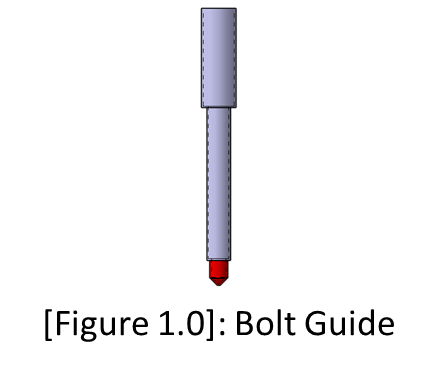
The CAD files were purposefully made to accept a wide range of board types by remaining generic in form. All red highlighted regions in [Figure 1.0] are present to aid in assembly and can remain or be removed (depending on preference).
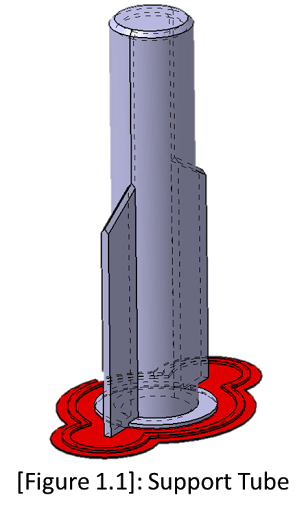
All red highlighted regions in [Figure 1.1] are meant to be removed after printing.
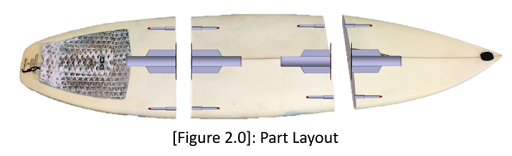
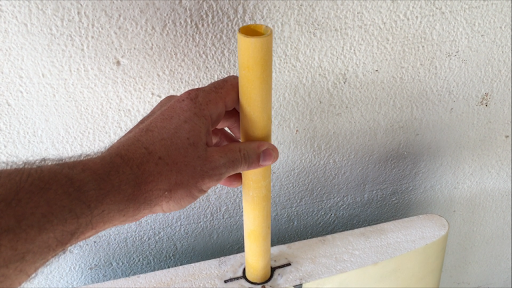
The project requires 4 x Support Tubes and 8 x Bolt Guides.
The position of each 3D printed part is outlined below in Figure 2.0.
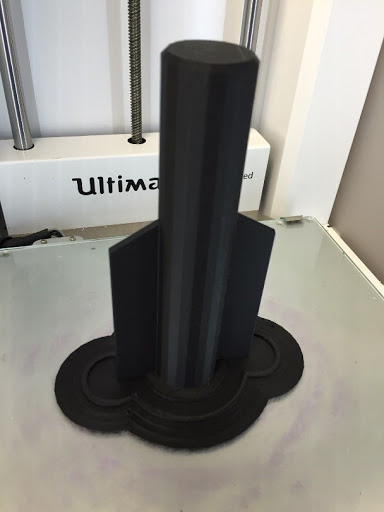
The parts were printed in MatterHackers PRO Series ABS filament on the Ultimaker 2 Extended. Here are some images before and after trimming.
Materials You'll Need for Assembly
- 1 yard fiberglass cloth
- 1 quart epoxy resin
- PVC saw (rough square file would work too)
- Angle grinder with flap disc
- Dremmel
- 120 grit sand paper (5 sheets)
- ABS filament (Nylon X will be used for version #2)
- Safety glasses and painters mask
- 1 x hard exterior suitcase (Purchased $20 at thrift store)
- Either line with foam or use your cloths for you trip to pad your board
The Process
Use the forstner bit to create the main hole for the support tube. A PVC saw can be used to create the grooves for the fins.
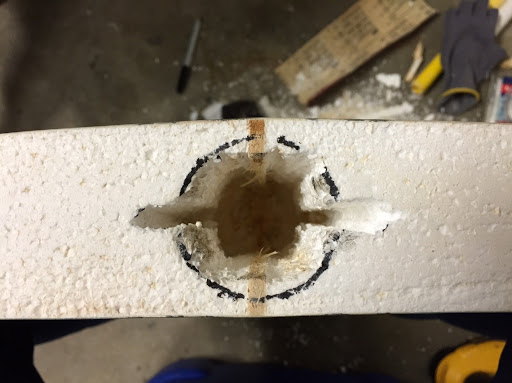
Dry fit the support tube in place and trim any portion of the print that sticks up out of the surface of the foam.
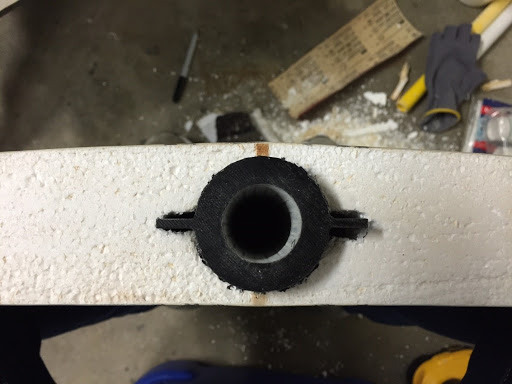
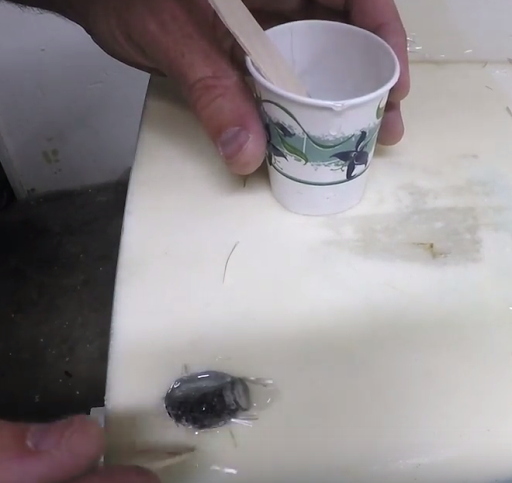
Fiberglass both mating support tubes in place with a minimal amount of fiberglass and resin. You only want to use enough to hold the pieces in place.
Insert fiberglass rod into both pieces to assemble the two thirds.
Align the two pieces with the rod in place and hold together with painters tape. You may need to support the two pieces to keep them aligned while the resin dries. Once dry, you can separate the pieces and finish fiberglassing the the inserts in place.
Take these same steps for the third piece of the surfboard.
Now you’ll need to finish the fiberglass work to seal the board ends that you created when cutting the board into three pieces. This isn’t any different than normal fiberglass work so I’ll skip this part.
Using the alignment from the support tubes, drill a hole from approximately a 45 degree angle from the top surface of the board and about 50 mm from the rail. You will need to drill 4 of these holes. The key is to try to drill directly through the middle of the mating surfaces.
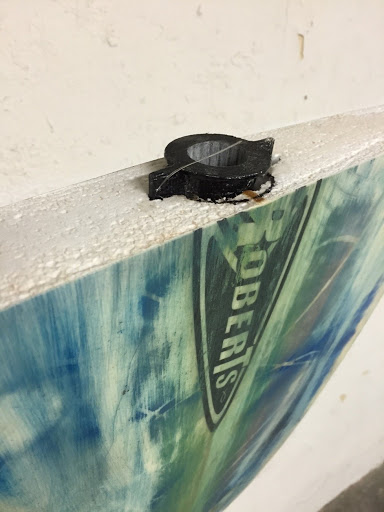
Assemble the T-nuts onto the bolt guide and seal the connection by wrapping a small strip of painters tape between the T-nut and the bolt guide. Next, fiberglass the bold guides in place at your desired angle. The bolt guides are purposefully long so that they stick up out of the board in order to avoid resin dripping into the guide. When the last layer of fiberglass is dry, trim off any excess print material sticking up above the surface of the board.
Notes
Take your time. This is a very difficult project and is not recommended to anyone who does not feel comfortable with detailed fiberglass techniques. Remember, you may just ruin your favorite surfboard (I sure could have ruined mine had this not worked or had I botched my glass job). I am a beginner 3D Printer, but proficient with fiberglass work. You don’t need a 3D printer to do this project, but by utilizing the benefits of 3D printing, all the mating parts are perfect and only took a few hours to print rather than days to fabricate. This is an absolutely amazing benefit to using a 3D printer: Reliable and accurate execution.
All in all, the project took about 60 hours to complete in 7 days…it was a long week. However, I like to think the reward was worth it! Now I can take my favorite board with me anywhere and never pay a baggage fee again!