
How To: Smooth and Finish Your PLA Prints - Part 1
Making your 3D prints look fresh off the assembly line isn't as hard as you think. Follow these simple techniques to finish your 3D prints and make them shine.
PLA (Polylactic Acid) filament is one of the two most commonly used desktop 3D printing materials (with the other being ABS filament). It is the ‘default’ recommended material for many desktop 3D printers, and with good reason - PLA is useful in a broad range of printing applications and can be produced in a variety of colors. It has the virtue of being both an odorless and low-warp material, and does not require a heated bed. PLA plastic is also one of the more eco-friendly 3D printer materials available; it is made from renewable resources (corn-starch) and requires less energy to process compared to traditional (petroleum-based) plastics. Cool, but what do you do to finish a PLA print to make it truly good?
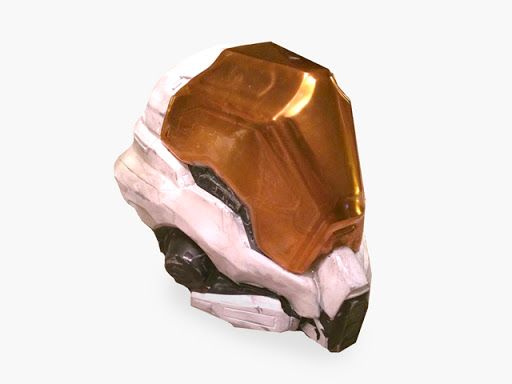
Yes, this Halo helmet is 3D printed!
There are several techniques to remove or diminish the striations or layer lines of a 3D print. Some of the different processes that can be applied to PLA can be applied to ABS, but not vice versa. Generally, for PLA filament, the methods you can use involve the continual adding and subtracting of different materials back and forth until it is as smooth as you want it.
What do I mean by finishing?
Think of your 3D prints as the Great Pyramids of Giza. They used to be totally smooth down the side, but age has revealed the layered and rough base built underneath. To make the pyramids smooth, Ancient Egyptians added limestone over the top, since it was a much softer material than the base stone. If they had the technology, they also could have cut away the jagged levels to make smooth, flat faces. This is what finishing consists of; a fine balance between adding and subtracting material to achieve the desired surface finish. The key is to remove enough material to hide some striations (layer lines) and adding just as much to fill in the gaps.
To help showcase the benefits and problems that can arise with each technique, I’ve designed a “Finishing Torture Test.” This simple model has sharp corners on the outside of the cube and the inside of the hole, along chamfers, and the edges of the pyramid. It also has round faces, fillets, and a cylinder. I chose to include all these in the model as they are different examples of some common features you might find in the various models you can print, and to show how some of the features can be lost or diminished.
If you'd like to put your finishing skills to the test, you can download this model from our Thingiverse or from the Design Store

Finishing Torture Test
I started by printing out the model in MatterHackers Silver PRO Series PLA. This will serve as the control print. I then repeated the print eight more times. The eight prints will be used to demonstrate four different techniques, each with two different finishes.

The control print.
As this in an introduction to finishing PLA, this list is non-exhaustive of the techniques you can learn to clean up your 3D prints. More tools can be used, small tips can be learned, and starting with a good model are all techniques you can use to produce finished prints, but the ones I will be going over are:
- Painting alone
- Sanding and painting
- Sanding, filler primer, and painting
- Sanding, filler primer, spot putty, and painting
Note:
If I were doing this with the intent to mold these or use these as a finished product, I would have gone through each step half a dozen times over, moving from low to high grits, priming, more sanding, priming, sanding, spot putty, sanding again, etc. Since the purpose of this article is to show the difference each material introduces to the finish of your part, only one pass of sanding and finishing is done to each part.
Painting
Painting is the least involved of any of the techniques; all you need is a rattle can and some open air and you can paint your 3D print.
Materials:
- Spray Paint
Some recommendations to follow when spray painting:
- Don't spray right up against your print: if you spray too close to your print, you risk getting noticeable drips in the paint job.
- Spray in a back and forth motion, overlapping each pass.
- Multiple coats will fill in the striations better than one coat alone, but keep each coat light.
Total Time: 1 minute (not including drying times)
Here you can see that there are still a lot of striations visible even after the paint, but it's less than if it was unpainted.

Left: Control, Right: Spray Paint
Sanding and Painting
Sanding is going to be the most common finishing technique, with any 3D printing filament. It’s easy, and it’s cheap, but that doesn’t make it any less tedious. The lower the grit, the coarser the sandpaper is, and the quicker it’ll remove material. I use 3M Pro Grade Precision because its backing is a little sturdier so it doesn't rip as easily and it lasts a while longer because the grit doesn't gum up as quickly as normal sandpaper.
Materials:
- Sandpaper
- 120 grit
- 200 grit
- 400 grit
- Water
- Paper towels
- Spray Paint
Start with the 120 grit and focus on the sides of the print. 120 grit will tear away material pretty quickly, so avoid sanding corners, edges, and any fine details.

Sanded using 120 grit
Continue to progress through the grits as you need to remove less and less of your print. Once you’ve finished with 200, start using water as you sand. 400 grit and above is going to remove very little material, any major blemishes or layer lines in the model will be mostly unaffected at this point, and will more or less be polishing what you have.
Dip your piece of 400 grit sandpaper into some water and continue sanding your print. The water helps keep the paper from clogging and gets a much finer finish than dry sanding with the same grit. As you sand, run your fingers over the print to get a feel for how smooth it is. When you think it’s pretty smooth, you're ready for paint.
Here is what the 3D print looks like after two matte gray coats of paint or two gloss gray coats. Keep in mind these are cheap Rustoleum rattle cans, but these prints do look better after having been sanded and painted.
8 minutes using 120 grit
6 minutes using 220 grit
5 minutes using 400 grit
1 minute spray painting
Total time: 20 minutes (not including drying time).

Left: sanded, matte paint; Right: sanded, gloss paint
Filler Primer
Once you’ve given it a quick sanding, spray on some filler primer to coat the entire 3D print. Keep alternating through sanding with 120 and spraying filler primer until things like the dome on top are filled in enough to make one smooth surface, rather than the clear layer lines on top. Once it’s filled in enough, repeat the steps listed in Sanding and Painting.
Materials:
- Filler Primer
- 120 grit
- 200 grit
- 400 grit
- Water
- Paper towels
- Spray Paint
Start by sanding with 120 grit sandpaper to bring down some of the surface texture. Before adding more material on top, it’s always better to remove some material first.
8 minutes using 120 grit
1 minute spraying the filler primer
7 minutes using 120 grit
10 minutes using 220 and 440 grit
Total time: 26 minutes (not including drying time).

Left: sanded, filler primer, sanded, matte paint; Right: sanded, filler primer, sanded, gloss paint.
Spot Putty
Spot putty is a great material and like any great material, slightly toxic. Gloves are a must as spot putty is basically dye, resin, and talcum powder, and a mask is based on personal preference but always encouraged. The label does list the vapor as harmful, but it's in such small quantities I usually ignore it, although it has given me headaches on several occasions.
Materials:
- Filler Primer
- Bondo Glazing and Spot Putty
- 120 grit
- 200 grit
- 400 grit
- Water
- Paper towels
- Spray Paint
- Gloves
- PPE
This is basically the same as the last process, except you will be using the spot putty to fill in any low spots to fill in some of the major layer lines, or rebuild minor blemishes like the top of round surface.
First, you're going to want to follow the steps I've given for filler primer, up to the point of switching to 220 grit. Instead of changing grits, you're going to do the following steps instead.
To apply spot putty, either use your gloved finger, a small paddle, scrapers, the side of a plastic scrap, a popsicle stick, it doesn't really matter. My personal preference is to use my finger for most and a small spreader for the tight spaces. Using a pea sized amount of putty, I smear it across the surfaces of the print and try to spread it thick enough to fill gaps but thin enough to not lose the details I'm trying to preserve. Either way, it's really easy to sand off so don't worry about overdoing it.
Once you've covered the entire 3D print with spot putty, wait 15 minutes or so until it has cured. After it has cured and is no longer gummy, start sanding again at 120 very briefly. Like I said, it's mostly talcum powder so it's going to be really easy to sand, you're basically wiping it off. When your 3D print looks like you initially did only a light coating, with pink spots of putty all over, you're ready to bump it up to 220 grit. At that point, follow the previously listed directions for sanding.
8 minutes with 120 grit
1 minute spraying filler primer
5 minutes applying spot putty
3 minutes with 120 grit
10 minutes with 220 and 400 grit
1 minute spray painting
Total time: 29 minutes (not including drying time).

Left: sanded, filler primer, sanded, spot putty, sanded, matte paint; Right: sanded, filler primer, sanded, spot putty, sanded, gloss paint.
Comparisons and Final Thoughts

From left to right: Control, Painted Matte, Painted Gloss, Sanded with Matte, Sanded with Gloss, Filler with Matte, Filler with Gloss, Spot Putty with Matte, Spot Putty with Gloss
Each technique took more time than the last, but you also get much better results - after all, it is a craft. Keep in mind that only one coat of filler primer and spot putty was used during the process (for the sake of time), but you can use as many coats as you'd like to eliminate layering. As you can see in the picture above, the results are still pretty stellar for only half an hour of work. For reference, the picture below is the 3D printed Torture Test before they were spray painted.

From left to right: control, sanded, sanded with filler primer, sanded with spot putty.
For part two in this series, read the sequel article, How To: Smooth and Finish Your PLA Prints - Part 2