
How To Succeed When 3D Printing With ASA Filament
Unlock the potential of ASA filament for durable, outdoor 3D prints! Dive into our comprehensive guide and elevate your 3D printing skills.

Welcome to the exciting realm of 3D printing with ASA filament! ASA, or Acrylonitrile Styrene Acrylate, is a robust and weather-resistant material that's gaining popularity among 3D printing enthusiasts. The reason? Its exceptional ability to withstand external elements makes it ideal for outdoor applications.
Whether you're planning to design a charming garden gnome, a durable outdoor planter, or any other outdoor fixture, ASA filament is an excellent choice. Its properties are akin to ABS filament, yet it surpasses ABS in terms of resistance to UV light and weathering. This means ASA won't yellow in the sun or lose its strength over time, making it a superior choice for outdoor and long-lasting projects.
If you're new to printing with ASA, or you're looking to refine your skills, you're in the right place. This guide will provide you with the essential tips and tricks to ensure your success in 3D printing with ASA filament. Let's dive in!
Step 1: Nailing the First Layer
The first layer of your print is crucial. It's a two-pronged process: ensuring your bed is level and setting the correct distance between the nozzle and the bed.
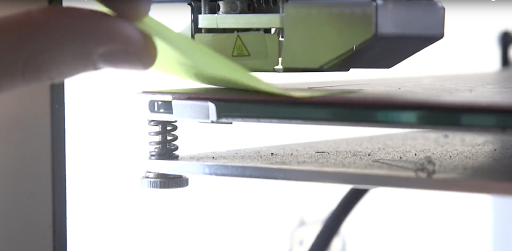
Leveling the Bed
Bed leveling varies from printer to printer. Some printers provide guided wizards or auto bed leveling, while others leave you to figure it out. Generally, 3D printer bed surfaces are leveled using three or four screws that attach the bed to a carriage. Adjusting these screws changes the plane the bed is on. Here's a simplified procedure:
- Move your print head out of the bed's way to avoid any crashes.
- Home the Z axis to bring the nozzle as close to the bed as possible.
- Move the print head above one of the screws and insert a piece of paper between the bed and the nozzle.
- Loosen the screw until there is a slight resistance between the bed and the nozzle.
- Repeat this process with the rest of the screws. The goal is to achieve the same resistance at all points.
Adjusting Nozzle Distance
Once the bed is level, you need to ensure the nozzle is at the right distance from the bed. Start a print with a skirt that covers the entire bed area and observe how the filament is laid down. Adjust the nozzle's distance accordingly until the skirt comes out okay.
Learn more about getting the best first layer for every print here.
Step 2: Print Bed and Adhesion
ASA filament, similar to its ABS counterpart, is temperature-sensitive and requires a heated bed for optimal performance. If your 3D printer comes equipped with a heated bed, here's how to prepare it for ASA printing:
-
Use a Brim: Start your print with a brim - a flat area around the base of your model to prevent warping. A brim of about 15 loops usually suffices for most prints.
-
Apply a Bed Adhesive: Modern 3D printing has moved beyond the use of hairsprays and homemade solutions. Today, several companies manufacture adhesives specifically designed for 3D printing. These products, such as Magigoo or Stick Stick, provide excellent adhesion for your prints and are easy to apply. Simply spread a thin layer on your print bed before starting your print.
-
Set the Right Bed Temperature: The optimal bed temperature for ASA is around 110C. However, if your printer can't reach this temperature, aim for the maximum it can achieve.
-
Consider a Build Surface: Consider using a dedicated build surface on top of your heated bed. Build surfaces, such as LayerLock, PEI sheets, or BuildTak, can enhance adhesion and ensure a more uniform heat spread across the bed, reducing the chances of warping.
Remember, each 3D printer and filament can have unique characteristics, so you may need to experiment with these settings to achieve the best results.

Step 3: Calibrating Your Print Temperature
Typically, ASA prints at 250 degrees Celsius with a bed temperature of 110 degrees Celsius. However, you may need to adjust these temperatures for your specific printer. Remember, it's better to print ASA slightly hot than too cold to avoid warping or splitting.
Extruder Temperature: ~ 250°C
Bed Temperature: ~ 110°C
If your temperature is too low, you will experience warping, splitting, and terrible layer adhesion. If your temperature is too hot, you can experience stringing and some rougher overhangs.

Step 4: Solving Warping and Splitting
Despite perfect settings, ASA prints can still warp or split due to temperature inconsistencies. To mitigate this, consider using ASA on a fully-enclosed 3D printer, purchasing an enclosure, or building an enclosure for your printer to keep the heat in and cool air out.
Additionally, turn off layer cooling fans as they can cool your prints too quickly, causing splits and issues in your print.
There you have it - a comprehensive guide to mastering 3D printing with ASA filament. With its durability and resistance to weathering, ASA offers unique possibilities for outdoor and long-lasting projects, making it an invaluable addition to your 3D printing repertoire.
Remember, like any 3D printing endeavor, it may take some trial and error to find the perfect settings for your printer and project. Don't be discouraged if your first few attempts aren't flawless. Keep refining your process, and soon, you'll be creating stunning and durable 3D prints with ASA filament.
So, are you ready to embark on your ASA printing journey? With the knowledge you've gained from this guide, you're well-equipped to explore the potential of ASA filament. We can't wait to see what you create.
Happy printing!