
Custom Rigged Kayak - Own Your Hobbies
Learn how 3D printing can enhance your hobbies in this detailed account of a man, his kayak, and the open ocean.
If you’re like me, no feeling quite measures up to that of being out on the open water. I love water sports, so after a friend took me out kayak fishing a couple of years ago and showed me firsthand the kinds of big fish I could catch two miles out on the ocean I decided to invest in my own kayak that I could outfit for fishing.
I’m a very DIY person, so there was no question in my mind about how I would go about turning my dream into reality-- I’d build it myself, or at least as much of it as possible.
Kayaks themselves are typically much more easily purchased than made, so I used a Craigslist app to automatically notify me when the search term, “kayak” brought up a result in my price range. It took a while for a decent posting to match my budget, but eventually, my patience paid off, and the app notified me about a great deal on a 12-foot blue Cobra Navigator for $300, so I snagged it.
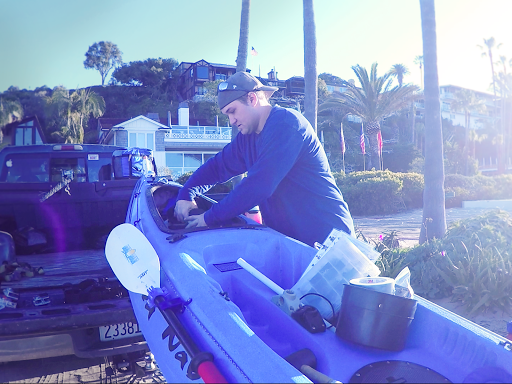
Me and my custom rigged kayak that has many 3D printed parts
Now that I had the kayak it was time to outfit it for fishing. There are so many options and accessories available for the sport, so I began by visiting the websites of reputable kayak and fishing dealers, many of which had an “ultimate kayak fishing setup” image or article that showed every accessory that I would or could need to get me out on the water in style. I compared several of these and identified the most common components as well as some outliers that were either nonessential or just for luxury. Certain features I made a note of so I have options when I get the urge to upgrade.
As I did this, I created an inventory spreadsheet and denoted whether a component was necessary or not, and took note of any part that looked something I could manufacture myself. As the list (and budget) grew, I had to determine which parts would be worth the cost of buying a commercially-available version and which ones I would be able to make. At the same time, my mind was racing through a wishlist of features that would be cool to have, and some great brainstorming occurred as I explored the scope of how I wanted my kayak to look.
Considerations
The decision of manufacturing the parts myself vs. buying new came down to the following elements of consideration: cost, customization, known-good-but-complex designs, and instant gratification. My goal has been to build the best boat possible with the amenities I want on as small a budget as possible, all in time for the next fishing season (which starts in March in Southern California). I have been willing spend a little more on certain items if I think the cost is warranted but usually try a DIY version first if I see good enough build instructions and positive feedback about it online.
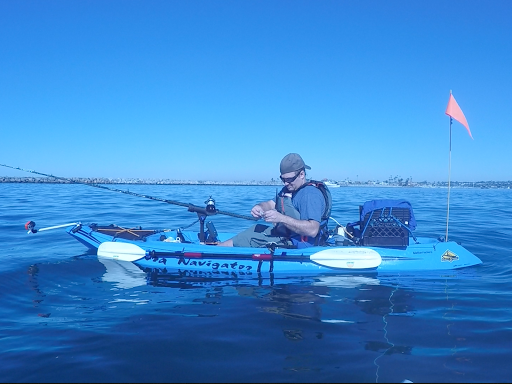
Testing the prints on the open water
Cost
Some parts are cheap and easy to get. If that’s the case, I probably won’t spend my time making them. Then again, I might just save the small cost and churn a few out quickly if I can find a model that’s ready to print. If I have to design it myself too, that will weigh on my decision.
Customization
I want to make my boat the way I want it. I refuse to sacrifice features that are important to me if I’m going to be the one using it, so if I can’t find a ready-made version for sale, I will consider designing it. If no such product even exists, it’s up to me to make the thing myself.
Good, but complex designs
Some products are the result of years of development, and I’m not going to pretend that I can do it better than the engineers. When it comes to buying a product that will save me hours of time or frustration I consider scoping out the options.
Instant Gratification
Along with the consideration of the time involved in making a certain thing, sometimes life gets in the way, and timelines don’t allow for its creation the way I want it. If I can’t wait for a thing until I get around to building it, I will just buy it.
Iterative Design
Once I had an established plan for what I wanted to do, I began sifting through the list of parts I created, and my path became clear. I was able to identify which parts I would need to print, and which parts I would need to buy. When I started work on creating the parts I needed to print, the real fun began.
The process of creating these or any 3D printed parts starts with an idea. The idea is your wants, hopes, and goals, and it manifests through you and the tools you use to create the end result. It’s essential to know your skillset and the abilities of your tools well enough that you’re confident using them to their full potential. If you don’t know how a tool works, you probably won’t be able to use it correctly, and that can inhibit the creative process.
With a solid set of tools at your disposal, you can then create. Keep in mind that things don’t always turn out the way you hoped, so the ability to adapt a design or fix a problem is essential when you’re making something yourself. In the context of 3D printing, the printer is the main tool for creating the raw structure, but once that’s complete, you may need to alter the design or make slight modifications to make it work the way you want.
Once you have a printed part, try using it as you intended. Does it fit correctly? Is it sturdy? Can it handle accidental unnecessary force? Make the part pass a test you create for how you intend for it to perform, taking into account potential problems or pitfalls. Does it need hardware to function correctly? These and other questions about your goal for the part will help you decide whether the part is good as is or if you need to make another version with improvements. If improvements are necessary, make them and then go through the same tests and questions until you’re satisfied.
Ultimately, you have to be confident in the part’s ability to perform-- and you do that through the testing process I described in addition to using it in an actual production environment. In my case, if a part doesn’t work it means I could lose functionality while out on the ocean, which is never a good situation. Having backups and redundancies will minimize the potential for failures. For this reason, I take my kayak out regularly to test the parts I make to ensure they will work for me when the time comes to do some real fishing.

Waiting for the fish to bite
Printed Parts
Custom Designs
Anchor Trolley
This piece of equipment is used to allow the anchor to move along the side of the boat so that the anchor line tethers at either the bow or stern depending on the current and which direction you want to fish. The assembly is made up of a plastic hoop, five line guides, two stainless steel pulleys, and about 20 feet of 4mm paracord. Commercially-available trolley systems are typically made of injection-molded plastic and can be pricey for what they are relative to a 3D-printed version. My version is pretty simple and much cheaper, though I haven’t quite been able to get the pulleys to spin as nicely as I would like. It’s not detrimental to the design; it just requires a little extra force to move the trolley when a pulley doesn’t spin freely.
Find the part kayak parts.
Anchor Trolley
Pad Eyes
Along with cleats, a common item for anchoring lines and bungee cords is a pad eye. It’s essentially just a small loop through which line can be tied or run. My kayak had several already installed when I bought it, but I wanted more so I reverse engineered one in CAD so I could print them out as needed.
Find the part kayak parts.
Pad Eyes
Fishfinder/Compass Mount
My kayak already had a Scotty mount installed in front of the seat when I bought it, so I figured I would just go with that system when it came to adding other mounts for fishing accessories instead of starting from scratch. I bought an additional Scotty mount which I installed right in front of the existing mount, so I now have two: one for holding the rod holder, and the other for one of my favorite designs, the custom fishfinder/compass mount. It’s designed specifically to fit my Lowrance fish finder and a compass. This part is a perfect example of customizability that you can’t just buy.
Find the part kayak parts.

Fishfinder/compass mount
Flagpole
NOTE: This isn’t a printed part, but since other printed parts directly rely on its design I figured I should link to the product I used.
My personal feeling is that every boat deserves a flagpole. Flags are for communication, and if you don’t have a flag, well, you just can’t communicate as effectively as you would be able to if you had one. In my case I just want other boats to know I’m there, so I have a bright orange triangular flag up all the time. I also have snorkeling equipment, so I have a dive flag in case I want to take a dip.
The flagpole I use is a sturdy fiberglass driveway marker from Home Depot: http://www.homedepot.com/p/Blazer-International-Driveway-Marker-48-in-Round-Yellow-Fiberglass-Rod-381YDM/202498050
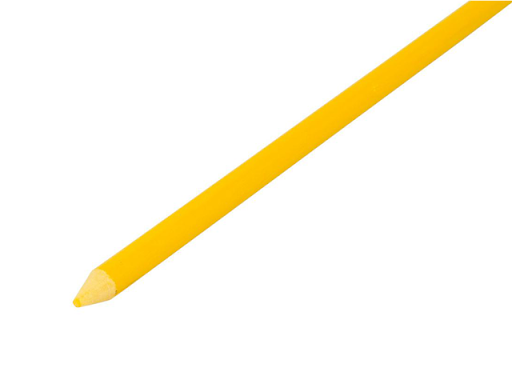
Flagpole
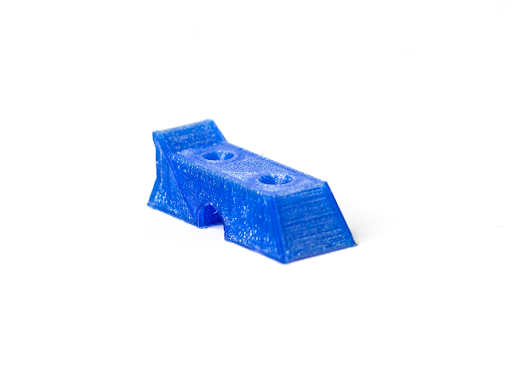
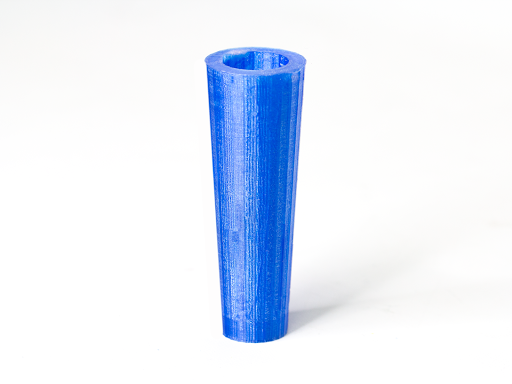
Pole Mount
I needed a way to mount the flagpole to the back of the kayak. I designed a mount that has a well for the bottom of the pole to sit in, and it’s attached to the hull with three screws. I had to use a heat gun and make the hole a little bit smaller, so the pole fits very snug and makes that *mpop* sound when I pull it out.
Find the part kayak parts.
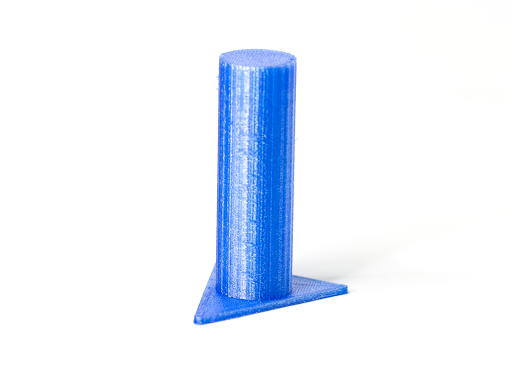
Pole mount
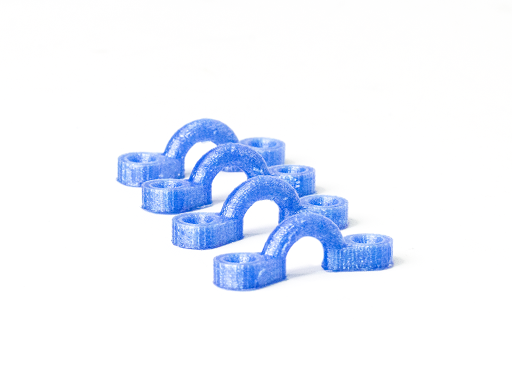
Flag Holder Loops
These small parts slide up onto the pole and hold the flag(s).
Find the part kayak parts.
Camera Mount
On the top of the flagpole I wanted to have an action camera, so I had to design a mount to fit. In the future, I would like to add a battery-powered 360-degree white LED light to the apparatus so I have the option to use the kayak from dusk until dawn (as is required by California law).
Find the part kayak parts.
Scupper Plugs
The Cobra Navigator kayak is a sit-on-top, and I don’t like constantly resting my feet in a couple of inches of water, so I printed a few scupper plugs to keep water from coming in through the bottom of the kayak. Of course, water comes in over the sides occasionally, so I have a large sponge to bail with.
Find the part kayak parts.
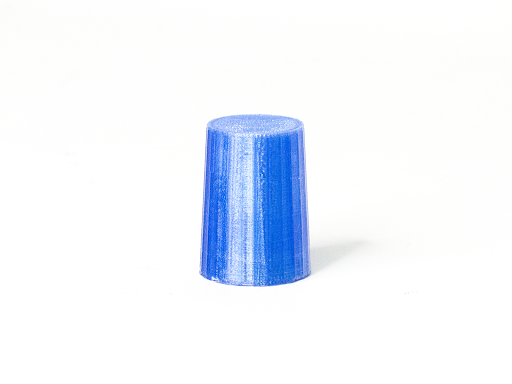
Scupper plugs
Battery Box Belt Loops
I used some leftover 3D printer belt to secure the two 12-volt batteries inside the utility box I bought to hold them. I had to design and print some custom loops to secure the ends of the belt to.
Find the part kayak parts.
Battery box belt loops
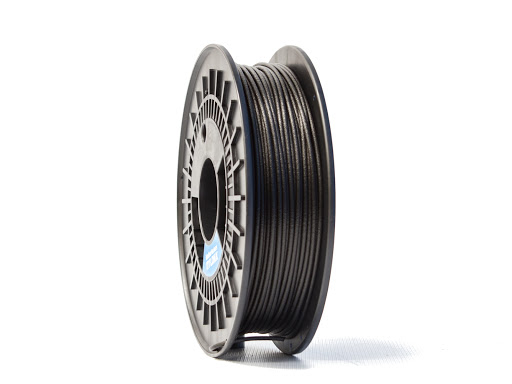
Anchor Line Reel Handle
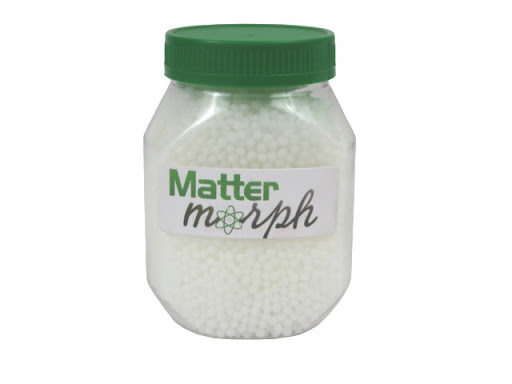
I used an empty filament spool for a reel, then designed and printed one of the two handles for it. I sculpted the other handle from MatterMorph so it would perfectly mold to the shape of my hand.
Find the part kayak parts.
Anchor line reel handle
Others' Designs
While I designed the parts above (which you can find for free in the design library kayak parts), there were already some great designs available online that fit my needs perfectly.
Paddle Clips
When I finally reach my destination and want to do some fishing, I don’t want to have to hold the paddle or keep it in my lap, so I printed these paddle clips that keep the paddle attached to the side of the kayak. I also made a smaller pair to hold my gaff.
Thing: http://www.thingiverse.com/thing:420343
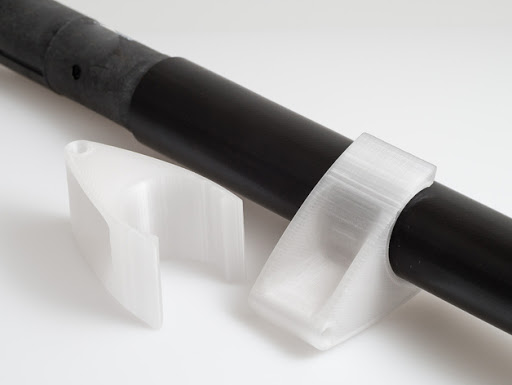
Paddle clips
Cleats
Any good boat has lots of cleats for tying off rope or line. This cleat design prints well and I have three total on my kayak. One at the back is the start and end for my perimeter deck line, and the two at the front are for tethering various other items like the fishing pole and gaff.
Thing: http://www.thingiverse.com/thing:63053
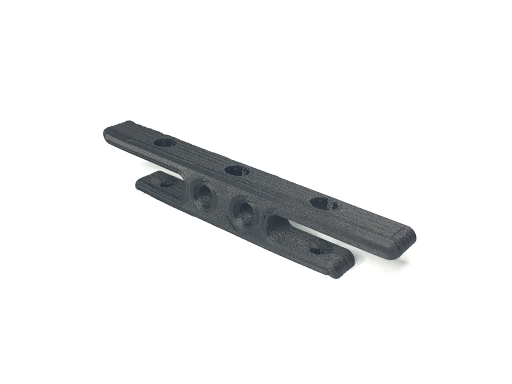
Cleats
Extra Scotty Rod Holder Knob
The rod holder I bought has a knob, and I probably don’t need a backup, but I saw it on Thingiverse and wanted to make one just for the heck of it since I like practicing with heat set finishes.
Thing: http://www.thingiverse.com/thing:1259205
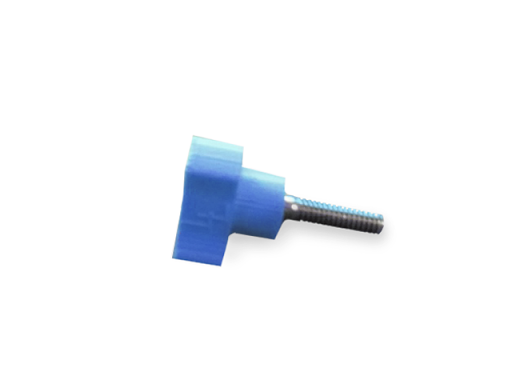
Scotty Rod Holder Knob
3D Printer Filament
When it comes to 3D printing parts that can withstand the elements, I like PRO Series PETG or Nylon filament. ABS filament also works well, but for me, it’s enough of a hassle to print with that I seek out alternatives. To be fair, Nylon filaments are also a hassle, but I’ve been able to mitigate enough of the negative effects associated with printing it that I can use it for some prints.

MatterHackers PRO Series PETG Filament
I printed the majority of the parts using the MatterHackers PRO Series Translucent Blue PETG, but for the cleats and some of the pad eyes, I used our new NylonX 3D filament, which is Nylon reinforced with ground carbon fiber. It’s very hard but flexible, so it won’t break if sudden force is applied.
NylonX 3D Filament
For one part, in particular, I wanted a handle that forms to the shape of my hand, so I used MatterMorph to create it. MatterMorph is not a 3D printing material per se, but rather are plastic pellets made from a material that has a low glass transition temperature which makes them easy to melt in a glass of hot water. Then, as the pellets clump together and become more malleable, they turn into a shapeable medium like clay or play-doh. When cooled back down to room temperature, the form hardens and is very durable.
Post-Processing
Function over form is my mantra. Often I am less concerned about how something looks than I am about its performance, and when it comes to 3D-printed parts, this is especially true. For this reason, my parts don’t always look great, but they are made to withstand heavy use and abuse. I can be clumsy at times, and there’s a very good reason I have an expensive phone case for my iPhone. I’m hard on my things, and for me, if a thing can’t stand up to my using it then it’s probably not for me. Unfortunately, this has historically meant that I can’t have some nice things, but when it comes to boating the ocean’s going to be plenty hard on this stuff so I figure it might as well be able to withstand both of us.
The plus side of not caring about looks is that I can make modifications to things that don’t necessarily look good but are quite functional. It also sets my aesthetic standard lower, but that’s a price I am willing to pay since the ultimate goal for a fishing boat is catching fish, and it doesn’t need to look good for me to do that.
For example, the connector part of the fish finder/compass mount I made out of ColorFabb XT didn’t print quite correctly. Instead of printing the whole thing again, I opted to repair the afflicted areas using a MatterHackers Crafty Pen (by hand). The result looks pretty awful, but since it works and my fish finder isn’t going to be thrown overboard if the kayak accidentally flips I will use it-- at least until I have a need for a different mount.
Another example is the flagpole mount. I wanted the flagpole to fit so snug that it wouldn’t have a chance to come out if the kayak flipped (the ultimate worst-case scenario). After printing, the fit was a little loose, so I used a heat gun to soften the PETG and was able to make the hole just the right size by molding it with my hands. The result is a very nice *mpop* sound when it’s removed, indicating that the fit is air-tight.
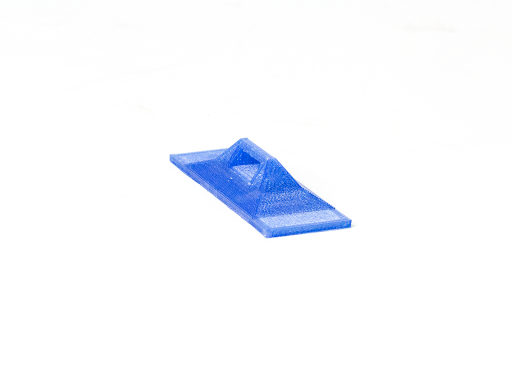
A Quick Fix
During the writing of this article I brought my kayak and all the equipment into the MatterHackers office to take pictures, and incidentally one of the plastic pieces on a leash broke. It’s a good leash otherwise, so rather than throw it away, I designed a replacement in Blender and printed it out.
The whole process took a few hours, but it saved me some cash and was a good opportunity to practice my CAD skills. More experienced users could probably do it in much less time. In any case, I’m pretty happy with the result.
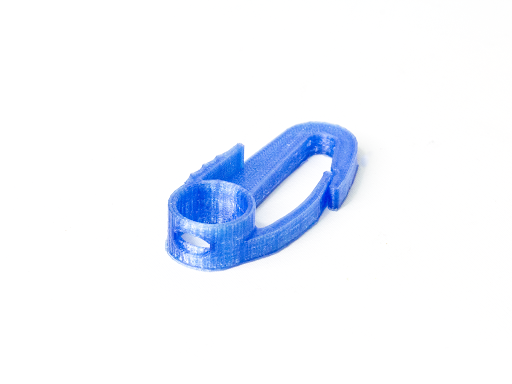
Custom clip for the leash that broke
Make It Your Own
So now that you’ve seen the basic process behind my kayak buildout, you can get to work on your own project. Have fun, explore all the options, and most importantly: make it your own! With 3D printing and MatterHackers behind you, you can make anything.
Happy printing!