
How To: Paint a 3D Printed Dice Tower
Learn how to create a stone-like effect on a 3D printed dice tower printed in PLA filament.

Games come in all different shapes and sizes - there are board games, card games, tile games, role-playing games and everything in between. One thing most of them have in common are dice. Rolling dice comes with some common accidental hazards - they knock over pieces on the game board, they fall on the floor, they roll under the refrigerator, and they get eaten by the family pet. But with the Dice Tower, those problems are a thing of the past!
Check out some other great weekend builds.
This article will show you how to paint a 3D printed dice tower - the model we selected was designed by NIXA and uploaded to the Zortrax library Dice Water Tower by NIXA.

The PLA printed tower alongside the original tower in Olsztyn, Poland.
The original model for the 3D tower was based on a real water tower in Olsztyn, Poland built in 1897 (it is now a planetarium, and is in the city where the headquarters of Zortrax is located). The actual tower is made of masonry and reddish, rusted brick, but I will finish this print with an awesome, stony, dungeony paint job. Of course, feel free to finish the tower however you like; because our family plays Settlers of Catan a lot, I wanted to go for the medieval castle feel.
3D Printing the Dice Tower
First, we need to get our 3D printer ready. While there are many options for finishing the print, I went with very little sanding as the print resolution was high and the details came out great!
The model was printed on an Ultimaker 2 printer. Here are the settings:
- -Material: Translucent Orange PLA 1.75mm filament
- -Layer: .2mm
- -Infill: 15% triangles
I printed 2 versions - one in transparent orange PLA 3D filament and another in silver/grey ABS filament. While both turned out really well, I went with the transparent orange model - you will find out why later in the tutorial! =)
Check out our guides to printing with both of these materials here:
How to Succeed when Printing with PLA:
http://www.matterhackers.com/articles/how-to-succeed-when-printing-in-pla
How to Succeed when Printing with ABS:
http://www.matterhackers.com/articles/how-to-succeed-when-printing-with-abs
Painting the 3D Printed Dice Tower
Once you are satisfied with the texture of the print using your post-processing method of choice, it’s time to paint! Here are two pictures that gave me inspiration for the type of color and design I was looking for:

A gothic church and a tower with a parapet similar to my model.
For the gothic, medieval look on the tower, we definitely want a lot of stone details and wear and tear to stand out, along with smaller details around the door, on the stairs and the top parapet of the tower, to add realism and also not to make it all one color - booooorrrrring!
For the stone look, I took a multimedia approach. Because the texture was so smooth on the print, and there wasn’t an accurate, practical way to carve or etch the mortar lines into the tower, I decided to build it up instead. I purchased foam, double-sided stickers in various square shapes from my local craft store - they are typically used in scrapbooking to layer paper cutouts.
In the first picture, you can see the initial stages of applying the cutouts around the windows and how I arranged the stickers away from the windows. Getting the windows dialed in should happen first - you can always cut out the foam to fit in the nooks and crannies after that.
In the second picture, I have finished applying the foam and have removed the adhesive backing.

The slow process of applying foam stickers - but its worth it!
I used two sizes for a variety of the types of ‘stone blocks’ on the tower, so it’s not all one size (again, boooorrrrrring!). They also have a great mini-stone texture to them, which will help make the paint job really pop - double win! The only cutting of the blocks I needed to do was to trim pieces that were too big, and to bevel the blocks above the windows - they needed an angle cut so they would interlock and look nicer. But I will say, it took a lot longer than I originally anticipated! Also, I got a little lazy with the bigger foam squares on the bottom - normally I would cut them to fit and apply them at different angles - but Christmas was coming!
I would definitely suggest NOT removing the backing on the outside of the foam until you are completely finished applying them; as I was applying more, my hand kept getting stuck to them, and some pulled off.
For the painting, it is extremely important to get a dark base layer down; this gives you a foundation for the acrylics to stick to, as well as a filler for all the cracks and crevices on the print. A dark color in those spaces gives the illusion of more depth and makes your foam squares really pop. I used a matte black spray paint - nothing fancy, but definitely take the time to get the entire print covered; it will most likely take at least two coats to get complete coverage.
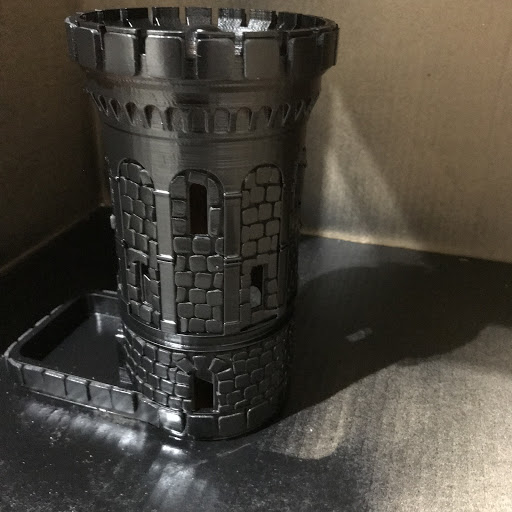
After one coat of matte black spray paint - definitely apply two!
For the stone surfaces, I decided to go with a layered dry-brushing technique using basic acrylic paints. The darker gray stone colors went on first to emphasize the depth of all the little nooks and crannies. I gradually painted with lighter and lighter layers, with light brush strokes, to emphasize the highlights and outcroppings on the tower. I also went back and used a small mottling brush with gray and black on it to give the stones a better looking texture; the ‘bricks’ were left alone with just the base coat.
By slowly applying paint layers, the illusion of stone and masonry will appear. If I had started with a completely smooth texture, I would have had to either draw or etch the mortar lines, which would take the painting treatment in an entirely different direction, and the depth effect wouldn’t be as cool.
One of the details I wanted to emphasize are the smaller stone trim details that are darker than the rest of the exterior because their surfaces are flat in relation to the sun. They pick up all the sunshine, moisture, dust, and debris which ‘cook’ in layers and become darker than the rest of the exterior over time on real stone.
For the doorway and the stairs, I decided to use some earthy and woody gray/browns on the threshold, as well as some very light greens to highlight ‘moss’ and ‘algae’ on the stairs, and as vegetation growing around the base of the tower.
Now for the reason I printed the tower with transparent orange filament! I took advantage of the void under the bottom of the stairs inside the print and decided to add a lighting effect. I cannibalized a battery-operated tea light and drilled a hole to fit inside the void to add some dungeon ambience. When the lights are low, it adds a really cool effect to the tower!
For more tips on how to finish your 3D prints, head over to this instructional video where Alec and Bill from Punished Props show you how to finish your prints using sanding, filling and painting:
https://www.youtube.com/watch?v=eGrRKdy6x7I
If you are looking to learn more about using a more chemical-based approach to finishing, (I did not use this method on this project, but you can!) you can check out this MatterHackers guide with Alec: he shows you how to finish a print using XTC-3D High-Performance 3D Print Coating:
I hope you enjoyed this How To article on creating an awesome stone-like facade on a 3D printed tower. Remember, you can always pick different colors and textures and add-ons to make the tower truly your own. Thanks for reading! Now go out and make something!
Do you have a suggestion for a weekend build? Let us know in the comments below or at MatterHackers.com!