
Tips for Getting Started: How Many 3D Printers Does Your Classroom Need?
A look at the benefits of having multiple machines in the classroom, how to manage them, and how to develop a 3D printing schedule for student use.


Where to Begin?
As we move forward with distance learning, there has been a push for more innovation and there is the belief that innovation will continue when in person teaching returns. One tool that can really push innovation is a 3D printer. Working on a geography project? Have students design landmarks via Tinkercad, print them and put a monument city on display! Reading a novel as a class? Have students use SculptGL to create how they envision a main character looks, print and then compare/contrast the different takes! The question then arises: “How should I get started with 3D printing?” But before we can answer that, you first need to ask, “How many 3D printers will I need?”
Today we will look at the benefits of having multiple machines, how to manage them and also how to develop a schedule if access to a 3D printer is limited. Along the way, we’ll answer some questions about print time, quality and what the purpose of the 3D printer in your classroom is. Let’s start off by looking at how to manage a printer in the classroom and come up with a print schedule that works!
Developing a Print Schedule
One of the first things to take into consideration when developing a print schedule for one 3D printer is what quality of print will be used. The different quality levels will vary and in some cases only one of those quality levels will work for specific projects. To really visualize what the difference is between a draft(low) quality print and a high quality print I have the two identical prints below for you. This little tugboat (known as a “Benchy” or benchmark print) will show how in a lower quality print we can see the layer lines, which can affect a print’s accuracy and can lead to problems with precise items such as gears. The difference in completion time is also substantial, as the lower quality print was completed within an hour while the high quality print took close to three hours.

Knowing the difference in time of the quality prints allows for time management to occur that much more easily. Being aware that a high quality print can take up to three times as long, a teacher can figure out how to manage their machine for those times that a high quality print is absolutely necessary. The other aspect that can affect print time is the scale of the item. Size can be adjusted so that an item prints within a specific time frame. This, along with print quality, will be used to develop a print schedule and manage print times.
Teachers that want to use their printer as a supplement to an assignment or as an extra activity in their classroom can develop a “time window” that prints must fit into. For example, if your goal is to only introduce next level technology, then you can give each student a turn and their selected item must be scaled to fit that “time window”. Here’s an example: If the student finds a keychain they like and it will only take 20 minutes at a low quality setting, then they can adjust it for a high quality print if it will fit into the time window. This will work if the teacher allows a 1 hour print per student. This “time window” will also allow for between 5-6 prints per day, and this means that a student who prints first on Monday will then be able to print again the following Monday or Tuesday. The visual below will help illustrate how one printer can be managed and also how the “time window” can be narrowed each time another printer is added to the classroom.

Choosing the Right 3D Printer(s) for Your Class
Now that we have an understanding of how we can manage print times, let’s look at choosing the right 3D printers. If you have one already, then you’re ready to get started! If you don’t have a 3D printer yet and want to know where to begin, then it comes down to a few questions that will help you find that perfect printer or printers. One is definitely the intended purpose of the printers; yes, we are not going to start with price! We will get there eventually, but first let’s look at what role the printer will take in your classroom.
If you are looking to introduce a 3D printer into your classroom as a way to expose students to cutting edge technology, then just one will be enough for that purpose -- have them cycle through the previously mentioned schedule. However, if the printer will be a centerpiece of the classroom that will be part of or an option for most assignments or projects, then you will want to get multiple printers. If you are still unsure, then I would suggest starting with one to get situated. Now that you have an idea of what you will do with your printer, let’s look at the two types of printers: plug & play and printer kits.
Plug & play printers, also known as fully assembled printers, are exactly as described in that you plug them in, balance the build area, load the filament and then get started with the machine. They are usually easier to use and faster to get started with. The other type of printer is a kit system, which is a printer that will need to be put together with varying levels of difficulty depending on the brand purchased.
Here are a few examples of plug & play printers:
Fully Assembled 3D Printers
The Matterhackers Pulse 3D Printer comes fully assembled and ready to use out of the box.

The Lulzbot Mini 2 also comes fully assembled and ready to use as well.

3D Printer Kits
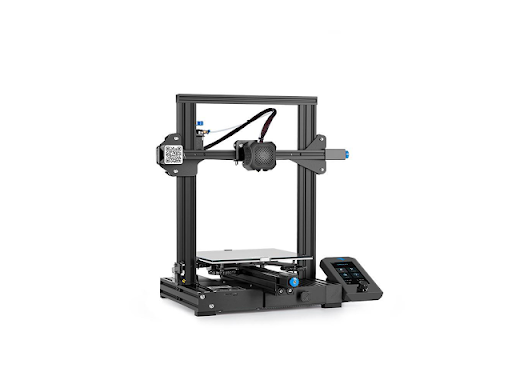
The Creality Ender-3 has several pieces that will be put together and can take two to three hours to put together.
The Creality CR-10s on the other hand is two frames and connect cables, which take less than 30 minutes to assemble but is technically considered a kit.

The next question is: Which of these would work best for your classroom? If you don’t mind putting things together, the kits come at a lower price and can print larger items at a reduced price versus the fully assembled printers. On the other hand, the fully assembled printers come with the convenience of arriving ready to use, and there is no need to worry about putting the machine together. Price wise, there is also a difference. Here’s a comparison of a few options:
Reach Out for Advice
Hopefully this information will help you to come to a more precise decision on introducing 3D printing into your classroom and also where to begin. The goal is to help you manage the printers you currently have available and also what options are available if you decide to expand the number of machines in your classroom. If you should happen to have any other questions about printers, slicer software, management of printers or lesson ideas, please feel free to reach out via my blog, email or twitter located below.
You can also contact support@matterhackers.com for phone and email support for all 70+ machines and 1000+ materials offered by MatterHackers, free US shipping on orders over $35, discounts for educators and libraries, video tutorials, and classroom case studies. Thank you for your time.
Jesus Huerta
Calexico Unified School District
Email: letsteach1979@gmail.com
Twitter: @jesush1979
Website: https://mrhuertasclass.weebly.com/
