How To: Change a 3D Printer Nozzle
Changing your 3D printer nozzle is quick and easy when you follow these simple steps.

If you’ve never changed a nozzle before, you might be wondering why you’d even want to. Well, there are a couple of reasons. While most stock nozzles are brass and have a 0.4mm diameter, nozzles come in a huge variety of materials and sizes. Brass nozzles are standard and are great at heating up and holding temperature, but stainless steel and hardened steel won’t wear out nearly as quickly as brass will with abrasive materials, like copperfill or NylonX with its carbon fiber. There are 0.25mm nozzles for high-details models and even nozzles as large as 1.2mm for incredibly strong, structural parts. In addition, it’s really nice to be able to minimize downtime by taking out a clogged nozzle, installing a clean one, starting a print, and then worrying about taking care of the clogged one. Every nozzle has its purpose and specialty, but first, you need to know how to change them out, so let’s get to it.
Step 1: Gather tools
- Depending on your 3D printer, this may change slightly, but in most cases, the two things you’ll need are a set of channel locks or a crescent wrench to grip the heater block, and a wrench to hold the nozzle. E3D nozzles, Ultimaker 2+ nozzles, and many other nozzles that use an M6 threading can use a 7mm wrench to grip them, but not all nozzles are the same.
Step 2: Heat up the hot end
- When the heater block, heat break, and nozzle heat up, the metal expands just enough to make the threads just a little bit easier to loosen. When they’re cold, they shrink together tight, to the point that you can tear out the thread of the heater block or nozzle when removing the nozzle. We’ve seen it happen plenty of times over, and I’ve done it myself when I first started 3D printing. At this point, remove any filament that’s in the printer as well.
Step 3: Remove the nozzle.
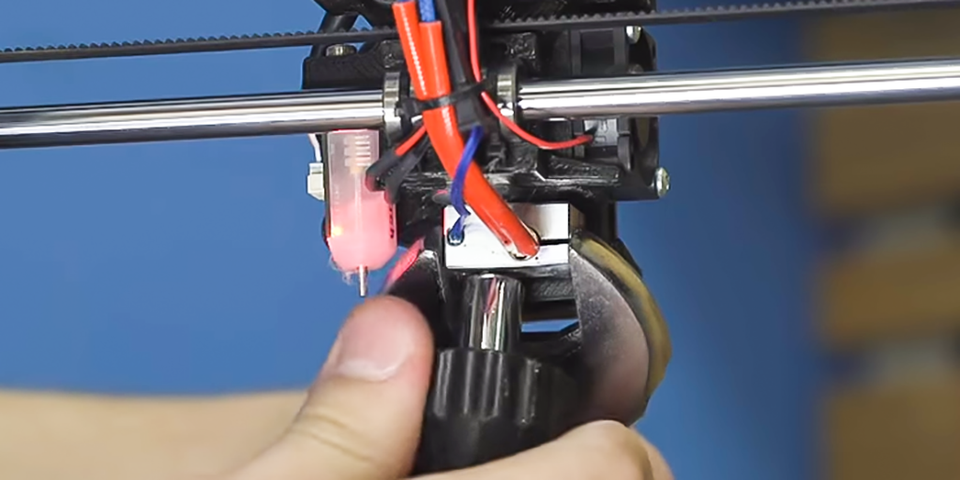
- With the hotend at temperature, use the channel locks to grip onto the heater block. You don’t need to grip it tightly, just enough to keep it from rotating while you remove the nozzle. With your other hand, grip the nozzle with the small wrench and begin unscrewing it clockwise (if you were looking at the hotend from above). Once you break the tension, it should come out easy, just keep unscrewing it until it’s out.
Step 4: Install the new nozzle.
- Since the new nozzle isn’t hot it’ll be a little harder to turn because its threads haven’t expanded, but you can do it mostly by hand to start with since it’s cool, then finish it off with a tool. You want to be extra sure that you don’t over torque the nozzle and tear out the threads at this point as well. You could print this nozzle torque wrench designed by Anders Olsson, and once it’s been tightened enough, the wrench will click and prevent you from turning it any further. If you have experience changing nozzles, it’s pretty easy to feel when it’s properly seated, otherwise this tool is super handy; we even have a couple floating around the office.
Step 5: Start printing!
It’s really that easy to change a nozzle. Now go and install the biggest nozzle you can and print something massive in no time at all. If you have any comments or questions, we have a nozzle comparison guide that might answer your questions, otherwise feel free to leave a comment down below.
Happy printing!
Request a Quote
To learn about available discounts, training, and maintenance options, please use the form below and a MatterHackers Expert will contact you within one business day. Alternatively, you can always feel free to give us a call at +1 (800) 613-4290 or email sales@matterhackers.com.