
Installing RAMBo Driver
------------UPDATE!!------------ THIS ARTICLE IS DEPRECATED AND IS ONLY RELEVANT TO MATTERCONTROL BEFORE V1.2. ---------------Instructions on how to install the Windows driver for RAMBo boards. Used by the Airwolf HD, XL, and the SeeMeCNC Rostock Max printers (among others). --- Updated 6/16/15
MatterControl now include a driver for RAMBo boards directly in the software. If your machine uses a RAMBo board and has a profile built into MatterControl, the correct driver will be installed as part of the printer setup.
If are using Windows and your 3D printer uses a RAMBo board, you will need to install the RAMBo Windows driver before going through the setup process. Once the driver is installed you can go through the normal MatterControl printer setup to get your printer up and running.
Installing the RAMBO driver
Here are the steps you need to do to get the RAMBo drivers installed.
- If you are running on Windows 8 you will need to follow directions below before you try and install the driver
- Run the MatterControl Setup and go through the installation wizard to install it
- Run the Windows Device Manager
- You can find the Device Manger by searching for it inside of the Control Panel
- Plug in your printer
- In Device Manager you should find a section "Other Devices" and an item withn it "RAMBo"
- Right click on "RAMBo" and select "Update Driver Software" from the menu that appears
- Click on "Browse my computer for driver software"
- Click the "Browse" button
- Navigate to "C:\Program Files (x86)\MatterControl\StaticData\Drivers" and Click OK
- Click "Next"
- Your RAMBo driver should now be installed and you can run the printer setup wizard in MatterControl to finish seting up your printer
Windows 8 Users
If you are running Windows 8, you'll need to restart your computer in Disable Driver Signature Enforcement
mode before you can install the driver. These steps are also required for the installation of the v.5.5 driver.
- Locate the options on the right side of the screen > select Settings

Settings Icon within Options
2. Select the Change PC settings link
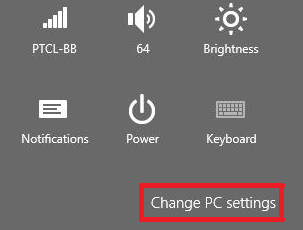
PC Settings
3. After opening the Control Panel, select Update & Recovery > select Recovery

4. A section called Advanced startup will appear > select Restart now
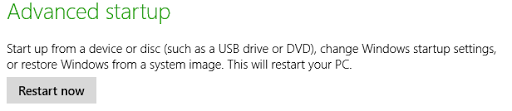
Advanced startup
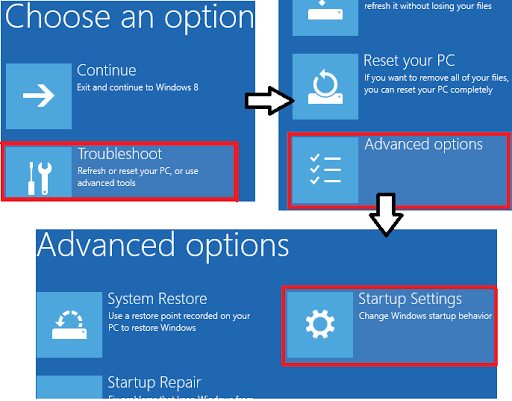
5. After the computer restarts, select Troubleshoot > Advanced options > Startup Settings > Restart
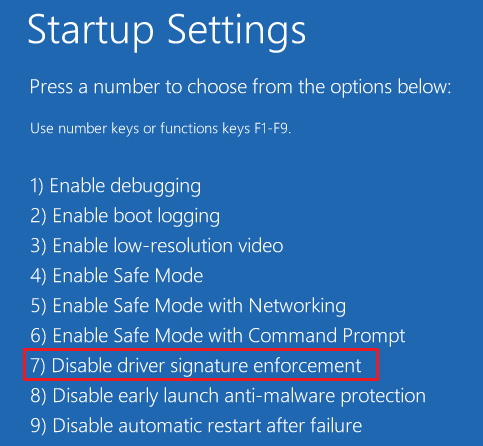
6. When the computer starts, select F7 to boot with the driver signature check disabled
At this point, you can move on to installing the driver in the guide above.