
Native American Homes Lesson Plan
Students will study, design, and 3D print various Native American Homes.
Nichole Thomas is a teacher at Liberty Elementary, a STEM based school in South Riding, VA. There, they teach 3D printing to students in Kindergarten through 5th grades, and work hard to connect all printing projects to their curriculum. Thomas was gracious enough to share her curriculum with us at MatterHackers, and we are happy to share it with you. Find Nichole on Twitter at @MrsThomasTRT
Overview and Background
Overview:
Students will learn about Native Americans and the types of homes they lived in. They will then design a Native American home that was realistic to the times and area. The models will include both structures and landscaping to show off their knowledge of Native American tribes. Students will use TinkerCAD to recreate the typical types of homes such as adobes, pueblos, and long houses. Models will need to look authentic and have different aspects of the homes such as ladders, community gardens, and other identifying features of the Native American homes they studied.
Objectives:
Students should be able to identify the different types of Native American tribes and where they lived. Students need to know the attributes and styles of the different Native American homes.
Subjects:
This lesson should accompany a social studies lesson where students learn about different Native American Tribes. Students should learn about where these homes are located and where they can be found on a map.
Standards:
Virginia SOL: Social Studies SOL 2.2: The student will compare the lives and contributions of three American Indian cultures of the past and present, with emphasis on the Powhatan of the Eastern Woodlands, the Lakota of the Plains, and the Pueblo peoples of the Southwest.
Common Core Standards:
Common Core Standards: http://www.p12.nysed.gov/ciai/socst/pub/sscore1.pdf
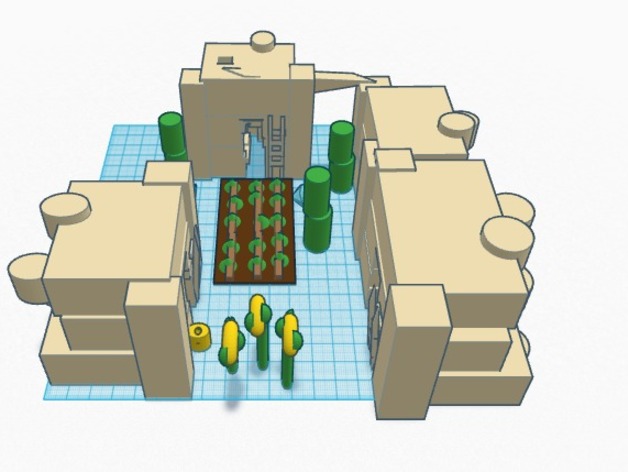
A Native American village designed by a student
Duration of Lesson:
After students learn about the Native Americans unit in class, 3D modeling and creating houses should take the students two 30-minute computer lab times, not counting print time.
Preparation
Students need to know:
- Real World Connection: Where in the US the chosen tribe was located, and where they were located in terrain (on a hill, in caves), what the homes were built from and how they were built, and how homes in a village were organized.
- TinkerCAD: Students need to know how to use TinkerCAD, specifically how to group items and create holes.
Lesson Plan and Activity
- In class students learn about different Native American tribes across North America and where the Native Americans lived and built their homes.
- Discuss similarities and differences of how various tribes built their homes and the physical characteristics of the different homes.
- Students choose a type of tribal home that interests them most and then create a drawing depicting the architectural and landscapes of that Native American culture. This will serve as their draft for their 3D design.
- After the student’s draft is approved by the teacher they may begin working in TinkerCAD.
- Students log into TinkerCAD and begin creating their model of the Native American home they chose.
- Once students finish the teacher needs to ensure that the creation has all of the components and is ready for printing.
- Have students place their homes on a map of the US to show where the homes were built.
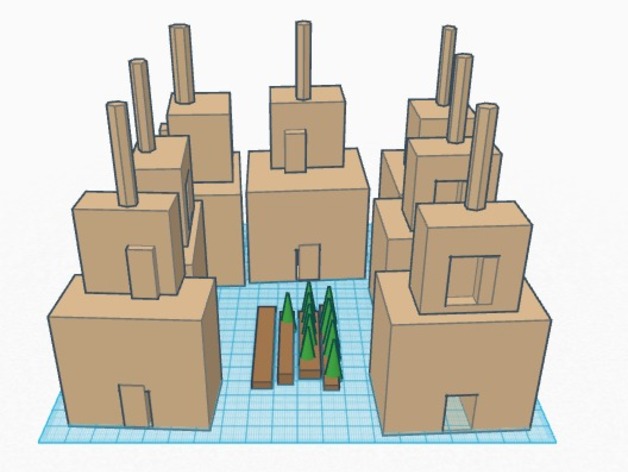 A Native American village designed by a student
Rubric and Assessment
By the end of the project students should have designed a home that represents how Native American people lived. Students will get full credit on their 3D models if they ensure that their home has both the structural and agricultural features of the different homes.
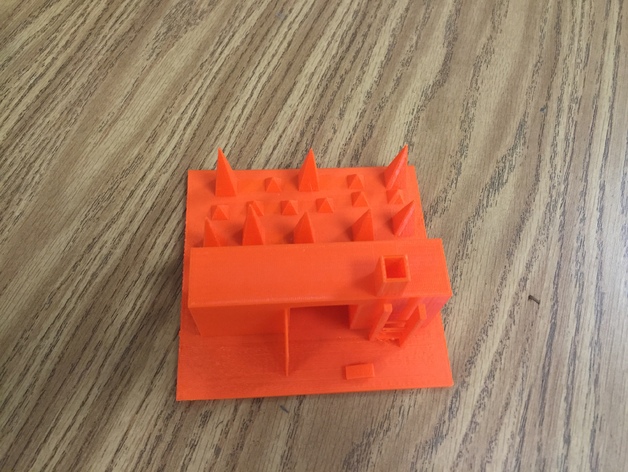
A printed home designed by a student and printed by a teacher
Tips & Tricks for Printing
• After students design their homes, make sure that each home design has a solid base underneath it. This will ensure that student's designs are printed as one solid piece, rather than separate pieces for the structure and agriculture pieces. The easiest way to do this is to add a square base to each students' model after the fact.
• Before printing, it's important to go through each student's design to ensure that their creations are printable. For example, students have created awesome crops however parts of the crops often "floated" above other parts instead of actually being connected. Doing a quick check that objects are correctly layered and designed will help immensely when it comes down to printing.
• If your printer is capable of it, print multiple homes on a build plate at a time. It will cut down on both printing time and allow the printer to run all day instead of shorter prints that need to constantly be started and scheduled around throughout the day.