
Weekend Builds: Wall Mount Anything
Once you have a 3D printer, desk space becomes a commodity. Being able to move that clutter into an organized wall mounted display comes in handy!

It’s happened to the best of us; you want to organize and clean up your space but there’s just not enough room to display that cool print you’ve put together or keep all your equipment neatly laid out. I’ve developed a system I use at home that’s really been really beneficial to have at the office; small or large I can wall mount any object you can throw at me. There’s three main methods I use of varying skill levels, so let’s start off with what you need for all methods:
You need an object to mount. This can be something you 3D printed, or something that only exists in the physical world (you don’t have a 3D model of it). Once you have your object, consider how you want it mounted, what might get in the way when hanging it up, are you going to use screws and drywall anchors, nails, etc. From there you can figure out which method is going to work best for your project.
All of these mounts utilize MatterHackers PRO Series RYNO, a copolyester that is really well suited for parts that need to work and handle stress, like jigs and fixtures or even the printed parts on 3D printers. While it does require an all-metal hotend, it’s super easy to print once you get going and you can create some beautiful parts.
MatterControl Image Converter
Of the three methods I use, MatterControl’s Image Converter is simplest. MatterControl has a lot of handy features to do basic designing and customizing. While the main use of Image converter is for creating lithophanes and adding emblems and features to your models, you can also use it when designing mounts.
You’ll need a little cleanup first in order to get a better approximation of your object, but the steps are easy. I wanted to mount some chargers for our filming equipment, so I grabbed one from the studio, laid it on some white printer paper, and snapped a picture with my phone, making sure it was as close as I could get to directly overhead of the charger.
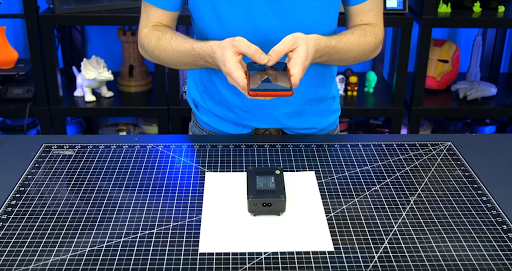
Taking a picture to create a silhouette of the charger.
From there I took I needed to make it easier for MatterControl to interpret what it was looking at; the stickers, ridges, and colors of it would throw off the image converter and create a shape not even close to the charger. I used Inkscape, a free image editing program, but you can use whatever you have available, even MSPaint. The goal is to turn this picture into a silhouette with a white background, so color over the top of the charger with black and export that as an image for MatterControl.
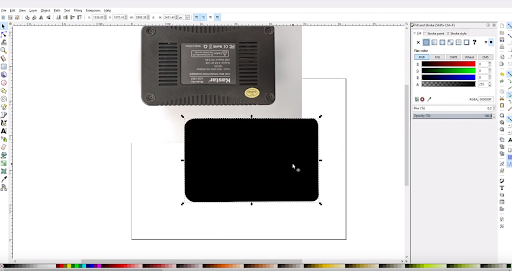
Any image editing software could be used to modify your picture.
Once I had MatterControl open, I simply dragged and dropped it in and selected image converter from the dropdown. Most of the settings are automatically selected and all I had to do was decide how tall I wanted to extrude it. With a set of calipers, I measured that the plug for the charging cable was roughly 6mm above the base of the charger, so I extruded it 5mm to leave enough room.
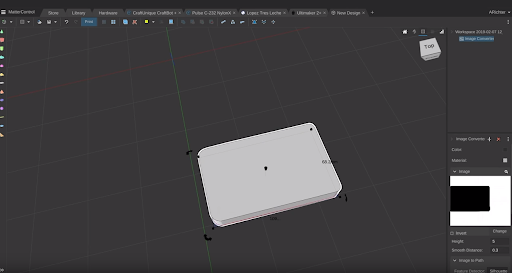
Using my calipers, I measured how wide the charger was and used that to scale the piece to be the right size of the charger, because the photo isn’t brought in to scale. Then I needed to model what I wanted the charger mount to actually look like. The screen on the front isn’t easy to see from all angles, so I thought it would make sense to put it at a 45°. I also added keyholes in the back for mounting, a slot for the charger’s cord, and a jig so I could easily see where I needed to drill holes in the wall.
The charger mount modeled entirely in MatterControl
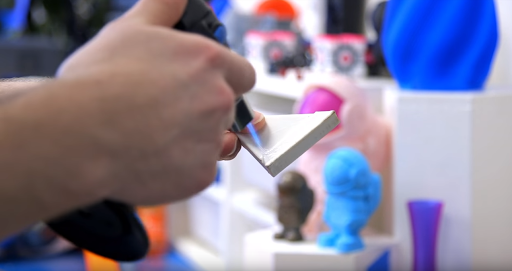
From there, all I needed to do was drive in some drywall anchors, install the screws, and mount it! A helpful tip is to print out just the section with the cutout first so you can check the fit of it; is it too tight, too loose, not the right shape at all. If after printing it’s really close to fitting but not quite there, I find that a small blow torch comes in handy for softening up a print so you can get it to fit. Don’t get too aggressive, otherwise your part may melt rather than soften.
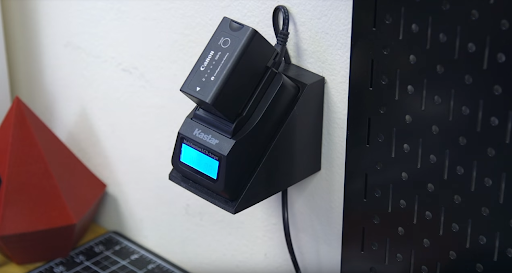
Mounted and ready to use
Using a 3D Model as Reference
If you’re trying to mount a printed object, like a custom jig or a finished prop, a picture probably won’t help if it has complex shapes to it (more complex than a simple extrusion). In this case, it’s really easy to take the 3D model you used and subtract it from something you can attach to the wall. In this case, our Community Manager Chris Morgan printed out Broken Nerd’s Stormbreaker and finished it and we wanted to display it, so he handed the models off to me.
For something like this, you can really use whatever design program you are most familiar with, I’m just very familiar with Fusion 360. I imported the STL into Fusion, and while I can’t modify it, I can use it as reference.
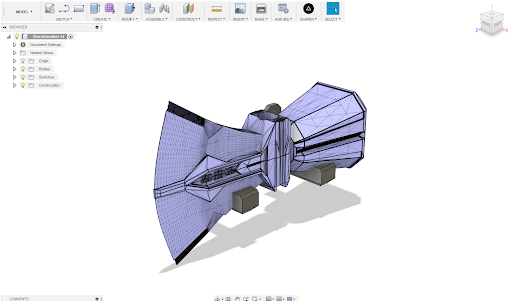
Stormbreaker imported into Fusion with the arms modeled around it.
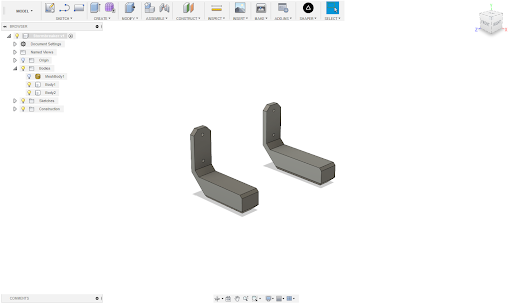
From here, I designed a piece I could mount into the wall, making sure the holes through it were slightly larger than the mounting hardware I’d be using so it could easily screw in without gripping the print. The actual shape of it doesn’t matter, just that I have two holes on either bracket and that it has room for the hammer to fit up against the wall, and there’s enough material to the “arms” that cutting away the hammer won’t significantly weaken it.
The shape is right, the arms just need to get cut out.
Since I can’t modify STLs in Fusion, I exported both brackets and the hammer again to make sure they are all based around the same coordinate system (you don’t want the hammer to come in a completely different position than you modeled it for). I then imported them into Netfabb, which not only is it great for mesh repair, but mesh modification. Once I had them all in, I subtract the hammer from one bracket then the next, leaving a perfectly shaped cutout of the hammer in each bracket.
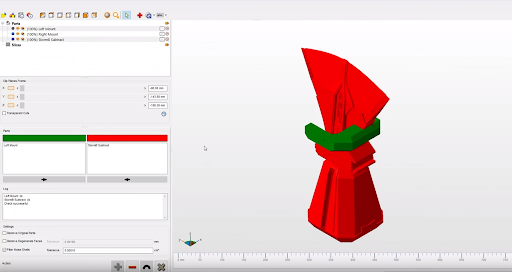
Netfabb is great for Boolean operations
However, that would mean that the 3D model would need to be perfectly represented in real life, which just isn’t realistic. Everything is built with tolerances - and this needs clearance tolerances to allow Stormbreaker to be placed in and not be squeezed. To do this, I can go into the mesh repair mode and select the faces that would mate against the hammer and move them inward 0.2mm just to give a slight bit of wiggle room.

With all that done, it was time to print them out and mount them using drywall anchors. It would have been smart to make a jig to make these perfectly spaced, alas I didn’t think that far ahead.
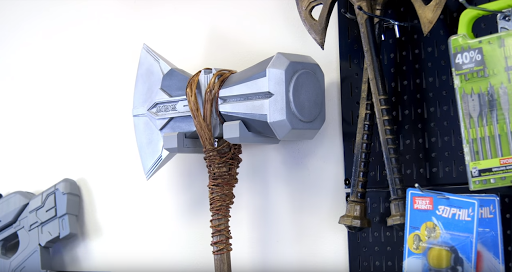 Printed, mounted, and ready for display
Measuring, Modeling, and Testing
The last method is the one I use very frequently; taking a real-world part, measuring it, printing test pieces, and creating a mating piece after iterating the prototype. It requires a little more forward thinking to see what features do I need to measure, how am I going to fit separate parts together, and what are my constraints. Let’s dive into my process:
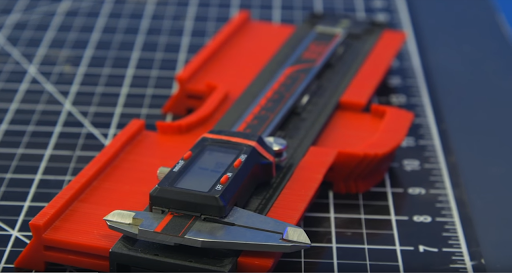
Calipers and a contour gauge - tools that are indispensable for a 3D modeler
Starting out, I’ll use a contour gauge to, much like the name implies, gauge the contour of the light. This will is mostly to help me figure out the radius of the rounded corners of the light, rather than major measurements like the diameter of the pull chain connection. For most of the parts, a set of calipers (which don’t have to be expensive, mine are $15) will be plenty fine to measure out all of the parts and create a basic sketch with dimensions.
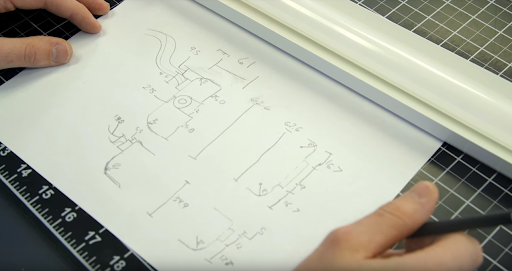
The light mounts sketched out and dimensioned.
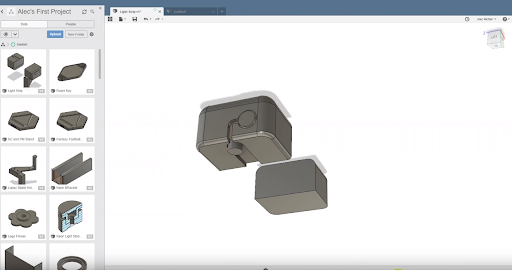
With all those dimensioned out, I jumped into Fusion360 and created a mockup of either end of the light, which is where I will be attaching the mount. Then I could start creating the pieces that slide over it to securely hold it. The key here isn’t to go crazy with detail, just get the significant parts modeled that will be the constraints for the bracket.
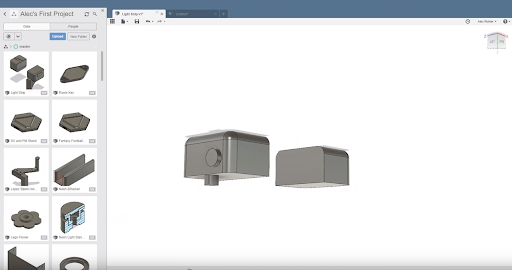
With the lights mocked up in Fusion, they're ready to create the brackets around them.
It made the most sense to me to have a piece slide onto either end, and to do that I needed a cutout on the right side for the outlet (so you can connect together a series of lights) and cutouts on the left side to fit the pull chain and the cord coming out of it. A key thing to note is that since this is slide on, I would need a channel for the pull chain, and I needed to consider the actual plug that goes into the wall and make sure that fit. Rather than creating a huge cutout for the plug, it made more sense to make a small channel connecting the two holes for the cord to slide through before the bracket is slid on.
Now that I have pieces that snugly fit onto the light, it's time to model the attachments
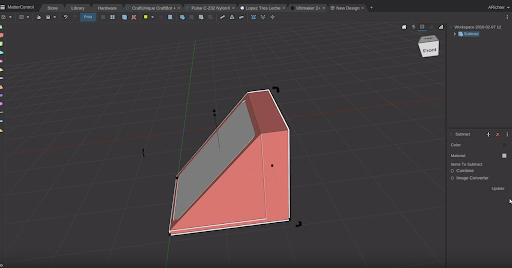
To mount this to the wall, I needed to make something that took the print orientation into consideration, rather than just printing this with a ton of support. The solution to that was splitting this into several parts and using half dovetails to minimize on support. I modeled the dovetails and extruded into the main section and used a subtraction operation to cut it out. I then fleshed it out into a triangular shape to connect it all to the piece that will screw into the wall.
For the wall mounted piece, I could have done everything from a really ornate design to a square, so I went with a rectangle with the corners chamfer to give it just a little detail. This also had a dovetail cut into it to allow the triangle piece to slide down into it, making sure that the dovetail on the triangle was unobstructed (I almost made the mistake of connecting the two dovetails, making the wall side impossible to connect).
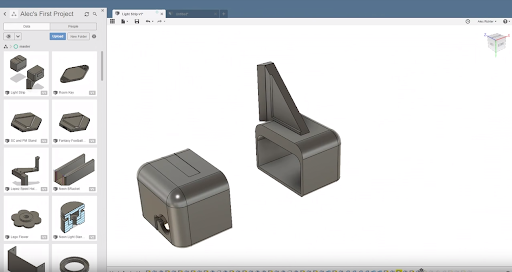
This triangular piece could easily be modified so you could mount these lights at any angle.
Since I was using the same screws as the two prior mounts, I already knew the right size holes to make to fit them. One thing I forgot though was to sink the hole in so the head of the screw is below the dovetail, so after printing I had to get a little melty with a blowtorch to get everything to fit. I also gave a little clearance to all the mating faces so they could easily slide into each other, but made it too small which meant that each one was way too tight to be usable. Rather than reprinting them, I used some sandpaper and a blowtorch on these parts as well. I did go back and modify my model so if we do use these lights somewhere else, I won’t have the same problem.
Some parts were a little too snug; I should have allowed for more clearance based on my printer's tolerances.
All that was left to do was mount these on the wall, and that was as simple as roughly placing the left side of the mount so the light didn’t bump into Stormbreaker or the organizers, then make sure the wall mounted piece was level, mark it, drive in the anchors, screw it into the wall, and repeat on the other side
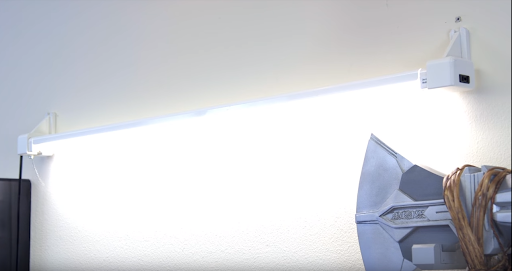
The lights are mounted and make a big difference in this side of the room.
And that’s it! All said and done this build took me the better part of a day to model everything and a series of overnight prints across a couple printers. It’s been really handy for me to be able to take the many things that clutter my desk and put them somewhere there’s plenty of usable space, or even to make a custom light fixture rather than having to source some weird and expensive solution.
I hope you are able to mount anything you are looking for pretty easily now using these techniques. If you’ve already done a bunch of mounting in your space and you don’t use any of these techniques, I’d love to hear about it in the comments below.
Happy printing!