
January 2016 Hacker of the Month- Freebird Flight
Roger Freeman, inventor of the Freebird Flight drone, shares his 3D printing story and the process behind developing his drone.
Technology and the latest gadgets have always been an interest to me, but they were confined to hobbies during my limited free time as a financial analyst for nearly 20 years. I decided to take some time away from that world in early 2014 after the 2008 financial crisis effects sapped the industry of a lot of the bright minds that had attracted me to it in the mid-‘90s. I was hoping to unleash my creativity in developing something new where I could make a difference, and I was excited to finally have some time to do that.
Naturally, I became interested in 3D printing, and bought a Cubex printer. I began teaching myself how to do basic prints with the out-of-the-box software, but I soon discovered Fusion 360 from Autodesk and was quickly making more complicated designs. First on the list were custom child-safety items like protected wall plates, knobs for stoves, and doors to make the house safer for our twin boys who were 1-year old at the time. I found I could make these items in just the right dimensions to fit the hardware in our house in contrast to generic store bought items that typically fell short of being truly useful.
A couple months later, I got a small drone, another new technology I was interested in, and which were just becoming more widely available. A few weeks after that purchase, like most new drone owners, I crashed it in our back yard and broke one of the arms. As I was trying to locate replacement parts, I glanced over at the printer and it occurred to me I could probably make replacements. Having successfully done that, and learning more about the drone technology in the market at the time, a couple of months later, I thought I’d try to develop something better than what was available – in particular something larger that could be used for all sorts of applications – not just video – and that was more weather tolerant. That was summer 2014.

By early fall, I had a working prototype – made mostly from ABS and PLA. I had also upgraded to a Lulzbot TAZ 4 printer, which opened up a whole new universe of materials that I couldn’t use with the proprietary Cubex platform. That’s when I discovered MatterHackers, which quickly became my single source for filament. In October or November 2014, they introduced Proto Pasta’s carbon fiber filament, which I quickly tried. That was perhaps the biggest enabler for me to develop the current design. I could now print much thinner, much faster, and with absolutely no warping. The design at the time, and which I stuck with for a couple more months after the carbon fiber was introduced, more closely resembled a tradition quadcopter with four arms. Even with the carbon fiber, I still had problems with arms breaking off over time because of the heavy load (up to 25 pounds) being carried by the arms in conjunction with vibration from the motors.
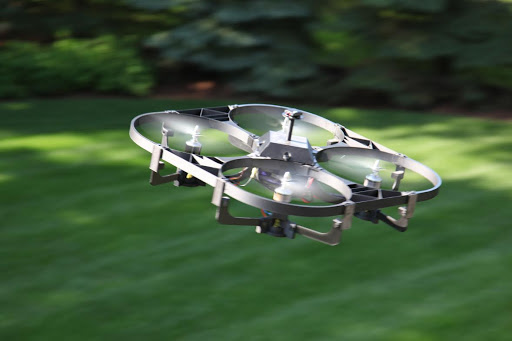
As I became better at printing the carbon fiber and improved my CAD design skills, I decided to overhaul the design completely in order to print even thinner parts while at the same time evenly distributing the weight of the UAV and stress from the motors’ torque all around the frame. The current enclosed frame design came to me one day – I still remember – on a Friday in early January, just about a year ago. The whole picture was in my head. It was to be an airframe that enclosed the blades (for safety), but in a way that actually increased the strength of the overall frame by distributing the vehicle’s weight and motor torque stress evenly to avoid concentration of stress at just four points – something I now call a SurroundFrame. Even until now, I have not seen an enclosed frame design that is anything more than a body cover that sits on top of a traditional frame with four arms – or a variation that has partial enclosures on the outer corners. In any case, while helpful from a safety perspective, they represent added weight that reduces battery and flight time. It took me exactly a week to design and print the whole frame and transfer the motors and other electronics over from the prior design. That following Friday, the 3-foot diameter UAV (now called Freebird One), was in the air.
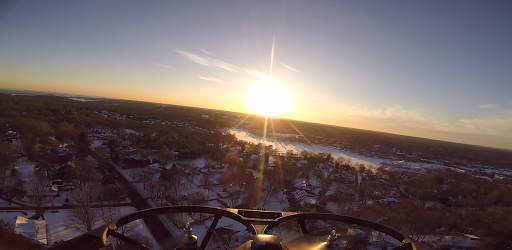
I knew this was the design I was after, but much work was still needed. It was lighter than my old design, but still too heavy. Flight times were 8-10 minutes with large batteries. It weighed 20 pounds or so. The wiring couldn’t stand up to the high current pull. A couple of times it even caught fire in the air! As it was winter at the time, electronics and motors were repeatedly destroyed by flying in the snow. Even so, I discovered the first alternative use for a large UAV with a lot of prop wash: an airborne snow blower. It was good for up to four inches or so of snow and could clear our driveway in minutes operated from inside the warm house! But it could do even more than a regular snow blower. It cleared snow off the cars and then off the roof of our house.
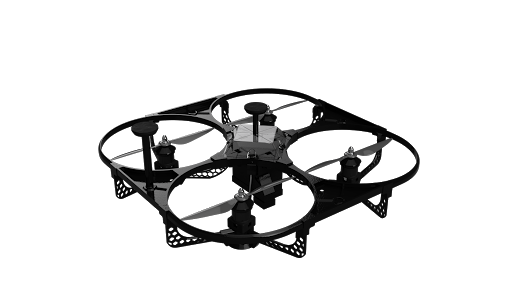
My mission was clear at that point: I had something powerful that could fly very precisely and on its own. But it needed to fly a lot longer, be a lot lighter, handle any kind of weather, carry a lot of equipment and attachments that I might want to develop for various tasks -- and do all this without sacrificing strength. I stuck with carbon fiber for the most part, though successfully produced one unit entirely with wood fiber filament from MatterHackers last summer. Additional materials in the current version include Ninjaflex for weather covers and vibration dampening and transparent Bluprint for the cockpit cover to make the lights from the 3D Robotics Pixhawk flight controller visible.
The bottom line is that numerous iterations and a year later, I have created a 100% printed large UAV from an idea in my head, a fantastic CAD package from Autodesk, a solid workhorse printer from Lulzbot, and high quality, reliable (always 2-day free deliver across the country) filament from MatterHackers, in particular Proto Pasta’s carbon fiber. The only purchased components are the electronics and propellers, though I have successfully printed propellers that work, and may eventually switch to printed props after testing is completed. The UAV is even assembled using printed carbon fiber pins, which replaced traditional stainless steel screws I had been using earlier.
Not only is Freebird One 100% 3D-printed, but I would argue its performance specs beat anything on the market today. It now weighs just 8 pounds without a battery (half of what it weighed the first time I made it). It can fly for up to 35 minutes, has maximum speeds of 70MPH horizontally and 3,000 feet/minute vertically, can carry an additional 15-20 pounds of payload thanks to more 6,000 watts (9+ horsepower) from the four brushless motors, and is completely weatherproof (snow, rain and winds up to 50 MPH or so). It’s also the safest UAV.
My hope for the future is to add artificial intelligence features to assist in obstacle avoidance and expanded failsafe features such as a parachute and ability to find safe places to land in the event of a problem that precludes the UAV from returning home. Equally important, I hope to develop a number of attachments to expand functionality of Freebird One as a useful “tool”. Snowblowing is just one example, but even that could be improved with attachments I have in mind. I also successfully used it this fall as a leaf blower. And because the blades are enclosed, I was able to remove impacted leaves along fences by bumping the UAV along the fence and angling the airflow in a way to get under the leaves. In a similar capacity, the UAV works well as a gutter cleaner with a 3D Camera (in a 3D-printed weatherproof case) sending a live video feed to a pair of goggles, allowing for precise maneuvering in tight spots. The possibilities are endless – both for consumers and businesses.
Freebird One will be commercially available in the near future. After having issued RFQs for injection molded parts, it is not clear that I can get parts made to the tight specs I have been achieved through 3D printing. Given the nature of this project, every gram of weight matters a lot, and in particular the strength-weight dynamic. Every 100 grams represents roughly one minute of flight time, and every gram of material needs to be exceedingly strong. As a result, the current plan is to actually build up a 3D printer “farm” to produce parts quickly. I have improved print settings to the point where the parts coming off the printer require little to no post-processing. At 20 um resolution using carbon fiber, the lines are not very visible and look more like a pattern than what traditional 3D-printed parts look like. Using 3D printing as a manufacturing solution also enables me to revise and improve parts quickly, introduce new attachments, and provide custom modifications without using a typical update cycle.
To date I have been working on this venture alone, but will be expanding in the near future. I really treasure the time I’ve spent on this so far. Not only have I been able to spend more time with my family, but I have been able to just dream up new ideas and then actually produce them right before my eyes. Even more than the UAV I’ve created, I remain amazed at the possibilities opened up by 3D printing and high quality consumer-accessible CAD software. It’s a great age we live in where someone like me with no engineering background can design and produce a high quality aircraft in the confines of my home with nothing more than an idea, a computer, a 3D printer, a few spools of filament… and some patience.
If you are interested in learning more about Freebird Flight, you can visit Roger's site or follow them on Facebook, Instagram, and Twitter.
Do you think you have what it takes to be our next Hacker of the Month? Simply follow us on Facebook/Twitter or email media@matterhackers.com. Tell us about your project or 3D printed creation, and you could be featured in our next newsletter. The Hacker of the Month will also win a free spool of PRO Series PLA or ABS filament to further their pursuit of 3D printing greatness.