
MatterControl 1.2 - Multi Extrusion Unleashed!
Support for multiple extruders, and a whole lot more, have been packed into the latest version of MatterControl 1.2.
MatterControl 1.2 is out and it is the best build we have ever made! It has tons of new features, and improvments to most of the existing ones. Here is a quick list of some of the things you can find in this build.
- Dual-Extrusion Support
- Simple Multi-Material Workflow
- Advanced Support Material Generation
- New Touch-Friendly UI
- Signed Windows Drivers (no more Windows 8 pain)
- Cloud Monitoring
- 3D Layer Preview
- Embedded SD Card Support
But the big thing is our multi-material support. Please read on for some indepth tips on how to get the most out of of this exciting release.
Enabling Multi-Extrusion
Multi-extrusion capability is defined within a device's hardware profile. Specifically, the following settings: 'Printer' > 'General' > 'Extruder Count' and 'Printer' > 'General' > 'Share Temperature' (the latter determines whether the extruders have separate or shared heating elements). Be sure to save any setting changes.
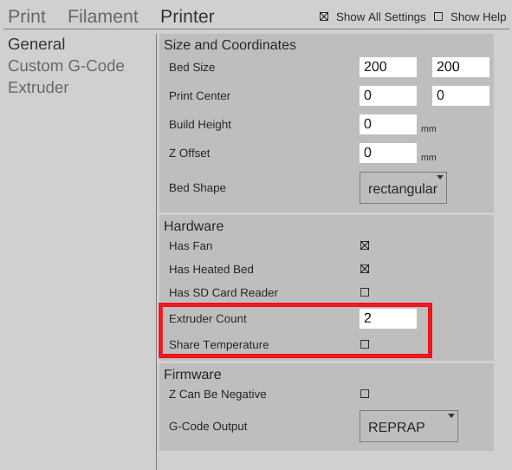
Set Printer to 2 Extruders
Separate manual extruder controls are automatically added for each extruder. For machines with separate heating elements, new temperature controls will appear for the additional extruders.
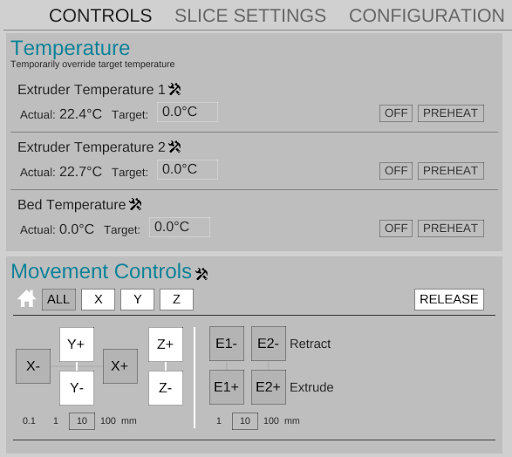
Controls Show Multiple Extruders
Printing with Multiple Materials
Multi-component parts can be imported or created within MatterControl by combining multiple parts. Preparing a part for multi-material printing is a matter of loading in parts, arranging them, and assigning materials.
Switch to edit mode
The first thing you are going to want to do is switch into edit mode. This will let you do all sorts of usefull things to your parts, but for now we'll focus on things related to multi material printing.
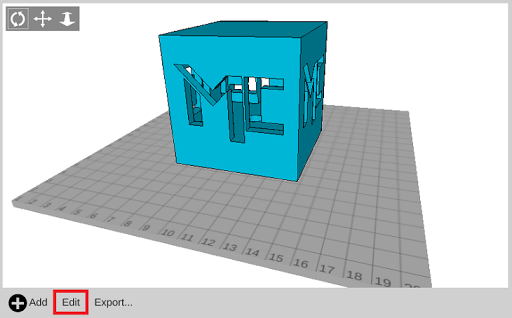
Select Edit To Get Started
Add additional parts to the bed.
You can click the 'Add' button or Drag & Drop printable files directly on the view.
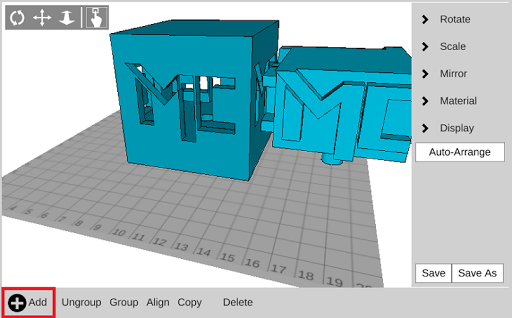
First Add Another Part
Aligning Parts
It is possible to automatically align parts that have been designed to print together. The 'Align' button actually moves all the parts currently on the bed to their absolute positions relative to the currently selected part. If the parts were all created together, in the correct positions, this will line them up with eachother. If they were not modeled together this will not get the parts aligned. You will need to line them up by hand.
Select the 'Align' button to align the parts
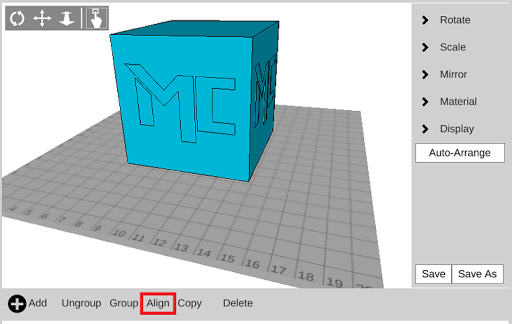
Press Align to Automatically Position Parts
Assigning Materials
Now that you have a part you would like to print, you may want to assign different sections of the part. You will need to ungroup your part then select each sub-part to assign a material.
Ungroup (if needed)
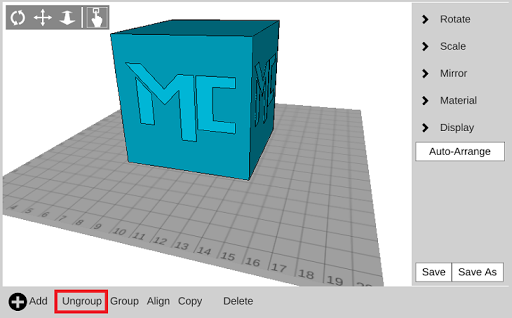
Ungroup Parts to Change Materials
Assign extruder to part and save as a new file
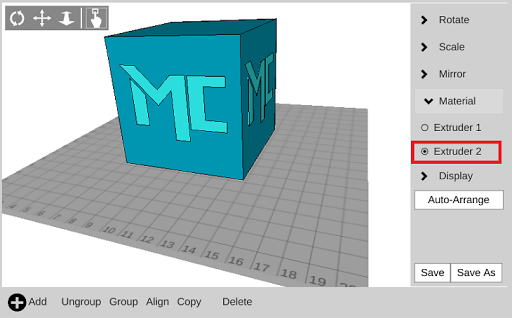
Choose Your Materials
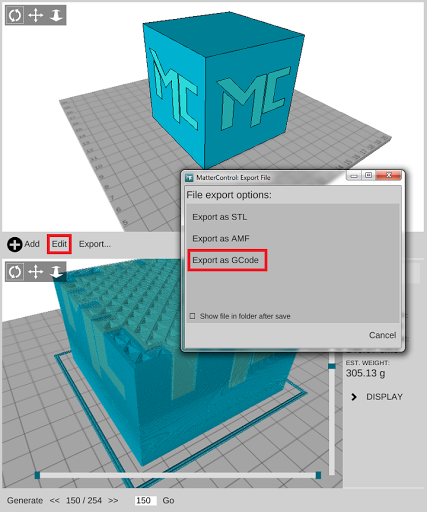
Exporting Multi-Extrusion Gcode
The export button can now be found in the part preview window while in view mode. Selecting 'Export' will allow you to save your current file as Gcode.
Exporting Multi Material GCode
Relevant Multi-Extrusion Settings
Retraction when switching between active extruders is determined by the 'Length on Tool Change' setting ('Filament' > 'Filament' > 'Retraction' > 'Length on Tool Change'). This setting is available in the 'Show All' mode when MatterSlice is selected.
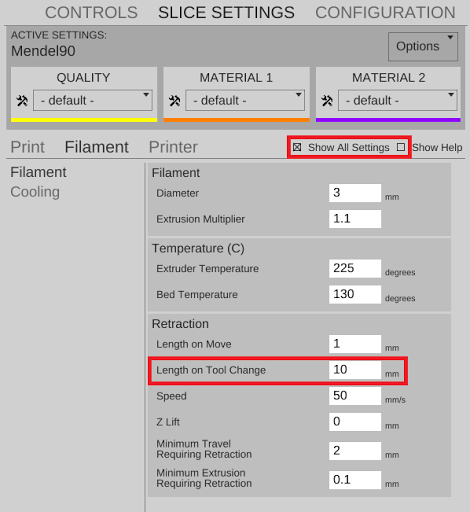
Setting The Tool Change Retraction Length