
Design Lab - 3D Printing Surfboard Fins
Learn how 3D printing can enhance your hobbies. Watch Dave as he designs, prints, and tests his custom surfboard fins.
This project started off as filling a need and quickly developed into a highly nerdy endeavor with huge amounts of experimentation and design iteration. I had broken a surfboard fin and looked around to replace it. The fin I needed was only available in sets of 3 or 4, but I only needed one. Having a 3D printer on hand, I dove into the world of foil design, flex, and surfboard fin design.
To print this surfboard fin, the files are hosted in the MatterHackers Digital Design Store here.
The Design Process:
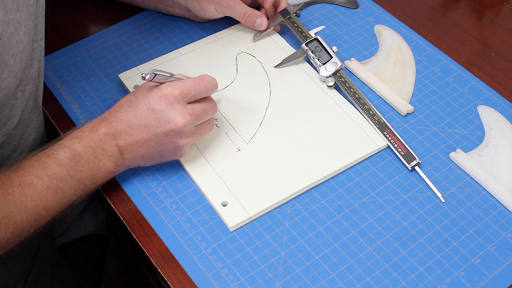
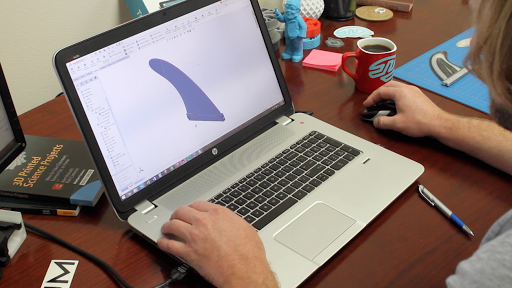
I took a look at all my surfboards, analyzed the fin shapes and foils of each of them - unfortunately no two fins were alike. A few of them seemed quite complex, others amazingly simple. I was able to break down the design into bitesize features that I was able to focus on. I started with a simple sketch on a piece of paper (because I am old school like that) which allowed me to wrap my head around how I could convert the design digitally. I use SolidWorks (one of many design software options that are out there) which is more of an ‘engineering’ CAD program where I was able to create the fin design digitally.
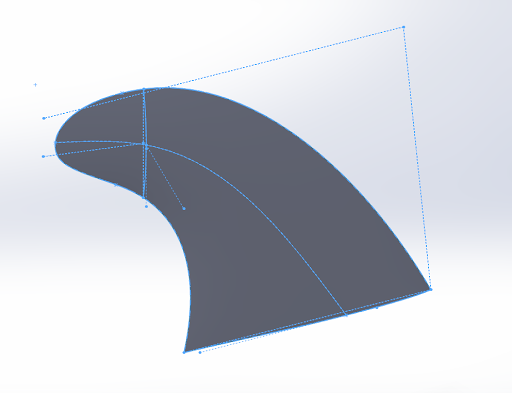
Profile Outline -
Most of the fins had a similar outline so I took an average of my two favorite fins that I use most frequently. The biggest consideration to watch out for was to avoid any overhang greater than 35 degrees or so to ensure the fin could print without any support. The fin outline was sketched using the ‘spline’ tool in SolidWorks on a single plane.
Surface and Foil -
For the complex and organic surface of the fin, the design had to consider printability and hydrodynamics. A foiled surface is used to create a low pressure when moving through a fluid. I don't intend to dive into that too deeply, but I was able to take some measurements off of the fins I had and recreate a foiled surface. The foiled surface was a combination of three splines - two cross sections and a spine to loft across.
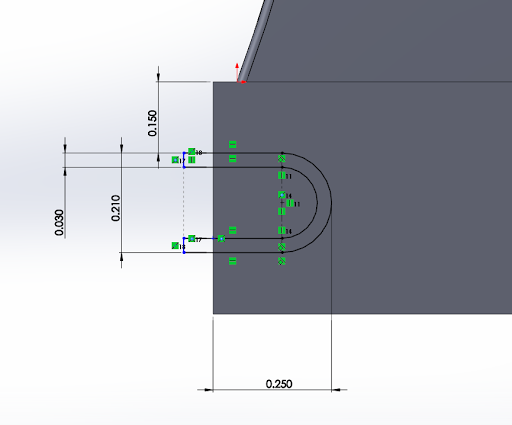
Fin Base -
My broken fin had a few attachment points that needed to be included in the design so the fin attached to the surfboard. These small features were created roughly, and optimized after a few printed iterations. The fin base features were created using basic extrusions and cuts.
Left and right fins -
This is one of the bigger cheats pulled. To design the left fin, the profile of the center fin was split in half, tilted at a five degree angle and ensured. The right fin was mirrored from the left. Hooray for short cuts!
The Printing Process:
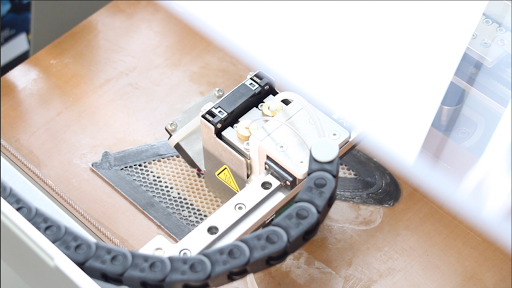
Material choices were tougher than expected for this project. I tried many options: PLA, Nylon, ABS, and PET. At the end of the day PET and PLA worked great, my concern with PLA is that it may warp in the sun - but after a few months of testing, that has not happened yet (fingers still crossed). Nylon is a strong material, but far too flexible to maintain shape as a surfboard fin in use and therefore not recommended for this project. ABS had its advantages and I was able to vapor polish the fin nicely to create a smooth surface, but layer adhesion was a problem.
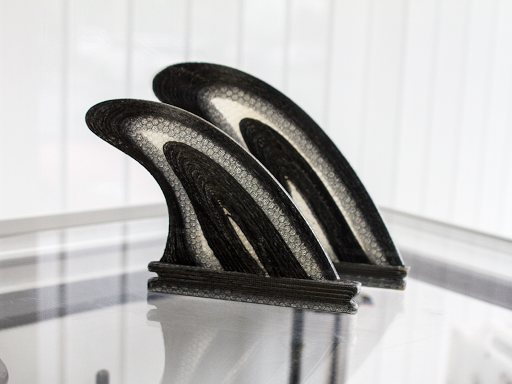
The best performing fin was printed on the Pulse XE machine using NylonX - the combination of Nylon and Carbon Fiber makes for amazing strength and durability with a stiffness that is unmatched.
Testing:
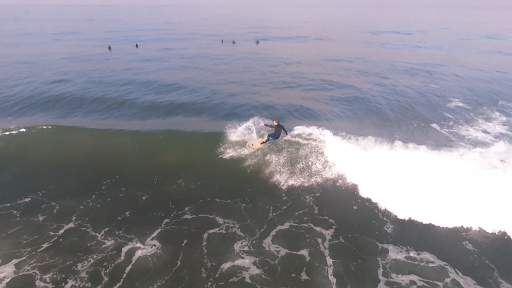
Ahhh - the most satisfying part of any task. I was able to take out a few boards - each with different 3D printed materials. The carbon fiber nylon fins that were printed on the Markforged worked fantastic. So great that they were functional, robust, and very stiff. PLA and PETG fins worked great as well, PLA has the potential to become malleable if left in the sun. I recognize that risk, but after a few trips to the beach and a few afternoons of the fins laying in the back of the truck on a hot southern California summer day - they have survived. The nylon only printed parts were disappointing, the fin design is just not thick enough to be rigid in nylon. Nylon is flexible when thin, and if designed thicker can be stiff - surfboard fins do not appear to be an excellent choice unless paired with the long strand carbon fiber.
Conclusion:
Not only a fun and satisfying project, but a chance to contribute to the 3D printing community as well as the surfing community. I have uploaded the files to the MatterHackers Digital Design Store and they are free for anyone to download and print for themselves. This is a project that really highlights the flexibility and power of desktop 3D printing. I was able to design and iterate quickly while working on a hobby that I have a great deal of passion for. At the end of the day 3D printing facilitated the something I had in my head as an idea into reality.