
SNAP Quick-Change Tool Head Printer Settings Guide on MatterControl
Successfully get your new SNAP Quick-Change Tool Head ready to print with this helpful printer settings guide.
If you've purchased a SNAP Quick-Change Tool Head and have not begun the hardware replacement process, SNAP Quick-Change Tool Head Replacement Guide.
If you've already installed your new SNAP tool head and it does NOT match the exact same hotend or nozzle size of the old one you replaced, continue reading this article before printing with your newly installed SNAP tool head.

Replacing hotends is more intuitive than ever on the Pulse thanks to the SNAP Quick-Change Tool Head.
STEP 1 - CONFIRM PREVIOUS SNAP MODEL
- Look at the sticker on the previous SNAP unit that was uninstalled.
- Confirm the model name using the table below the image.

The sticker on this tool head says "EV6-HDS 0.4mm", which, according to the table, means it has an E3D V6 hotend and a hardened steel nozzle that is 0.4mm.
SNAP Tool Head Legend
| Model | Hotend Type | Model | Nozzle Type | Model | Nozzle Size |
|---|---|---|---|---|---|
| ELT | E3D Lite6 | BRS | Brass | 0.4mm | 0.4mm |
| EV6 | E3D V6 | DMD | Diamond-tipped | 1.2mm | 1.2mm |
| MOS | Slice Engineering Mosquito | HDS | Hardened Steel | ||
| MAG | Slice Engineering Mosquito Magnum | RBY | Ruby-tipped | ||
| VAN | Vanadium |
STEP 2 - CONFIRM NEW SNAP MODEL
- Look at the sticker on the new SNAP unit that was just installed on your printer.
- Confirm the new SNAP’s model name using the same table above.
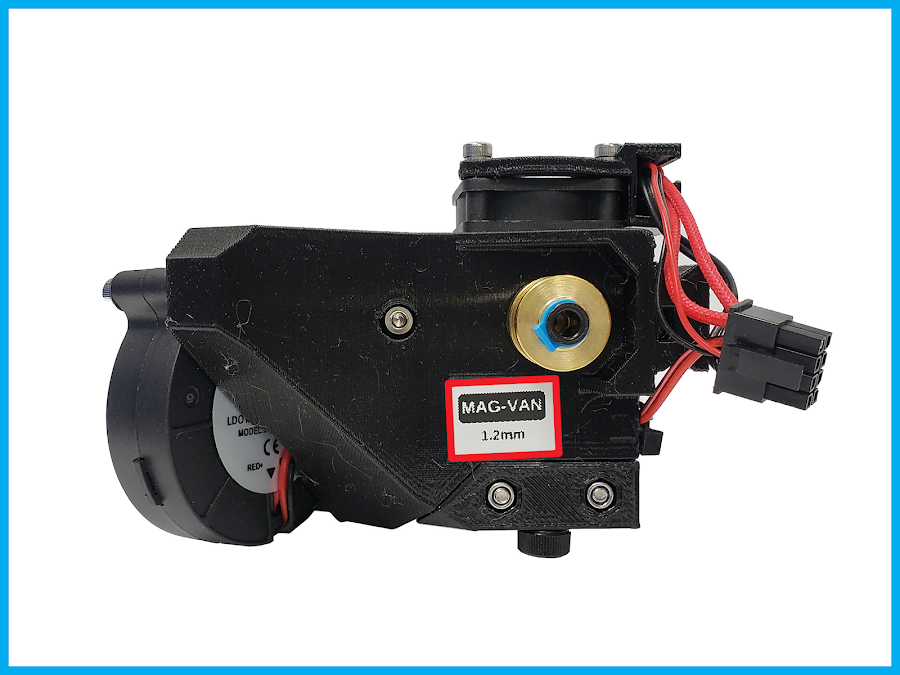
The sticker on this tool head says "MAG-VAN 1.2mm", which, according to the table, means it has a Mosquito Magnum hotend and a vanadium nozzle that is 1.2mm.
STEP 3 - UPDATE NOZZLE SIZE SETTINGS (IF APPLICABLE)
- If your previous and new SNAP tool heads have the same nozzle diameter, skip to step 4.
- If your previous and new SNAP tool heads have different nozzle diameter sizes, change the nozzle diameter to the new SNAP unit’s nozzle size in MatterControl.
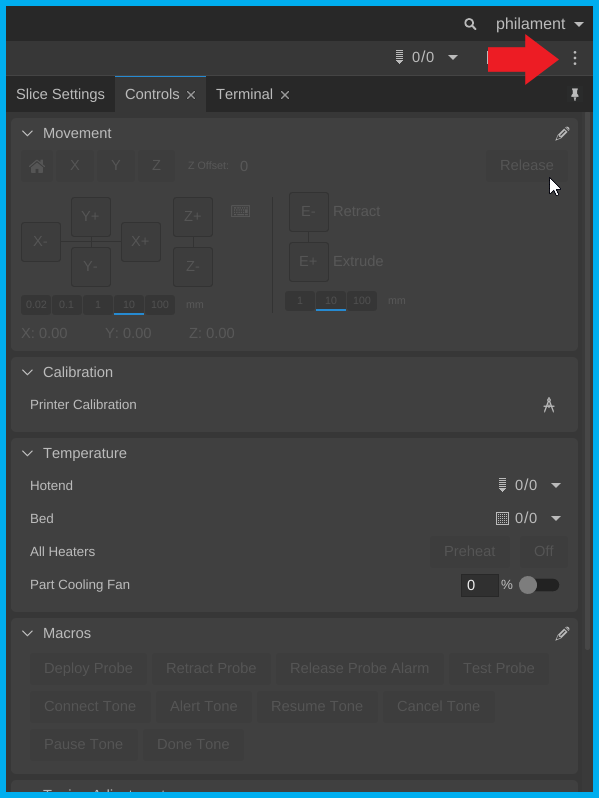
- If the Printer tab is not visible, go to 'Printer Options' (the three vertical dots button in the top right corner of MatterControl under your account name/sign in) and click 'Show Printer' (the second item in the drop-down menu).
- On the 'Printer' > 'General' tab, click or enter the new nozzle diameter under 'Nozzle Diameter' under ‘Extruders’.
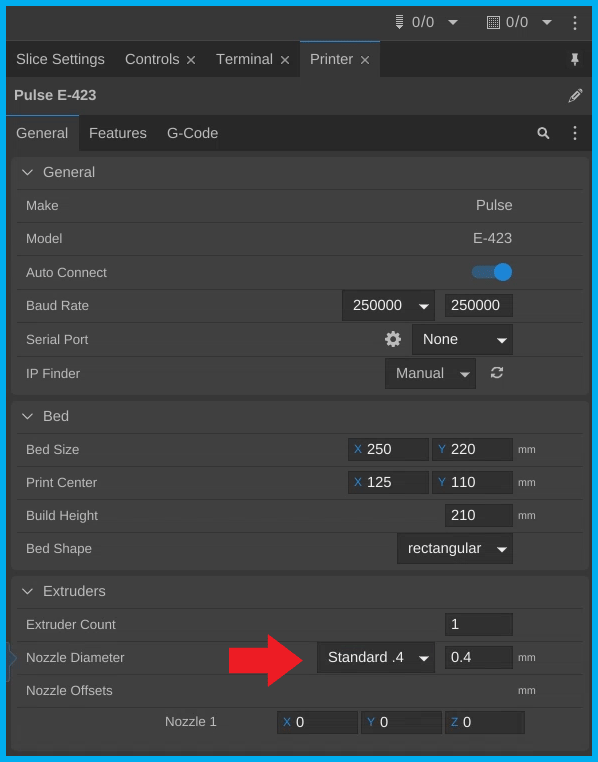
Change nozzle diameter in MatterControl under the Printer > General tab.
STEP 4 - TUNE PID (IF APPLICABLE)
- If the previous and new SNAP units have the same hotend, skip to step 5.
- If the previous and new SNAP units differ (i.e. previous: E3D Lite6 → current: E3D V6 or previous: E3D V6 → current: Mosquito), change the PID values to your new configuration using the table below.
- If you do not know how to change your PID values, read the instructions below the table.
Hotend PID Values Table
| Hotend Type | P | I | D |
|---|---|---|---|
| ELT | 20.03 | 2.22 | 45.12 |
| EV6 | 20.03 | 2.22 | 45.12 |
| MOS | 18.0 | 2.22 | 55 |
| MAG | 18.0 | 2.22 | 55 |
- To reach the window with your PID values
- Go to 'Printer Options' (located in MatterControl's top right corner, the three vertical dots button under your account name/sign in)
- Click ‘Configure EEProm’ (the first item on the drop-down menu)
- If ‘Configure EEProm’ is disabled, your printer is not connected to MatterControl. Click the ‘Connect’ button in the top left corner of MatterControl. If the Setup Wizard pops up after clicking ‘Connect’ follow the wizard's instructions to turn on and connect your 3D printer.
- Enter the new PID values in the ‘PID Settings’ section
- Click ‘Save to EEProm’ before closing the window.
- Go to 'Printer Options' (located in MatterControl's top right corner, the three vertical dots button under your account name/sign in)


Enter the PID Values under 'PID Settings' in your EEPROM Settings Window.
STEP 5 - RUN PRINTER CALIBRATION
After saving the new EEProm settings, run the printer calibration process.
- Go back to ‘Printer Options’
- Click ‘Calibrate Printer’ (the 7th drop-down menu item, above 'Update Settings')
- Click the ‘Run Z Calibration’ button and follow the instructions provided until you return to the main window pictured below. Then click the ‘Done’ button and close the Printer Calibration window.

Running Z Calibration after switching to a new SNAP tool head is necessary when changing critical components such as the hotend and nozzle.
That’s it! Your new tool head is now ready to print. Enjoy the many benefits of the SNAP Quick-Change Tool Head such as maintaining high production uptime and reducing both the time and complexities of upgrading/fixing extrusion setups. If further help is needed, reach out to support@matterhackers.com and one of our MatterHackers Pros will assist you.