
Starting Your First 3D Print on Your Pulse
While starting prints is easy, doing it correctly takes just a little instruction. Read on to see the couple steps you need to do before you start making.

Now that you have your Pulse connected to MatterControl, you're just about ready to start printing! There are a couple of things you'll need to do before you get started to give you the best chance of success.
Here’s a quick overview of what we’re going to do:
- Calibrate Z-Height
- Load Filament
- Fine-tune (Optional)
Step 1 - Open Printer Setup
- Click the "Print" button (A) and then click "Setup" (B).
- Note that you must go through the setup process before you can print.
Click "Print" button > Then click "Setup". Printing capabilities will be unavailable until the Setup process has been completed.
Step 2 - Prepare for Z Calibration
- Read the overview to understand what Z calibration is and the purpose of calibrating the Z height on any 3D printer. (A) Then click "Next".
- Grab a piece of paper (preferably one that has a thickness equivalent to printer paper). (B) Then click "Next".
- Note that if your hotend hasn't heated up, it will before the manual Z-calibration process begins. (C) Click "Next" once the button becomes available.
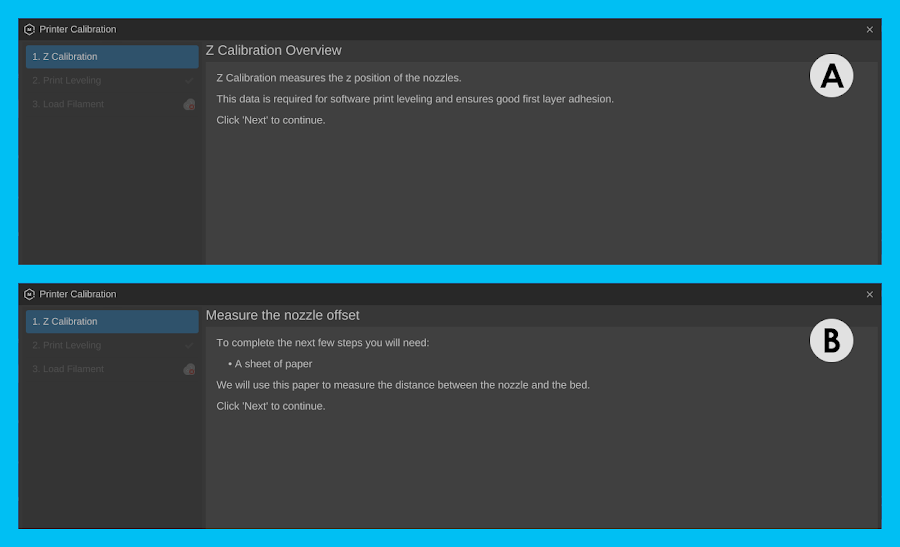
Understand what z-calibration is and why it's important. Then grab a piece of paper before beginning the process.

Your hotend must be heated to the temperature it will be printing at before Z-calibration can begin. If it's not already at that temperature, it will automatically heat up to that temp before continuing.
Step 3 - Calibrate Z-Height
- Follow MatterControl's 3-step instructions for calibrating your Z height.
- In Step 1, lower your Z height down to a level before it hits the bed. (A)
- If your nozzle touches the bed, click "Z+" once. Then click "Next".
- In Step 2, lower your Z height until you feel some resistance from the paper making contact with the nozzle. (B) Click "Next".
- In Step 3, lower your Z height until the nozzle causes enough resistance for the paper to fold up as you push the paper towards the hotend. Then hit "Z+" twice. (C) Click "Next".
- Do NOT match the numbers in the screenshot. The Z height at each step varies from printer to printer so the numbers pictured below may not match your specific printer's Z calibration needs.
- In Step 1, lower your Z height down to a level before it hits the bed. (A)
- Remove your paper when complete and click "Done".
PRO TIP: You can use the Up and Down arrow keys on your keyboard to move the nozzle up and down during the Z-Calibration process.
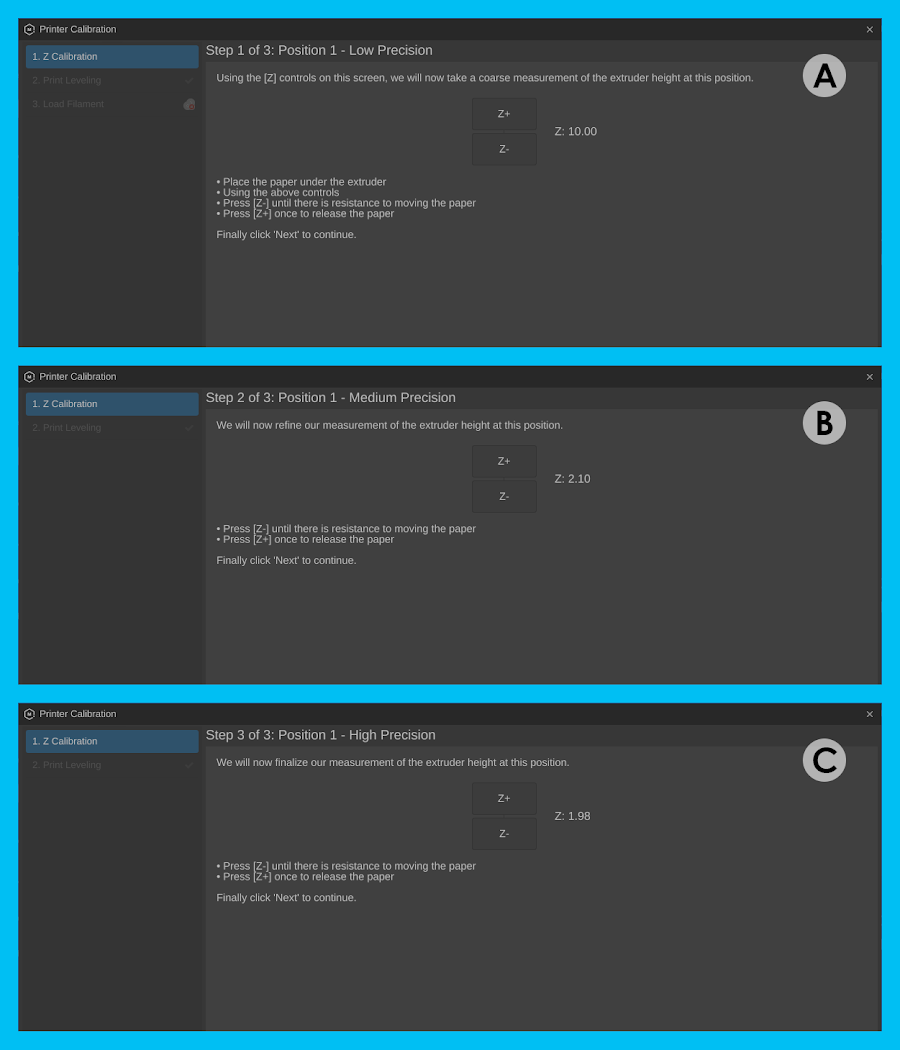
Do NOT mimic the values achieved in this image. Every printer is unique and will most likely be calibrated at different values.
Step 4 - Choose Material & Bed Surface
- Once you've calibrated your Z height, follow MatterControl's next instructions for loading material.
- Click the dropdown menu and select the material you will be printing with and then select the bed surface you will be printing on. Then click "Load Filament".
- If no options currently exist in the list, then click add new material from the drop list.
- If you already have filament loaded, you can skip the next step by clicking "Already Loaded".
- Click the dropdown menu and select the material you will be printing with and then select the bed surface you will be printing on. Then click "Load Filament".
- If the hotend is no longer/not at the temperature needed to print the material you selected, then you will need to wait until the hotend finishes heating up before proceeding to the next step.
Select the material you will be loading as well as the bed surface you'll be printing on. If you already have filament loaded, you can skip the remaining steps.
Step 5 - Load Filament
- Continue following MatterControl's next instructions for loading material.
- Trim the end of your filament down to a point (recommended to use flush cutters). (A) Click "Next".
- Feed it into the PTFE tube opening sticking out from beneath your extruder.(B) Click "Next" once the extruder has grabbed onto the filament.
- You'll know it has grabbed on if you are unable to pull it back out easily.
- Wait until the software finishes automatically loading your filament.
- Wait to click "Next" until the filament purges out the filament you fed into the extruder.
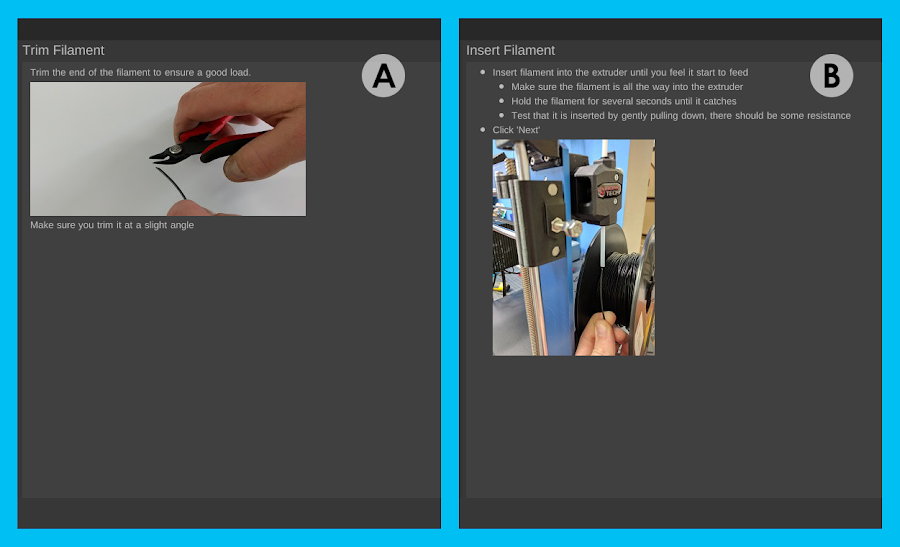
Trim the end of the filament into a fine point so the extruder grabs the end more easily. Then feed it into the PTFE tube opening sticking out below the extruder.
Step 6 - Start Your First Print
- Select "Print" (A) then "Start Print" (B).
- For specific guides for succeeding with a bunch of different materials - visit the Pulse User Guide at matterhackers.com/pulse
- There may be a note saying "Possible Unsupported Parts Detected". This means the software determined your model might need support in order to ensure parts of the model do not droop. For this test of a Phil model, there is no need for supports.
- Please note that on your first print, it will most likely conduct automatic bed leveling probing before printing. Once that completes (should take a few minutes at most), then it will begin printing.
- It may take a few seconds for the filament to start coming out of the nozzle. The hotend will lay down what is called a “skirt” around the outside of the print. This is to prime the nozzle and get filament flowing before beginning to print the part. Once the skirt is complete, it will begin the first layer.

Start your first print in two easy clicks by pressing "Print" then "Start Print".
Step 7 - Observe First Layer
- Observe the first layer that is printed and use the photo below to determine if further Z-Calibration is needed.


Here you can tell the optimal nozzle height for your first layer.
Based on how your first layer matches the photos above, correspond it to the following:
- Way too far. The filament is just laying on top of the bed & with no real compression. This leaves a very small contact point with the bed and will likely result in the part not sticking to the bed.
- Ideal first layer for most materials.
- Way too close. You will likely have extrusion issues because there’s nowhere for your filament to go. Pressure will build up in the nozzle and could cause filament grinding, heat creep, or other extrusion-related issues.
Step 9 - Fine-Tuning Your First Layer (Optional)
- You can allow the part to print as it is, or if you notice that the first layer is a little too close or too far from the bed, you can fine-tune the Z height using the baby-stepping feature in the progress box.
- Once the print has started, simply click Z+ to move the nozzle higher off the bed, or Z- to move it closer to the bed.
- Notice the ‘Offset’ value between both arrows. This indicates how much you’ve moved Z axis since the print started.
- Fine-tune the nozzle height to match the "ideal" example in Step 7.

Step 8 - Evaluate Your First Print
- Once your first print finishes, check how it turned out.
And that's everything it takes to get your Pulse ready for your first 3D print. If everything looks right and performed as expected, you're ready to start printing whatever you want! When working with a new 3D printer, start with smaller parts first before jumping into the 24 hour prints, that way you minimize any lost time or material from the learning process that is 3D printing. Each material has different considerations to make when preparing your 3D models for slicing, and for that we have more help guides to give you the best possible chance for success.
Troubleshooting
We test every Pulse before we ship it out to ensure that it can perform as expected, but sometimes shipping printers introduces new variables to the troubleshooting equation. Take a look at our Troubleshooting Guide to see if your test print matches any of the failed prints. If you aren't too sure whether your print succeeded or is exhibiting some sort of issue, don't hesitate to give our support team a call at (949) 613-5838 or send us an email at support@matterhackers.com
What's Next?
Now that you know how to start a print, check out how you can succeed with PLA and RYNO filament using your Pulse.
As always, we've got your back.
We don't expect you to run into any problems, but if you do, please do not hesitate to contact a MatterHackers Technician at support@matterhackers.com or by phone at (949) 613-5838. We're here to help!