
How To: 3D Print Your Own Torpedo Pool Toy
Understand how your favorite pool toys were designed for functionality and 3D print your own.

We're about halfway through summer now, which means the weather is at its hottest and spending time at the pool is a great idea. Let's 3D print some pool toys! There's this toy torpedo that many remember playing with as a kid in the pool - you throw it underwater and it rockets across the pool. The toy works because it's neutrally buoyant, which means it has close to or the same density as the surrounding water, so it neither floats nor sinks, and instead moves easily through the water.
Today, we're going to try and replicate that, with some experimentation and some trial and error to make it work.
I'm using Solidworks, an expensive and powerful parametric-modeling software. Instead, you could use Fusion 360, Tinkercad, or any modeling software of your choice, this is just what was available to me that I already know.
To start off, I found a picture of a generic rocket and used that as a sketch tool to create a profile.
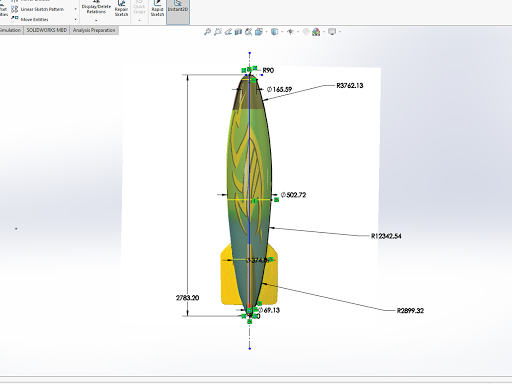
Sketching based on an existing object
With that, I could revolve it around a central axis to create the torpedo body.
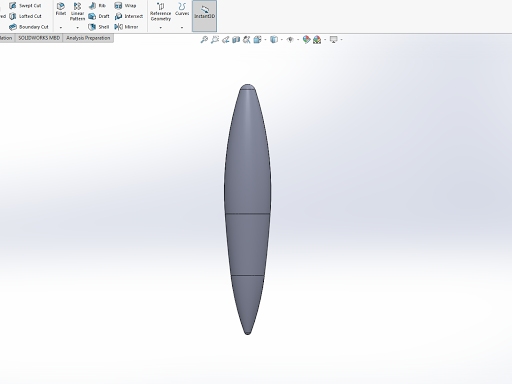
Revolving the sketch to create the main body.
To create the fins, I used a sketch plane that bisects the body, and drew the profile of the fin from the originial sketch picture.
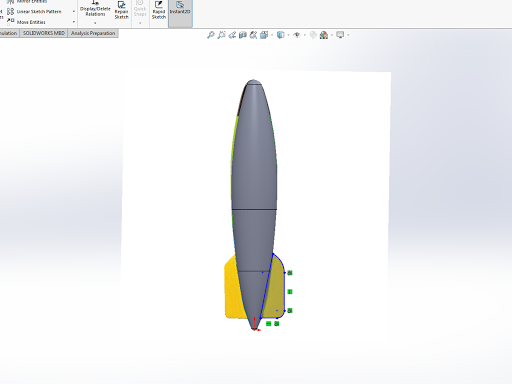
Fins are just a simple sketch extending into the body so it can be extruded.
I could then extrude it, using the sketch plane as the midplane. I couldn't tell the thickness of the fin from the picture, so I just approximated the size of the fin until it looked right.
A simple Midplane extrusion to create the first fin.
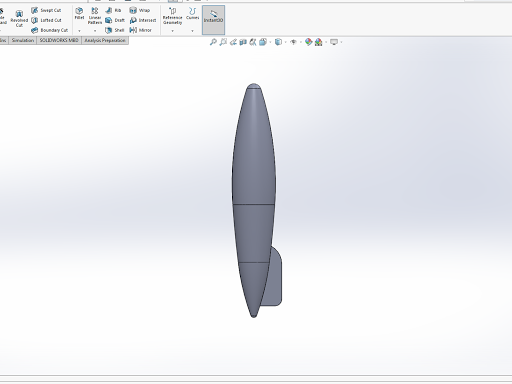
I then did a circular feature pattern, so I could have each fin equally spaced from each other.
A quick pattern with the main body as a center axis.
Now I have the basic shape of the torpedo, but I need it to be hollow so I can add ballast to alter its density. I could calculate, work out formulas, and fine tune the model to make it neutrally buoyant at a specific infill density, or I could make it hollow and fill it in with something denser like BBs. I decided to go with the latter - it seems like the faster method and would allow for more time in the sun. The easiest way for me to make it hollow was to bring it into netFabb and use the "Create Shell" tool.
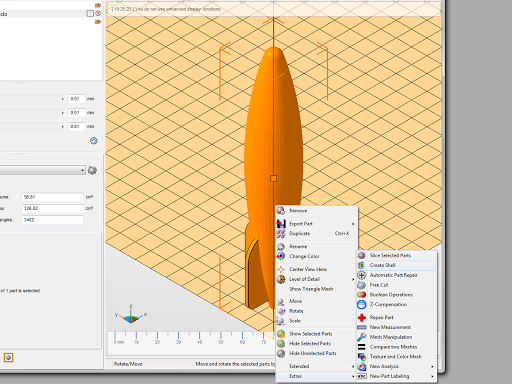
All of netFabb's features are really handy, and the "Create shell" tool especially.
Then, because there isn't an access point in the model to pour in the BBs, I used netFabb's slicing function to cut off the base far up enough to create a hole large enough for the BBs to fit through.
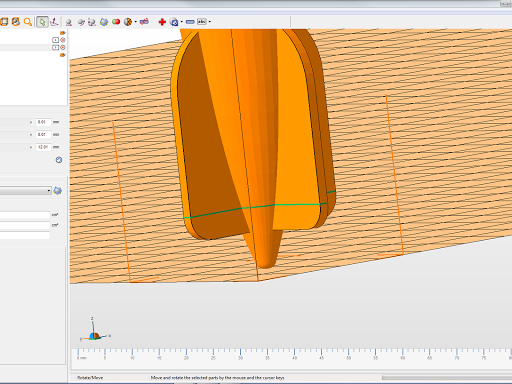
Although I could go back and remodel the torpedo to not cut off the base of the fins, but it really doesn't matter. I just need to get to the inside.
With the design done, it was time to head to the printer. I used ABS 3D filament on the Ultimaker 2+. You'll want to use ABS or ASA filament for this project, as it can withstand higher temperatures when compared to PLA filament - you won't want this toy melting in the sun after all your hard work. You can learn more about how to print with ABS filament how to print with ABS.
Once printed, I used a slip of paper as a funnel and poured in some BBs. Since netFabb tells me the volume of a model, I can get a good approximation of how much mass the torpedo should have to have a density of 1. I'm going to undershoot the mass just a little so I have room to add more mass for some epoxy to keep the BBs in place and seal the torpedo's base. Since the volume of the torpedo (with a closed bottom) is 155.85cm3, I need to have an overall mass of 155.85g.
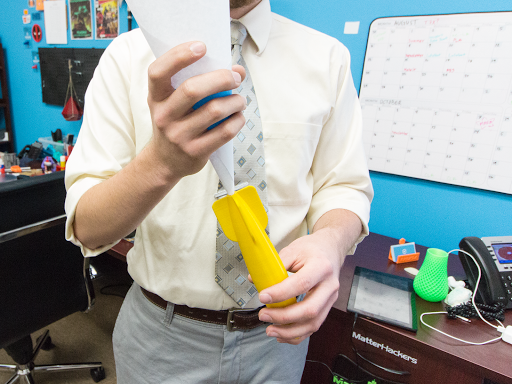
Pouring in the BBs using a makeshift paper funnel.
With the mass of the torpedo at 48g, I need the mass of the BBs and epoxy to be 107.85g to equal 155.85g. To make sure the BBs adhere to the inside of the torpedo, I'm going to use a ratio of 3 parts BB to 2 parts epoxy, or 64g of BBs and 43g of epoxy.

Measuring out the right mass of epoxy.
Now that the epoxy is cured, it's ready for the pool! It's a bit more work than buying your own torpedo, but for me it was a lot of fun to learn how it works and how much thought is put into what a lot of people have played with without considering the intricacies of its design. You can download the one I designed torpedo pool toy.
Happy Printing!
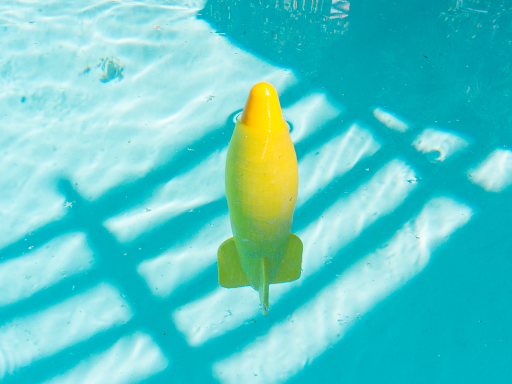
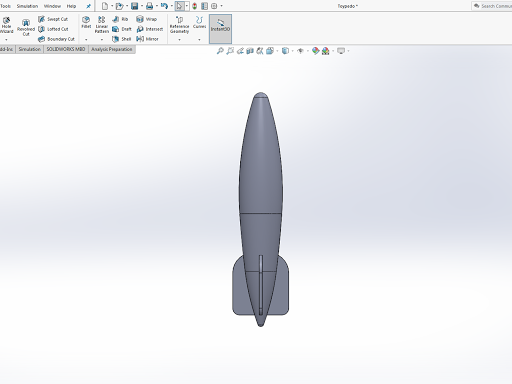
Floating and ready to launch!