
How To: Design and 3D Print a Custom Birdhouse
With these easy steps, you'll learn how to design & build your own 3D printed bird house.

It's summer! The birds are out singing, the sun is out, and there isn't a cloud in the sky! It's perfect weather to stay inside and 3D print. We have a really big tree outside the front door to our showroom, but we hardly ever see birds taking a rest on it. What it needs is a birdhouse! It'd be really easy to go out and buy some wood or go to a crafts store and buy a kit, but where's the fun in that? There's no personalization, no pizzazz, just a box with a triangular roof and a hole. Booooring.
Keep reading to see how to add some flare to your birdhouse by designing one yourself using Tinkercad. If you've never used Tinkercad, no problem! We have an article and a video demonstrating the basics of using Tinkercad. With that said, let's get to it!
To get started, make a quick sketch of the general shape you want your birdhouse to be. It can be as simple as a traditional birdhouse, or as complex as a castle. It all depends on your skillset and personal taste. In my case, I want something geometric, and hexagons are a shape found regularly in nature (and just so happens to be the shape of the MatterHackers logo).
From here, load up Tinkercad and start combining shapes to get closer to your sketch. Since my design is hexagonal, I will create a six sided pyramid and adjust the size of it using a ruler.
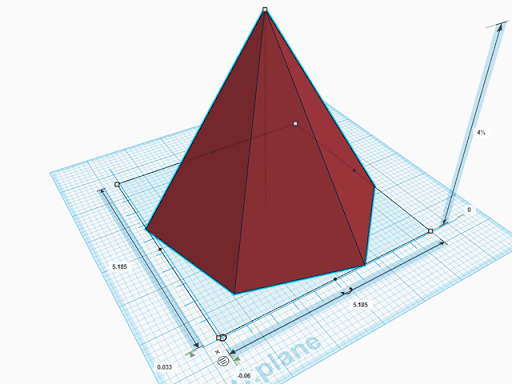
The ruler tool makes is really handy when you need to precisely modify the size of shapes.
To make the bottom half of it, I duplicated the pyramid, flipped it over, and cut off the point by using a box as a hole instead of a solid. With the angles I've used, this birdhouse won't need support.
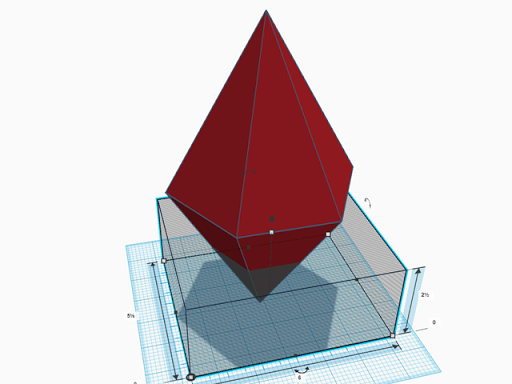
Two pyramids on top of each other with a box to cut off the bottom.
To make the hole for the birds to get into, I first needed to make this piece hollow. To do this, I duplicated the object I already had, shrunk it down just a little, and made it a hole instead of a solid and grouped them together. Then I was able to use a hexagonal prism as a hole and group those together, to make the whole thing hollow with an entrance.

Rotating the hexagonal prism into place as an entrance.
There needs to be a perch so birds can actually hop in, and the easiest way to do that is to create a small triangular prism and group it right under the hole.
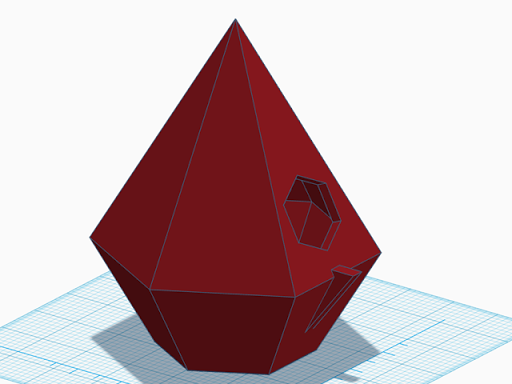
The perch can be as complex or simple as you want. A triangle is consistent with this style.
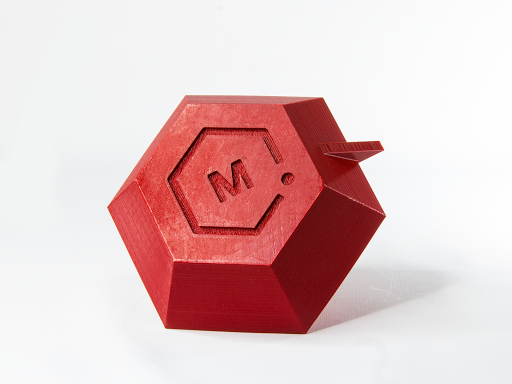
The last step, of course, is to throw our logo onto the bottom. I already had that modeled, so I imported the STL and made it a hole so it was subtracted from the base of the birdhouse.
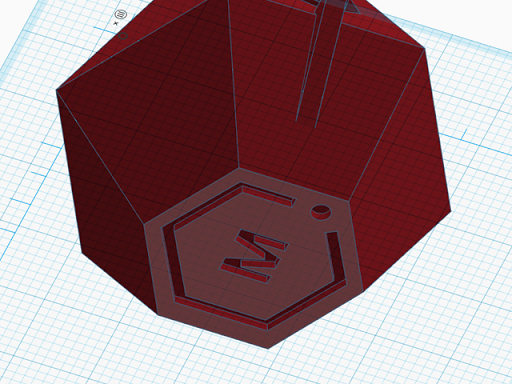
Gotta throw in the MatterHackers logo for that final touch.

Now, it didn't make sense to design a hook on this because that would probably break off and would need support of some sort. Instead, some colorful string and you have a beautiful birdhouse to hang from any tree branch you can find.
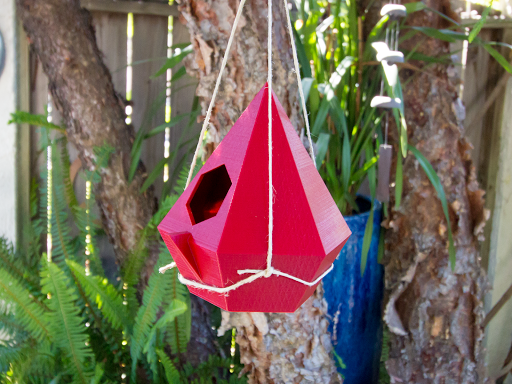
And there you go! Now you can design your own birdhouse, or you can download mine from the Design Store and print that.
Now that I have my design, it's time to print! My birdhouse was printed on the Raise 3D N2 3D printer in MatterHackers Burgundy PRO Series PLA. It's a good idea to print your birdhouse in a filament that is better for outdoor applications, like ABS filament or ASA filament.