
Getting Started With the Pulse 3D Printer
From unboxing to your first print, we will guide you through the process of unboxing and assembling your brand-new Pulse 3D printer!

WELCOME TO PULSE
Welcome to the Pulse family! We are excited to get you up and running with your new 3D Printer.
We don't expect you to run into any problems, but if you do, please do not hesitate to contact a MatterHackers Technician at support@matterhackers.com or by phone at (949) 613-5838. We're here to help!
Have a different model of the Pulse than the one you see in this guide? Download previous versions of our Getting Started Guide at the bottom of the page.
WHAT'S IN THE BOX
- Pulse 3D Printer
- 1 Spool of PRO Series Filament
- Spool Rod Handle
- Power Cord
- USB cable
- 3 pc Hex Wrench Set
- LCD screen (included with some models)
- PVA Gluestick (included with some models)

included items
GETTING STARTED
Step 1 - Unboxing
- Remove printer and accessories from the packaging.
- An LCD control panel interface is available as either an optional upgrade or stock only on certain models—not included with all Pulse models.
- Visually inspect for any damage that may have occurred in shipping.
Pulse - At a Glance
 Here's a quick look at the anatomy of a Pulse 3D Printer
Step 2 - Remove RED Zip Ties
- Cut and remove all RED zip ties. These help protect your printer during shipping. (A)
- DO NOT cut or remove any BLACK zip ties; they are used for wire management and are meant to remain in place.

Location of red zip ties can be found on the tool head, the back of the printer, the front of the printer, and on the LCD control panel interface (if one was purchased).
Step 3 - Remove Back Foam Piece
- Remove the back foam piece located behind the printer's heated bed. (A)
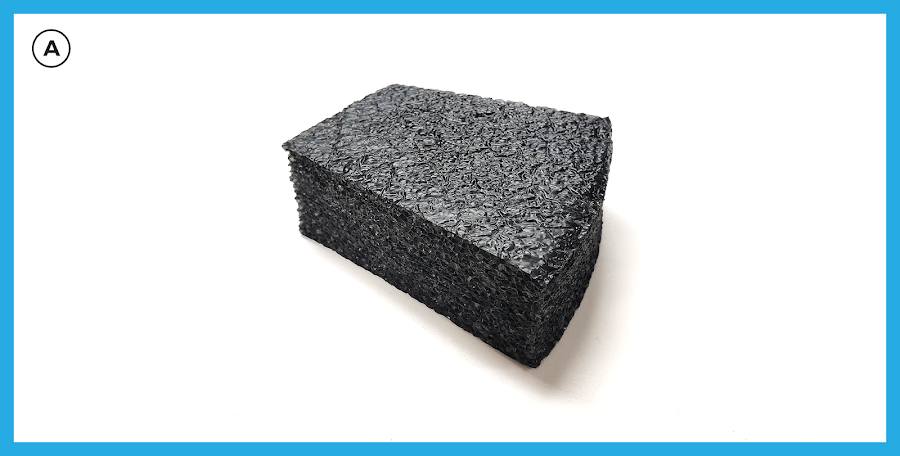 Remove the black foam piece located behind the heated bed. If it is not removed, the bed will not move properly along the Z-axis.
Step 4 - Mount Screen (Optional Upgrade - Skip to Step 5)
- Slide the screen into place as shown. (B)

Slide the LCD Control Panel Interface straight down onto the two dovetail mounts located in the front of the printer.
Step 5 - Attach Spool Holder Rod
- Slide the spool holder rod into place as shown. (C)

Step 6 - Connect Power Supply
- Connect the power cord to the back of the power supply on your Pulse. (A)
- Turn the power switch on (located on that same power supply). (B)

Connecting power and turning on Pulse.
Step 7 - Plug USB Cable Into Pulse
- Locate the USB input on the back of your Pulse 3D printer (top of the controller box) and plug the USB cable in. (C)
- DO NOT plug the USB cable into your computer yet. Doing so may cause difficulties with the initial connection setup.
Step 8 - Clear the Bed
- Every Pulse 3D printer is tested before it is shipped out. Remove the test print from the bed. (D)
- Note: Sometimes there is leftover PVA glue around the test print build area. If there's left over residue, you can wipe it clean before beginning your print using either isopropyl alcohol (preferably 90% or higher) on a paper towel or lukewarm water on a paper towel.
- If a purge line of filament is visible on the bottom left corner of your build surface, remove it.
- Note: Sometimes there is leftover PVA glue around the test print build area. If there's left over residue, you can wipe it clean before beginning your print using either isopropyl alcohol (preferably 90% or higher) on a paper towel or lukewarm water on a paper towel.

Plug USB and remove test print.
Step 9 - Install Printer Software
- Download and install the latest version of MatterControl 3D Printer Software MatterControl download.
Download MatterControl

Step 10 - Setup Wizard
- Open MatterControl.
- Click the ‘Setup New Pulse' button to create a printer. Go to Step 11.
- If the Setup Window pictured below does not appear upon startup, follow the second photo in Step 2's instructions under Software Setup for Pulse.
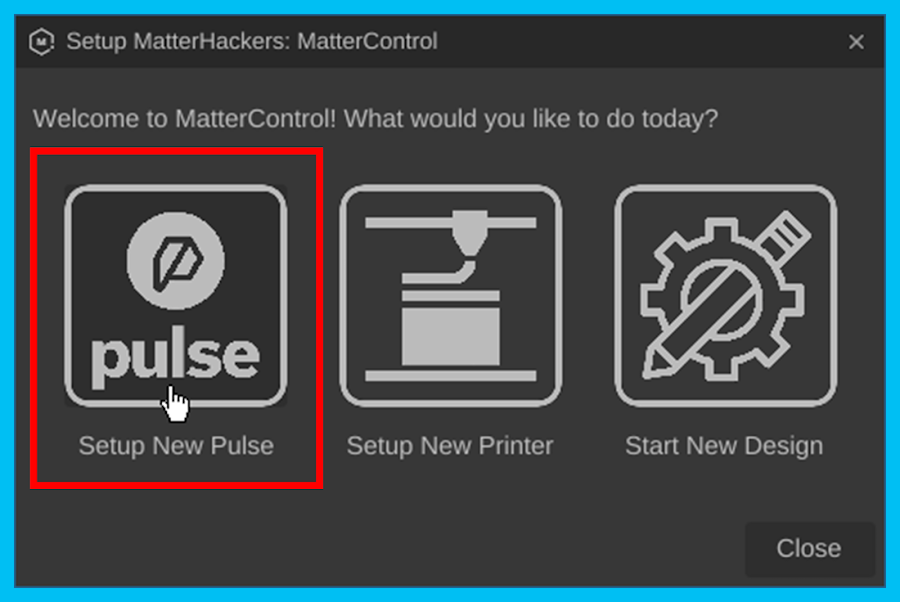
Click the left option "Setup New Pulse".
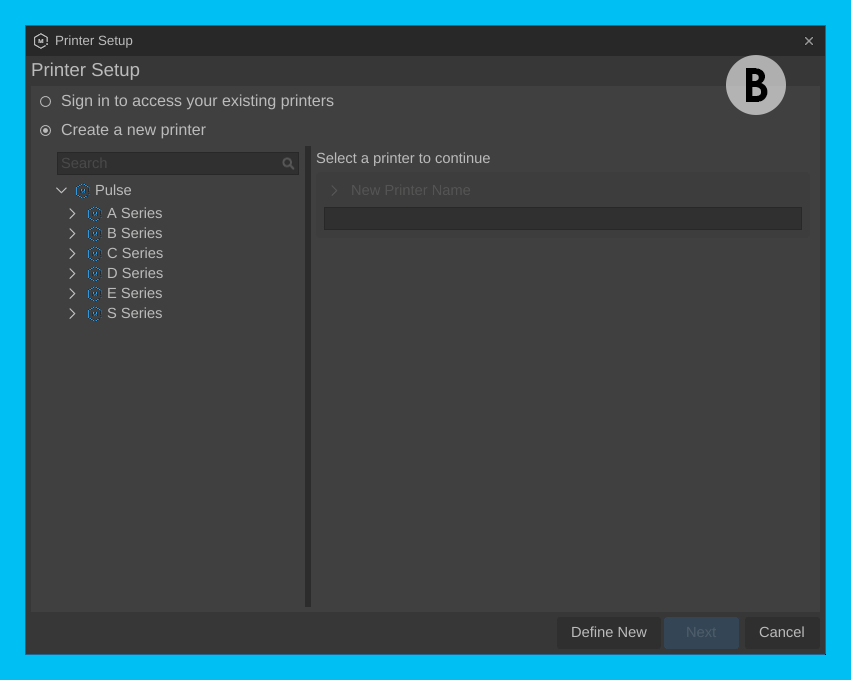
Step 11 - Create Printer
- Locate your Pulse's model number on the sticker that's on the back of the blue aluminum frame. (A)
- Type in and click the Pulse profile based on your Pulse model. Then select "Next". (B)
The model sticker can be found behind the blue aluminum frame of the printer.
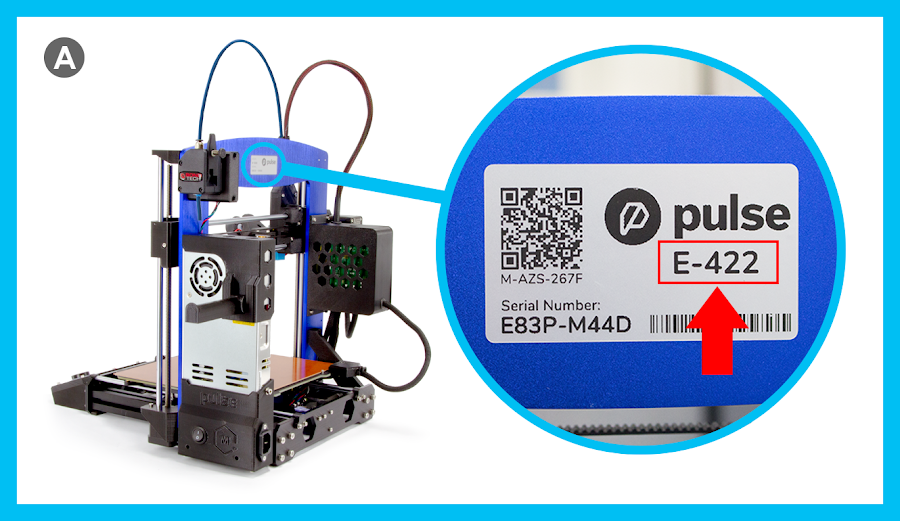
Type in the model number, click the model number, and then click "Next".
Step 12 - Connect Printer
- Follow the Setup Wizard guide to connect the printer.
- If you would like in-depth instruction on this setup process, check out our guide "Software Setup for Pulse - MatterControl".

Follow the quick Setup Wizard instructions on MatterControl.
Step 13 - Open Printer Setup
- Click the "Print" button and then click "Setup".
- Note that you must go through the setup process before you can print.
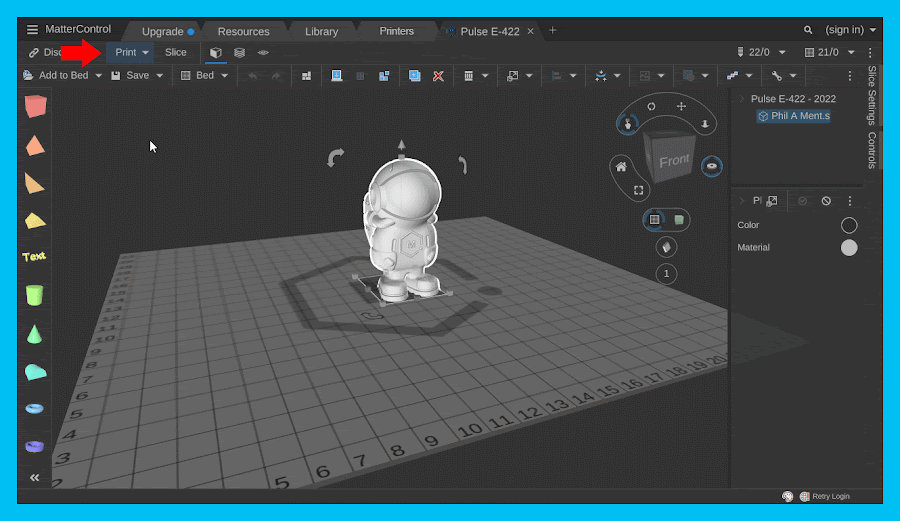
Click "Print" button > Then click "Setup". Printing capabilities will be unavailable until the Setup process has been completed.
Step 14 - Z-Calibration & Load Filament Wizard
- Follow the Z-Calibration Wizard instructions presented by MatterControl. (A)
- After Z-Calibration, follow the 'Load Material' instructions. (B)
- In-depth Printer Setup instructions can be found in Starting Your First Print.
- For more information on Materials and Bed Surface compatibility please visit the Guides section on www.matterhackers.com/pulse
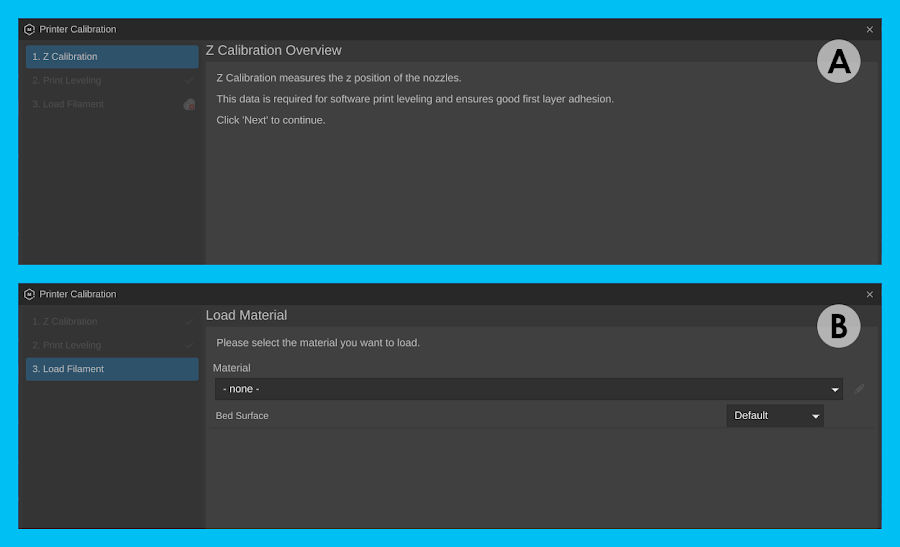
Follow the 'Z Calibration' instructions presented in MatterControl. Then follow the 'Load Material' instructions in that same setup. Click 'Done', then 'Close' when complete.
Step 15 - Start Your First Print
- Select "Print" (A) then "Start Print" (B).
- For specific guides for succeeding with a bunch of different materials - visit the Pulse User Guide at matterhackers.com/pulse
- There may be a note saying "Possible Unsupported Parts Detected". This means the software determined your model might need support in order to ensure parts of the model do not droop. For this test of a Phil model, there is no need for supports.
- Please note that on your first print, it will most likely conduct automatic bed leveling probing before printing. Once that completes (should take a few minutes at most), then it will begin printing.

That's It!
Once printing completes, you will have produced your first FDM print on your Pulse 3D printer.
Troubleshooting
Click First 3D Print on Your Pulse for tips and guidance on succeeding with your first print on a Pulse. You can also check out our 3D Printer Troubleshooting Guide if you have any issues or call us at (949) 613-5838 to speak with one of our support representatives. We're here to help you to be successful in 3D printing!