
How to Succeed with 3D Printing Metal on a Desktop 3D Printer
The time is here to explore easy and affordable metal 3D printing. 3D printing with real metal on a desktop 3D printer is now possible using Ultrafuse Metal 3D printing filament from BASF Forward AM.

What is metal 3D printing?
Until recently, 3D printing with metal has been limited to sintering or powder 3D printing. Essentially, metal powder is bound together using high powered lasers, and then the parts are post-processed in a kiln or forge to produce nearly 100% solid metal parts. These machines, materials, and the post-processing needed to produce parts are expensive to own ($100,000+ for entry-level machines), and cost-prohibitive for the general public. You could easily spend over $1000 for a few small parts.
Helpful Metal 3D Printing Resources
Fused Filament Fabrication (FFF) 3D printing has been around for a few decades now and is well established, but is generally limited to thermoplastics. Metal Injection Molding (MIM) has been around for a while as well, and is now a common manufacturing process. You have almost certainly used a tool or device recently that had MIM components in it (cordless drill, watch, car parts or even keys).
Industrial production can be extremely expensive whether you are purchasing entry-level industrial machines and materials or commissioning professionals.
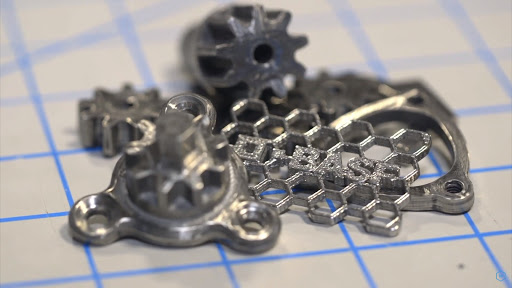
Now the FFF and MIM processes are joining forces to introduce metal filament to desktop 3D printing. BASF’s Ultrafuse 316L filament is a metal filament that is specifically designed to be debound and sintered, leaving your printed part nearly 100% solid 316 stainless steel. The best part about this material is that it can be printed on virtually any desktop 3D printer, like the BCN3D Sigmax R19, Ultimaker S5, Pulse, or any 3D printer with the right upgrades.
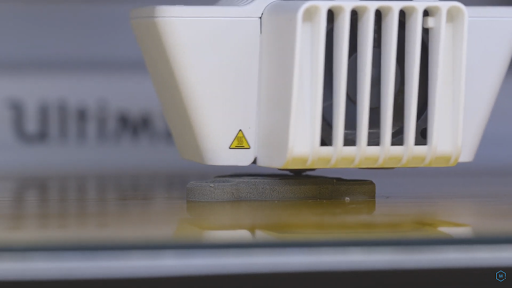
Easily produce functional metal parts straight from your desktop 3D printer.
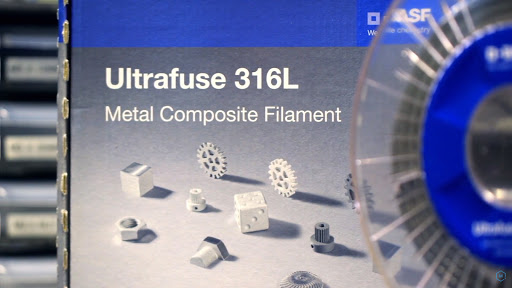
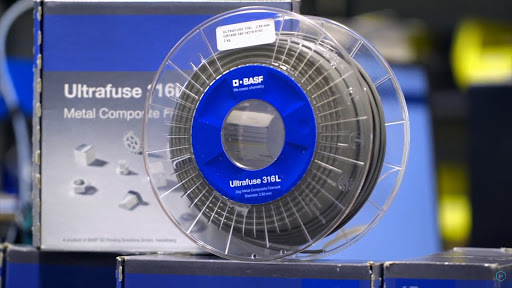
What is Ultrafuse 316L 3D printing filament?
BASF Ultrafuse 316L Metal-polymer filament, developed by BASF’s 3D Printing Solutions team, produces metal components in an austenitic stainless steel type 316L using standard FFF printer systems and subsequently an industry standard debinding and sintering process. The material itself (in filament form) is over 80% 316L stainless steel with a base material that is a polymer used to bind the material together during the printing process. This formulation, combined with the debinding and sintering process, results in full metal austenitic stainless steel type 316L 3D printed parts which can really open up doors to new applications.
Sail full speed ahead towards a new realm of metal 3D printing possibilities using BASF's Ultrafuse 316L filament.
Important Definitions:
Before we get started with the how-to process of printing with metal on your 3D printer, here are some terms you’ll want to familiarize yourself with:
- Debinding: process that removes the plastic material from the green part before sintering
- Sintering: process that turns the powdered metal in the brown part into solid metal through heat
- Green Parts: printed parts that have not gone through the debinding and sintering process
- Brown Parts: parts after debinding, before sintering. This is when the part is the weakest, therefore often considered when designing for successful processing
- FFF: A method of 3D printing called Fused Filament Fabrication which melts a monofilament to create the part from digital designs
- MIM: Metal Injection Molding
Who should use BASF Ultrafuse 316L Metal 3D Printing Filament?
There are a few reasons you may be interested in printing with metal using a desktop 3D printer. First, if you are currently producing metal parts, prototyping through traditional milling methods, and have the need for low volume injection molded parts, consider using BASF Ultrafuse 316L 3D printing filament.
Second would be if you simply need more strength and durability compared to your plastic 3D printed parts. Transitioning to metal parts is now easier and more accessible than it ever has been by using Ultrafuse 316L on your desktop 3D printer. This material is specifically designed for manufacturers, small business owners, or anyone looking to produce metal components on a smaller scale without all the complexity of conventional CNC milling or MIM procedures.
Elevate your prototypes to the next level by diving into metal 3D printing with BASF's Ultrafuse 316L filament.
Designing for Successful Manufacturing
Let's take a moment to guide you through the important considerations for succeeding with metal desktop 3D printing.
Along with anisotropic shrinking, there are other design elements that need to be considered for succeeding with desktop metal 3D printing. These recommendations are intended to provide guidance in order to succeed early on. As expertise progresses, these rules can be adjusted for your specific designs and use cases.
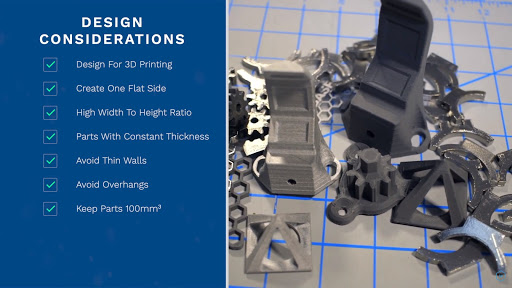
To produce beautiful accurate parts, follow these tips for successful metal 3D printing.
- Design for 3D Printing - Think Additive, Not Subtractive Manufacturing - Design for manufacturing is always important and something that is understood as a basic part of Engineering. 3D printing is no different. Just as you have to be aware of draft angles when designing for injection molding, or tooling radius for milling, 3D printing has its own set of parameters to consider when designing for that manufacturing method. Be sure to consider this when attempting to print your parts, often something designed for milling or injection molding does not transfer 100% to 3D printing without some modification.
- Parts Should Be Flat on One Side - The printing process relies on the materials’ adhesion to the bed surface (think of it as a datum). To ensure the datum stays true, a flat surface is recommended. This helps for the part to adhere well to the print bed as well as reduce any warping that may occur as the part is cooling on the print bed.
- Design with a High Width to Height Aspect Ratio - When designing parts for sintering, it is good to consider the strength of the part at its weakest state (as a brown part, after debinding). At this stage, the more stable you can make the design, the more likely the part is to go through the sintering process in tact. For this reason, designs that are wider than they are tall (think pancake instead of a tower) often have more success. This is not to say you cannot succeed with 3d printing a metal tower, but following this design guideline will produce the best and most consistent results.
- Design Features to Be Homogeneous - This is a fancy way of saying don't have drastic variations of part thicknesses. A large mass with delicate features will fail during sintering because the time needed to fully sinter the largest parts will deteriorate (overheat) the small features. For this reason, homogeneous design through constant feature geometry and thickness should be considered.
- Avoid Thin Walls - This is a bit redundant if designs are already considering feature homogeneity, but creating a part with only thin walls is difficult. The thin walls can delaminate during the sintering process - a minimum thickness of 1.5 mm is a good place to start. Even with this minimum wall thickness, be sure to have a decent infill overlap (35% or so) to ensure the wall retains strength while being processed.
- Avoid Overhangs - Because of the debinding and sintering process, no support material can be used. For best results, overhang angles should be 50° or steeper. This prevents the material from sagging during the sintering process.
- Keep Parts Within 100 x 100 x 100mm Build Envelope - For best results, keep parts within this build envelope. You can print larger parts, but the larger the part, the more likely there will be failures in the debinding and sintering process.
Preparing a Design for Desktop Metal 3D Printing
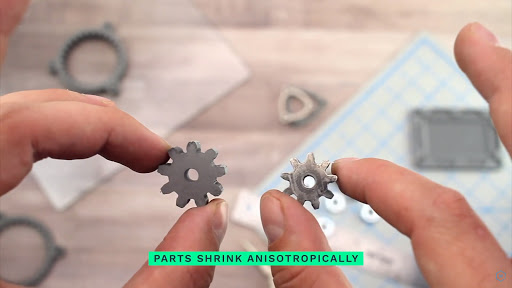
Parts shrink anisotropically in the debinding and sintering process. That means they shrink at different rates along different axes. Parts need to be scaled +120% (+119.82% for more accuracy) of the required final dimension in X/Y, and +126% (+126.10% for more accuracy) of the required final dimension in Z.
If you are using MatterControl you can scale your objects pior to printing with the built in scale tool. It supports Ultrafuse 316L directly and will make your part exactly the right scale for the green part.
No need to be conscientious of readjusting sizes in the original design. Use MatterControl to easily resize your model for accurate metal 3D printing.
How to succeed when 3D printing with BASF Ultrafuse 316L Metal 3D Printing Filament
In order to print with Ultrafuse 316L filament, your desktop 3D printer will need to be equipped with the proper components
- Heated bed capable of at least 100° C
- Glass bed with Dimafix bed adhesive (preferred).
- You can also use Kapton tape on a glass bed, but we find better results with Dimafix.
- Hardened nozzle (preferred).
- You can use a brass nozzle, but it will need to be changed after approximately 1kg of material
- Use a clean nozzle. It is critical to either use a nozzle dedicated to printing BASF Ultrafuse 316L Metal 3D Printing Filament or purge the nozzle of as much foreign material as possible (i.e. PLA, ABS, PETG, etc.). This is to ensure that no foreign materials will cause your parts to explode and fail during the debind and sintering process.
Follow these print settings and adjust accordingly for a successful metal 3D printing experience with BASF's Ultrafuse 316L filament.
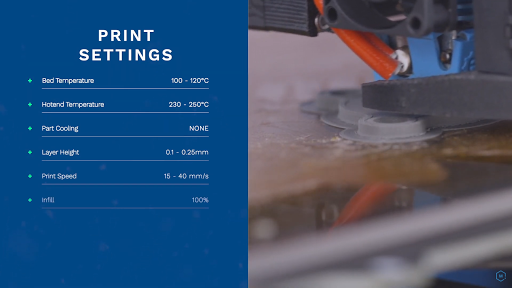
BASF Ultrafuse 316L 3D Printing Filament Settings
- Recommended Print Bed Surface: Dimafix on Glass Bed
- Alternative Option: Kapton Tape on print bed (preferably on glass)
- Recommended Nozzle: Abrasion Resistant and clean of any filament that isn't Ultrafuse 316L
- Heated Bed Temperature: 100 - 120°C
- Hotend Temperature: 215-235°C - Never to exceed 250°C.
- No Part Cooling: Layer cooling can cause warping during printing
- Recommended Layer Height: 0.10 - 0.25mm [.15 or lower for higher density]
- Recommended Speed: 15 - 40 mm/s
- Infill: 100% - We recommend either Lines or Concentric pattern depending on your geometry. These will give you the most uniform and solid infill. Any gaps or voids in your infill could lead to failure during the debinding and sintering process.
It’s critically important that your first layer is at the proper height so that all printed lines are completely connected to one another. We've found that Dimafix bed adhesive provides the strong bed adhesion necessary for ideal flat prints. It’s also important that your extruder is properly calibrated so that there are no areas of under-extrusion within the part. Gaps and voids can cause failure in the debinding and sintering process.
Preparing Green Parts for Processing
It is important to remove any contaminants - oils, fingerprints, bed adhesives, etc. because contaminants can cause failure during debinding and sintering.
Green Parts printed from Ultrafuse 316L 3D Printing Filament are very easy to clean-up as it is relatively soft. Remove brims, clean up any printing artifacts left from the printing process. A razor blade, deburring tool, and a small file set are recommended for clean-up. It’s much easier to clean up the green part than the metal part.
If any warping occurred during the 3D printing process - now is a good time to sand the base surface of your part flat. ‘Lapping’ the bottom surface will have the part process through the debinding and sintering steps with greater feature and dimensional stability.
Lapping is an easy way to increase your chances of a smooth and successful debinding and sintering process.
How to Debind and Sinter Ultrafuse 316L 3D Printed Parts
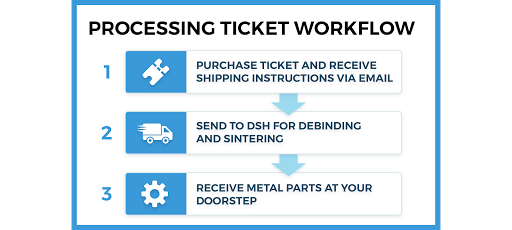
Send to Sintering and Debinding Service House - There are service houses that are set up with all the proper tools and materials to succeed with Metal Injection Molding, debinding, and sintering. Simply print and clean your part, mail it off, and wait for it to return in just a few days after a scheduled run.
- BASF 3D Printing Solutions, with the help of their distribution partners, is setting up a network of debinding and sintering services so users can send their printed Ultrafuse 316L green parts out and get them back fully processed—all within an accessible price point. Easily save thousands of dollars on prototypes, metal tooling, and functional metal parts by outsourcing these services.
- MatterHackers, BASF, and DSH make this outsourcing easy for you with MatterHackers' BASF Ultrafuse 316L Processing Ticket. No need to spend hours of researching for an affordable, reliable debinding and sintering company, negotiating price, and figuring out which debinding and sintering process is right for you. A price is ready for you at checkout and your parts are set to be processed with DSH Technologies, a professional debinding and sintering service house. With the BASF Ultrafuse 316L Processing Ticket, all you need to do is purchase this ticket, ship out your parts, and receive your now metal parts right at your door.
- For details on how to prepare your printed parts for outsource processing, check out our "How to Prepare 3D Printed BASF Ultrafuse 316L Parts for Debinding and Sintering."
In-house - Access the proper debinding and sintering industrial-level equipment and materials, which can cost up to a fortune for professionals just getting into additive metal manufacturing. Successfully operating these machines will require proper knowledge and particular skill sets.
- After your parts have been cleaned and refined in post processing, it's now time to change them from green parts to solid stainless steel parts through catalytic debinding and sintering. Catalytic debinding is the process of decomposing the primary polymer (the plastic holding the metal powder together as a green part) in a gaseous acid environment at temperatures in the low hundreds (°C). Reaction products are then burnt in a natural gas flame at much higher temperatures of above 600 °C and your green part is now officially a brown part. This is done within an enclosed, controlled system designed specifically for this entire process. Debinding is absolutely required as it prevents your green part from melting in the furnace during the sintering process.
- Once the now brown part has finished the debinding process, next is sintering—the process of turning the leftover powdered metal in the brown part into solid metal through heat. In a specially designed furnace, temperatures are set right below the melting temperature of the metal in order to remove the secondary binder from the brown part. With this binder gone, the metal particles are now able to fuse together. Out of the furnace, the material reaches its final properties as a solid stainless steel part.
- Because performing this processing in-house can be extremely costly for professionals that are new to debinding and sintering metal 3D parts, we are happy to offer a more affordable solution through MatterHackers' BASF Ultrafuse 316L Processing Ticket.
Purchase a BASF Ultrafuse 316L Processing Ticket and follow our "How to Prepare Ultrafuse 316L Parts for Debinding and Sintering" guide for an easy, quick, and accessible method of achieving the final solid stainless steel stage of your Ultrafuse parts.
Post Processing Sintered Parts
Sintered parts can, generally, be treated like any other 316L Stainless Steel part. When received back they have a relatively rough metal surface finishing. The parts can be polished to a shiny surface, ground for material removal, or even machined for greater tolerance and fitment. We’ve had great success with roto tumbling parts in an abrasive media to bring out the materials’ luster.
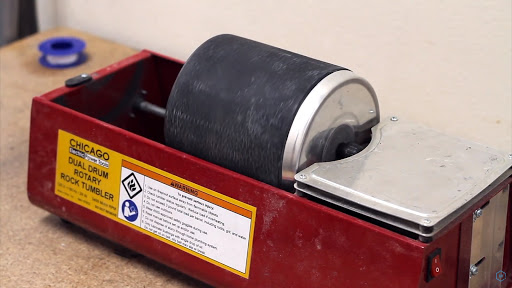
Achieve your desired aesthetic via your preferred post-processing of choice. Grind for material removal, polish in any method you see fit, or machine your parts for higher tolerance features.
Is 3D printing metal on a desktop 3D printer right for me?
If you, your business, or manufacturing process is looking to rapidly create prototype or production metal parts without spending the traditional time and cost of machining expensive consumables, then desktop 3D printing with BASF Ultrafuse 316L Metal 3D Printing Filament is the best choice for you. Using this material on a standard desktop 3D printer is a cost-effective alternative to typical subtractive methods or setup and tooling costs of metal injection molding.
With BASF's Ultrafuse 316L 3D Printing Filament, exploration into affordable metal 3D printing options is now much easier and attainable.
Conclusion
As 3D printing becomes more widely available to the average consumer, its capabilities and possibilities also expand. Attainable industrial materials on the market such as the BASF Ultrafuse 316L Metal 3D Printing Filament make 3D printing metal more affordable and easier for any maker passionate about advanced prototyping. When engineering-grade plastics such as NylonX and NylonG have satisfied the early rounds of designing and testing a project, makers can then move on to producing metal parts for an even more advanced 3D printing experience. Do more with your time and creativity when you dive into the world of 3D printing metal.
Conveniently produce metal prototypes straight from home or your company through desktop printers like the Ultimaker S5, Pulse 3D Printer, BCN3D Sigmax and more!