
Which UltiMaker 3D Printer is Right for Me?
Take a look at what makes each UltiMaker 3D printer tick and which one is best suited for your projects.

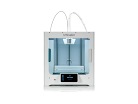
UltiMaker has been, and continues to be, a prominent player in the desktop 3D printing industry for a long time. They offer a comprehensive range of solutions for every part of the 3D printing process, from filament and their free slicing software, Cura, to polished, high-quality 3D printers and invaluable accessories that add convenience to your workflow. UltiMaker's line of machines is a force to be reckoned with, offering powerful options that range from their professional S-series line like the single extrusion UltiMaker 2+ Connect and their dual extrusion collection of the UltiMaker S3, UltiMaker S5, and UltiMaker S7 3D printers. They also offer their specialized engineering Method series, which includes the dual-extrusion UltiMaker Method XL. It can be challenging to compare different models and determine the best one for your needs without knowing what to look for. Luckily, the Pros at MatterHackers are here to guide you on your journey.
Let's jump into it!

Table of Contents
UltiMaker 3D Printer Overview of Differences
 |
 |
 |
 |
 |
|
|---|---|---|---|---|---|
| Model | 2+ Connect | UltiMaker S3 | UltiMaker S5 | UltiMaker S7 | Method XL |
| Starting Price | $2,750 | $4,450 | $6,950 | $8,299 | $12,999 |
| Ideal Application |
Personal Workhorse |
Entry Professional Workhorse | Professional Workhorse |
Advanced Professional Workhorse |
Specialized Industrial Workhorse |
| Extrusion | Single | Dual | Dual | Dual | Dual |
| Build Volume | 223×220×205mm (8.7"×8.6"×8") | 230×190×200mm (9"×7.4"×7.9") | 330×240×300mm (13"×9.4"×11.8") | 330×240×300mm (13"×9.4"×11.8") | 305×305×320mm (12"×12"×12.6") |
| Max Hotend Temp | 260°C | 280°C | 280°C | 280°C | 300°C |
| Max Bed Temp | 110°C | 140°C | 140°C | 140°C | 105°C* |
| Enclosed | Partly | Partly | Partly (Fully option available)1 |
Fully | Fully |
| Heated Chamber | Passive Heating | Passive Heating | Passive Heating | Passive Heating | Active Heating* (100°C) |
| Interchange Hotend | ✔ | ✔ | ✔ | ✔ | |
| Composite Material Compatible | Optional1* | Optional1* | Optional1* | ✔ | |
| Metal Material Compatible | Optional1* | Optional1* | |||
| Material Flow Sensor | ✔ | ✔ | ✔ | ✔ | |
| Build Surface | Glass Plate | Glass Plate | Glass Plate | Flexible Plate on magnetic bed |
Flexible Plate on magnetic bed |
| Bed Leveling | Assisted | Automated | Automated | Automated (Inductive with Bed Tilt Compensation) |
Automated |
| Air Filtration | Optional | Optional | ✔ | ✔ | |
| Material Station | Optional | Optional | ○ |
1 Additional accessory recommended/required.
○ The Method XL does not utilize the same Material Station as the UltiMaker S-series line. However, it does come with a Material Case designed to keep filament dry while printing. Note filament still needs to be pre-dried before placing into material case/station.
*Learn more in the Tech Specs Spotlight section! Links in the table above directly take you to the section going into greater detail about that feature. Click on the product name links for more information on that specific product.
UltiMaker 3D Printer Tech Specs Spotlight
Need more information to inform your decision? Keep on reading for more details and recommendations on some of the technical specifications described in the Overview table.
Price
It can be hard to compare pricing for machines that seem very similar and yet have some pretty significant differences. While the UltiMaker 2+ Connect and UltiMaker S3 have comparable build volumes, the 2+ Connect is quite a bit cheaper than the S3 at the cost of being only single extrusion and leaving out convenient features such as interchangeable hotends and a material flow sensor. Jumping to the UltiMaker S5 and UltiMaker S7 price tier is significant, but comes with much more capabilities and quality-of-life features that ensure your production workflow runs as smoothly as possible. If you need an UltiMaker for important on-demand projects that require superb end-use, functional prototypes, the UltiMaker Method XL is well worth investing in.
TLDR; unless your priority is to maximize a limited budget, your choice will mainly come down to their capabilities. The features can differ greatly between each model so it’s hard to truly compare, but rest assured every UltiMaker 3D printer is well worth every penny, reflected in the unique applications they offer.

Number of Extruders
If you need to print in multiple colors and/or complex geometries, then the UltiMaker S3, UltiMaker S5, UltiMaker S7, and UltiMaker Method XL are the recommended choices to look at. The UltiMaker 2+ Connect is limited to 3D printing in only one material (or color) at a time. Support structures with your complex geometries will have to be extruded in the same material as your build material, which is perfectly serviceable. However, this can require quite a bit of post-processing time and effort chipping and clipping away at the supports to reveal your 3D print underneath (which will probably need additional polishing of any support stubs left over). Dual-extrusion 3D printers allow you to use dissolvable support materials so you can toss your finished 3D print in a tub of water and simply wait for the supports to dissolve away and reveal a smooth model.
TLDR; if you want to minimize post-processing complex prints and/or want to print parts in two colors, look no further than the UltiMaker S3, S5, S7, and Method XL.

Build Volume
Between the four UltiMaker models, there are essentially two size classes (see sizes below). The UltiMaker 2+ Connect and UltiMaker S3 have similar build volume dimensions with the S3 losing some Y height due to having a dual extrusion head. Keep in mind that may be worth the loss if dual extrusion is important to you! In contrast, the UltiMaker S5, UltiMaker S7, and UltiMaker Method XL are considerably larger. The S5 and S7 share the exact same size while the Method XL has a little bit more total volume than the S5 and S7. If large prints are in your future and you're not limited in benchtop space, consider the price of the model and your application/feature needs as those can easily make or break your decision between the S5, S7, and Method XL.
TLDR; if a big size matters and you have no restrictions in workspace, consider price and model-specific features when deliberating between the S5, S7, and Method XL.
| Model | 2+ Connect | UltiMaker S3 | UltiMaker S5 | UltiMaker S7 | Method XL |
| Build Volume | 223×220×205mm (8.7"×8.6"×8") | 230×190×200mm (9"×7.4"×7.9") | 330×240×300mm (13"×9.4"×11.8") | 330×240×300mm (13"×9.4"×11.8") | 305×305×320mm (12"×12"×12.6") |

Maximum Temperatures
(Max Bed Temp / Max Hotend Temp)
The temperatures that your 3D printer can reach dictate what materials you can and can’t work with. In the case of the UltiMaker 2+ Connect, its maximum bed temperature is 110°. The UltiMaker S3, UltiMaker S5, and UltiMaker S7 have a maximum bed temperature of 140°C, so you can rest easy knowing the bed will not be your limiting factor as it can reach the ideal temperature for even the most extreme materials like ABS or Polycarbonate. The UltiMaker Method XL reaches a maximum bed temp of 105°C which is normally not the ideal maximum you'd want on hand if intending to print higher temperature materials but is no problem for this machine due to its active heating chamber that adds an additional 100°C to its enclosed environment, giving temperature-sensitive materials the right space to succeed.
Additionally, they differ in the temperatures that the nozzle can reach; because the UltiMaker S3, S5, S7, and Method XL utilize interchangeable hotends, the maximum printing temperature is 280°C (for the S-series) and 300°C (for the Method series) which should allow for the use of most materials that you can 3D print with. While the UltiMaker 2+ Connect is limited to 260°C and is enough for any UltiMaker materials, it may add difficulty for other brands of filament that need higher temperatures.
TLDR; the UltiMaker S3, S5, S7, and Method XL should be the go-to considerations if you intend on printing any material that requires more than 260°C to successfully print.

Enclosed
(Enclosed / Heated Chamber)
All UltiMaker 3D printers are enclosed to some degree—how much is dependent on your application needs (and potentially other factors). If you plan on just printing PLA and PETG, then the UltiMaker 2+ Connect would be an optimal choice since it isn't fully enclosed and would save you extra money. However, if you plan on printing lots of ABS for production, then either the UltiMaker Method XL or UltiMaker S7 would be the running candidates since both come out of the box fully enclosed. The Method XL even has the unique bonus of having an actively heated chamber, providing the ideal environment for materials like ABS to succeed. The UltiMaker S5 and UltiMaker S3 are mostly enclosed and are capable of printing materials like ABS, but it's worth noting that the UltiMaker does not have an Air Manager available for the S3 to cover the top, and the Air Manager that is available for the S5 is a separate purchase either on its own, as an upgrade bundle, or bundled together with the printer.
TLDR; if material compatibility and success are the main priority, the 2+ Connect is perfect for printing mainly PLA/PETG while the Method XL and S7 are the top choices for out-of-the-box optimal performance with temperature-sensitive printing materials.
 and UltiMaker S7 are designed to keep temperature in and external variables out of the build volume area for maximum 3D printing success.")
Material Compatibility
(Composite Material Compatibility / Metal Material Compatibility)
It's vital to know whether or not the machines you're considering can print specific materials. If you intend to utilize both metal and composite 3D printer filament, the UltiMaker S5 and UltiMaker S3 are the top contenders. The UltiMaker S7 and UltiMaker Method XL knock composite 3D printing out of the park but are unable to print metal (green) parts at this time. Note that regardless of whether you're printing metal or composite filament, you'll need a Print Core CC hotend for the S-series (S3, S5, S7) 3D printers as abrasive materials like metal and composites will quickly ruin brass nozzles that come standard on those printers. The UltiMaker Method XL automatically comes with an abrasive-resistant hotend (with additional hotend options available). The UltiMaker 2+ Connect is not equipped with a dual-geared extruder to handle the abrasive filament nor does it come with an abrasive-resistant nozzle (it's also not compatible with Print Core technology).
TLDR; the UltiMaker S3 and S5 can fulfill both metal and composite 3D printing needs. The UltiMaker S7 and Method XL are both viable options as well if it's just fantastic composite 3D printing you need (while keeping in mind that Print Core CC's are necessary for the extended lifespan of your S-series [S3, S5, S7] 3D printer's nozzle).

Convenient Features
(Interchangeable Hotend / Material Flow Sensor / Build Surface / Bed Leveling)
When you're on a time crunch for an important project, suddenly that quality-of-life feature becomes a need instead of a want. While the UltiMaker 2+ Connect has the common built-in hotend format, the UltiMaker S3, UltiMaker S5, UltiMaker S7, and UltiMaker Method XL design their hotends in an easily removable package. If you want a new nozzle size, new nozzle material, or if you want to remove it for regular maintenance, you can swap out the entire hotend in seconds and have another pre-packaged hotend ready to go while the other is out of commission. Having this interchangeable feature saves big and is a great investment in the long run in a production world where downtime is not an option.
Other time and cost saving convenient features you should consider when picking your 3D printer candidates are if they come with a material flow sensor (pauses your printer when it runs out of filament), what type of build surface it includes (flexible plates mean easier print removal and an easily swappable build surface), and what type of bed leveling system it utilizes (automated leveling equals guaranteed accuracy and convenient hands-off approach). See the table below for which capabilities each model has.
TLDR; if absolute minimal downtime is a top priority for your needs, consider the UltiMaker S7 and UltiMaker Method XL for prototyping applications or the UltiMaker S7 for print farm jobs.
|
|
|
|
|
|
|---|---|---|---|---|---|
| Model | 2+ Connect | UltiMaker S3 | UltiMaker S5 | UltiMaker S7 | Method XL |
| Interchange Hotend | ✔ | ✔ | ✔ | ✔ | |
| Material Flow Sensor | ✔ | ✔ | ✔ | ✔ | |
| Build Surface | Glass Plate | Glass Plate | Glass Plate | Flexible Plate on magnetic bed |
Flexible Plate on magnetic bed |
| Bed Leveling | Assisted | Automated | Automated | Automated (Inductive with Bed Tilt Compensation) |
Automated |

Air Filtration and Control
If you know you’re going to be printing with some of the stinkier 3D printing materials like ABS or Polycarbonate, having built-in filtration to clean the air of the printer is a worthwhile investment. Both the UltiMaker Method XL and UltiMaker S7 come integrated with an air filtration system. The UltiMaker 2+ Connect and The UltiMaker S5 have the Air Manager add-on that you can purchase that simply plug into the back of the Ultimaker, snap onto the top, and provide full control of the air surrounding the 3D print. In the case of the UltiMaker S3, there isn’t a filtration option available from UltiMaker.
TLDR; if your workspace requires filtration or you really don't want the smelly scents that arise with filaments like ABS and PC, consider the Method XL or UltiMaker S7 which includes an air filter system. The S5 and 2+ Connect are also candidates if you combine them with their respective Air Manager add-ons.

Material Station
The UltiMaker S5 and UltiMaker S7 really stand out in this lineup by having the option to utilize the Ultimaker Material Station which manages up to 6 of your materials at once without any user intervention. Keep multiple materials or colors loaded and at the ready (although you can only use 2 materials per print job). The main purpose of this is to fully utilize the Ultimaker Cloud to send, for example, a Yellow PLA with PVA print to your cloud-synced print farm and have the UltiMaker S7 / S5 automatically unload filament and load in the desired materials to get started. Paired with a sensor in every bay to determine if they’ve run out of material before the job is done, and you can have a nearly completely hands-free print job from start to finish, save for the print removal. It's worth noting that, while not the same thing as a Material Station, the UltiMaker Method XL comes with a Material Case that stores two spools of filament to maintain a humidity-controlled environment for your material (crucial for printing success).
TLDR; if increasing automated material loading for maximum production uptime is a must, look no further than the UltiMaker S7 and UltiMaker S5 models.

Summarized Recommendation Guide
The table below is a simplified recommendation on which 3D printers are most likely best for your applications.
Note that there may be personal differences on specifics such as "limited space", "limited budget", "minimal production downtime", etc. Review the Tech Specs Spotlight again for any information you may have missed or click on the product names below if you want to learn more about those specific machines.
| I will... | 2+ Connect | UltiMaker S3 | UltiMaker S5 | UltiMaker S7 | Method XL |
| Need Excellent Print Quality | ✔ | ✔ | ✔ | ✔ | ✔ |
| Run a Print Farm | ○ | ○ | ✔ | ✔ | ○ |
| Need Hotend Interchangeability | ✔ | ✔ | ✔ | ✔ | |
| Print Composite Materials | ✔ | ✔ | ✔ | ✔ | |
| Print Tough, End-Use Parts/Prototypes | ○ | ○ | ○ | ✔ | |
| Print Mainly ABS and Other Advanced Materials |
○ | ✔ | ✔ | ✔ | |
| Print Complex Geometries | ✔ | ✔ | ✔ | ||
| Print Large Parts | ✔ | ✔ | ✔ | ||
| Print Metal Materials (Green Parts) | ✔ | ✔ | |||
| Print Mainly PLA / PETG | ✔ | ✔ | ✔ | ✔ | |
| Need Material Humidity Control | ✔ | ✔ | ✔ | ||
| Need Minimal Production Downtime | ○ | ✔ | ○ | ||
| Have Limited Workspace | ✔ | ✔ | |||
| Have a Limited Budget | ✔ |
○ - The model is capable of that need, but may not be the most optimal option either because there's another model that is better equipped for that need or other various reasons.
As you can see, UltiMaker has a range of 3D printers that encompasses various additive manufacturing needs. Hopefully things are a bit clearer now and you have a better sense of which UltiMaker 3D printer will be the powerhouse manufacturing machine for you!
Want to read the article from the top? Click here.
Interested in more comparison content? Check out the video below! Please note, the below video was created in mid-2021.
Models launched post-2021 are not mentioned such as the UltiMaker S7 and UltiMaker Method XL.